Search the Community
Showing results for tags 'modding'.
-
I suggest adding a method that will allow us to load skinned mesh in game! I replaced the original models of clothes, and it looks good. But unfortunately adding them without replacing the original is impossible, since there is no skinned model load method. :(( Class LuaManager.GlobalObject has a method that allows loading a static model, but it does not allow upload skinned model, because it sends boolean true to ModelLoader.instance.Load
-
Hello to anyone who's reading this. I'm working with Neutz on the Union City map. We'll release a part of it once the Suburban Area is done. What I need from each one of you is an idea for buildings, it can be a shop, a gas station, (no more house ideas, please, unless you made some and want to share them, my brain is mush as this moment from making 200+ houses already) warehouses, small clinics, pet shops, you name it. I just need building ideas. If you want to give some buildings for the upcoming map you're more than welcome to do so. If you want to give ideas, give a small description or a list of the buildings, if you can, provide a picture if you want something custom which I could try and make. Thanks to anyone who'll be writing below, be sure to check the Union City thread, we'll keep you posted weekly (if we don't forget from time to time ._.) on the upcoming map progress.
-
First, create the following file structure (if you are adding the lootable map to your own map mod then create all folders within the media folder below in your map mods media folder instead): Spoiler MyLootableMapsMod >media >>lua >>>server >>>>Items >>>client >>>>ISUI >>>>>Maps >scripts >textures >>worldMap Next up create a .txt file in the scripts folder called something like "mylootablemap" (except make it more unique to avoid any possible compatability issues with other mods that might use the same names), it should include this code: Spoiler module Base { item MyLootableMap { DisplayCategory = Cartography, Type = Map, DisplayName = Your map name here, Icon = Map, Weight = 0.1, Map = MyLootableMap, WorldStaticModel = Map, } } The above code is adding a new item with the internal name "MyLootableMap" (so again make sure yours is something unique) into the vanilla pool of items, the above settings work for maps. The next file you need you will want to create in the "media\lua\server\Items" folder, call it something like MyLootableMapDistribution.lua but again make it's a unique name to avoid any possible mod imcompatability with other mods. It should contain the following code: Spoiler local function preDistributionMerge() table.insert(ProceduralDistributions.list.MagazineRackMaps.items, "MyLootableMap"); table.insert(ProceduralDistributions.list.MagazineRackMaps.items, 50); end Events.OnPreDistributionMerge.Add(preDistributionMerge); In the above code you can see that we are adding our new Item "MyLootableMap" into the "MagazineRackMaps" loot table inside of ProceduralDistributions.lua, this will affect any roomDef of any building that pulls from the MagazineRackMaps loot table. We are doing it this way as the definition we want to add to has the "procedural" tag in Distributions.lua and is therefore using the procedural loot tables. The number 50 is the "weight" of the item you are adding, higher number = more chance. To find the current room and container definitions, navigate to your "steamapps\common\ProjectZomboid\media\lua\server\Items" folder and open the Distributions.lua file. If the definition you want to add your item to is not procedural (does not have the "procedural = true" line) then you want to add this code instead of the above code: Spoiler local myMapdistributionTable = { all = { shelves = { rolls = 5, items = { "Magazine", 20, "Newspaper", 20, "Book", 20, "SheetPaper2", 20, "Notebook", 20, "BookTailoring1", 2, "BookTailoring2", 1, "BookTailoring3", 0.7, "BookTailoring4", 0.5, "BookTailoring5", 0.3, "BookCarpentry1", 2, "BookCarpentry2", 1, "BookCarpentry3", 0.7, "BookCarpentry4", 0.5, "BookCarpentry5", 0.3, "BookCooking1", 2, "BookCooking2", 1, "BookCooking3", 0.5, "BookCooking4", 0.3, "BookForaging1", 2, "BookForaging2", 1, "BookForaging3", 0.7, "BookForaging4", 0.5, "BookForaging5", 0.3, "BookFarming1", 2, "BookFarming2", 1, "BookFarming3", 0.7, "BookFarming4", 0.5, "BookFarming5", 0.3, "BookFishing1", 2, "BookFishing2", 1, "BookFishing3", 0.7, "BookFishing4", 0.5, "BookFishing5", 0.3, "BookTrapping1", 2, "BookTrapping2", 1, "BookTrapping3", 0.7, "BookTrapping4", 0.5, "BookTrapping5", 0.3, "BookFirstAid1", 2, "BookFirstAid2", 1, "BookFirstAid3", 0.7, "BookFirstAid4", 0.5, "BookFirstAid5", 0.3, "BookMetalWelding1", 2, "BookMetalWelding2", 1, "BookMetalWelding3", 0.7, "BookMetalWelding4", 0.5, "BookMetalWelding5", 0.3, "BookElectrician1", 2, "BookElectrician2", 1, "BookElectrician3", 0.7, "BookElectrician4", 0.5, "BookElectrician5", 0.3, "BookMechanic1", 2, "BookMechanic2", 1, "BookMechanic3", 0.7, "BookMechanic4", 0.5, "BookMechanic5", 0.3, "FishingMag1", 1, "FishingMag2", 1, "HuntingMag1", 1, "HuntingMag2", 1, "HuntingMag3", 1, "HerbalistMag", 1, "FarmingMag1", 1, "CookingMag1", 1, "CookingMag2", 1, "ElectronicsMag1", 1, "ElectronicsMag2", 1, "ElectronicsMag3", 1, "ElectronicsMag4", 1, "ElectronicsMag5", 1, "MechanicMag1", 1, "MechanicMag2", 1, "MechanicMag3", 1, "EngineerMagazine1", 1, "EngineerMagazine2", 1, "MetalworkMag1", 1, "MetalworkMag2", 1, "MetalworkMag3", 1, "MetalworkMag4", 1, "Journal", 2, "Radio.RadioBlack",2, "Radio.RadioRed",1, "MyLootableMap", 50, } }, } } table.insert(Distributions, 2, myMapdistributionTable); This would add your map to the existing "all>shelves" definitions, which would be every shelves container in the game world not inside a roomdef defined inside Distributions.lua, so for example your map would not spawn on shelves that are placed inside a "bookstore" room def as that room def already exists in Distributions.lua with a rule for shelves. You can also check this thread: for a more in-depth guide to working with the loot tables. Lastly, inside of your "media\lua\client\ISUI\Maps" folder create a new file called something like MyLootableMapDefinition.lua (make it unique to your mod instead of a generic name) and include the following code: Spoiler require "ISMapDefinitions" MapUtils = {} function MapUtils.initDirectoryMapData(mapUI, directory) local mapAPI = mapUI.javaObject:getAPIv1() local file = directory..'/worldmap-forest.xml' if fileExists(file) then mapAPI:addData(file) end file = directory..'/worldmap.xml' if fileExists(file) then mapAPI:addData(file) end -- This call indicates the end of XML data files for the directory. -- If map features exist for a particular cell in this directory, -- then no data added afterwards will be used for that same cell. mapAPI:endDirectoryData() mapAPI:addImages(directory) end function MapUtils.initDefaultMapData(mapUI) local mapAPI = mapUI.javaObject:getAPIv1() mapAPI:clearData() -- Add data from highest priority (mods) to lowest priority (vanilla) local dirs = getLotDirectories() for i=1,dirs:size() do MapUtils.initDirectoryMapData(mapUI, 'media/maps/'..dirs:get(i-1)) end end local MINZ = 0 local MAXZ = 24 local WATER_TEXTURE = false function MapUtils.initDefaultStyleV1(mapUI) local mapAPI = mapUI.javaObject:getAPIv1() local styleAPI = mapAPI:getStyleAPI() local r,g,b = 219/255, 215/255, 192/255 mapAPI:setBackgroundRGBA(r, g, b, 1.0) mapAPI:setUnvisitedRGBA(r * 0.915, g * 0.915, b * 0.915, 1.0) mapAPI:setUnvisitedGridRGBA(r * 0.777, g * 0.777, b * 0.777, 1.0) styleAPI:clear() local layer = styleAPI:newPolygonLayer("forest") layer:setMinZoom(13.5) layer:setFilter("natural", "forest") if true then layer:addFill(MINZ, 189, 197, 163, 0) layer:addFill(13.5, 189, 197, 163, 0) layer:addFill(14, 189, 197, 163, 255) layer:addFill(MAXZ, 189, 197, 163, 255) else layer:addFill(MINZ, 255, 255, 255, 255) layer:addFill(MAXZ, 255, 255, 255, 255) layer:addTexture(MINZ, "media/textures/worldMap/Grass.png") layer:addTexture(MAXZ, "media/textures/worldMap/Grass.png") layer:addScale(13.5, 4.0) layer:addScale(MAXZ, 4.0) end layer = styleAPI:newPolygonLayer("water") layer:setMinZoom(MINZ) layer:setFilter("water", "river") if not WATER_TEXTURE then layer:addFill(MINZ, 59, 141, 149, 255) layer:addFill(MAXZ, 59, 141, 149, 255) else layer:addFill(MINZ, 59, 141, 149, 255) layer:addFill(14.5, 59, 141, 149, 255) layer:addFill(14.5, 255, 255, 255, 255) layer:addTexture(MINZ, nil) layer:addTexture(14.5, nil) layer:addTexture(14.5, "media/textures/worldMap/Water.png") layer:addTexture(MAXZ, "media/textures/worldMap/Water.png") -- layer:addScale(MINZ, 4.0) -- layer:addScale(MAX, 4.0) end layer = styleAPI:newPolygonLayer("road-trail") layer:setMinZoom(12.0) layer:setFilter("highway", "trail") layer:addFill(12.25, 185, 122, 87, 0) layer:addFill(13, 185, 122, 87, 255) layer:addFill(MAXZ, 185, 122, 87, 255) layer = styleAPI:newPolygonLayer("road-tertiary") layer:setMinZoom(11.0) layer:setFilter("highway", "tertiary") layer:addFill(11.5, 171, 158, 143, 0) layer:addFill(13, 171, 158, 143, 255) layer:addFill(MAXZ, 171, 158, 143, 255) layer = styleAPI:newPolygonLayer("road-secondary") layer:setMinZoom(11.0) layer:setFilter("highway", "secondary") layer:addFill(MINZ, 134, 125, 113, 255) layer:addFill(MAXZ, 134, 125, 113, 255) layer = styleAPI:newPolygonLayer("road-primary") layer:setMinZoom(11.0) layer:setFilter("highway", "primary") layer:addFill(MINZ, 134, 125, 113, 255) layer:addFill(MAXZ, 134, 125, 113, 255) layer = styleAPI:newPolygonLayer("railway") layer:setMinZoom(14.0) layer:setFilter("railway", "*") layer:addFill(MINZ, 200, 191, 231, 255) layer:addFill(MAXZ, 200, 191, 231, 255) -- Default, same as building-Residential layer = styleAPI:newPolygonLayer("building") layer:setMinZoom(13.0) layer:setFilter("building", "yes") layer:addFill(13.0f, 210, 158, 105, 0) layer:addFill(13.5f, 210, 158, 105, 255) layer:addFill(MAXZ, 210, 158, 105, 255) layer = styleAPI:newPolygonLayer("building-Residential") layer:setMinZoom(13.0) layer:setFilter("building", "Residential") layer:addFill(13.0f, 210, 158, 105, 0) layer:addFill(13.5f, 210, 158, 105, 255) layer:addFill(MAXZ, 210, 158, 105, 255) layer = styleAPI:newPolygonLayer("building-CommunityServices") layer:setMinZoom(13.0) layer:setFilter("building", "CommunityServices") layer:addFill(13.0f, 139, 117, 235, 0) layer:addFill(13.5f, 139, 117, 235, 255) layer:addFill(MAXZ, 139, 117, 235, 255) layer = styleAPI:newPolygonLayer("building-Hospitality") layer:setMinZoom(13.0) layer:setFilter("building", "Hospitality") layer:addFill(13.0f, 127, 206, 225, 0) layer:addFill(13.5f, 127, 206, 225, 255) layer:addFill(MAXZ, 127, 206, 225, 255) layer = styleAPI:newPolygonLayer("building-Industrial") layer:setMinZoom(13.0) layer:setFilter("building", "Industrial") layer:addFill(13.0f, 56, 54, 53, 0) layer:addFill(13.5f, 56, 54, 53, 255) layer:addFill(MAXZ, 56, 54, 53, 255) layer = styleAPI:newPolygonLayer("building-Medical") layer:setMinZoom(13.0) layer:setFilter("building", "Medical") layer:addFill(13.0f, 229, 128, 151, 0) layer:addFill(13.5f, 229, 128, 151, 255) layer:addFill(MAXZ, 229, 128, 151, 255) layer = styleAPI:newPolygonLayer("building-RestaurantsAndEntertainment") layer:setMinZoom(13.0) layer:setFilter("building", "RestaurantsAndEntertainment") layer:addFill(13.0f, 245, 225, 60, 0) layer:addFill(13.5f, 245, 225, 60, 255) layer:addFill(MAXZ, 245, 225, 60, 255) layer = styleAPI:newPolygonLayer("building-RetailAndCommercial") layer:setMinZoom(13.0) layer:setFilter("building", "RetailAndCommercial") layer:addFill(13.0f, 184, 205, 84, 0) layer:addFill(13.5f, 184, 205, 84, 255) layer:addFill(MAXZ, 184, 205, 84, 255) end function MapUtils.overlayPaper(mapUI) local mapAPI = mapUI.javaObject:getAPIv1() local styleAPI = mapAPI:getStyleAPI() local layer = styleAPI:newTextureLayer("paper") layer:setMinZoom(0.00) local x1 = mapAPI:getMinXInSquares() local y1 = mapAPI:getMinYInSquares() local x2 = mapAPI:getMaxXInSquares() + 1 local y2 = mapAPI:getMaxYInSquares() + 1 layer:setBoundsInSquares(x1, y1, x2, y2) layer:setTile(true) layer:setUseWorldBounds(true) layer:addFill(14.00, 128, 128, 128, 0) layer:addFill(15.00, 128, 128, 128, 32) layer:addFill(15.00, 255, 255, 255, 32) layer:addTexture(0.00, "media/white.png") layer:addTexture(15.00, "media/white.png") layer:addTexture(15.00, "media/textures/worldMap/Paper.png") end function MapUtils.revealKnownArea(mapUI) local mapAPI = mapUI.javaObject:getAPIv1() local x1 = mapAPI:getMinXInSquares() local y1 = mapAPI:getMinYInSquares() local x2 = mapAPI:getMaxXInSquares() local y2 = mapAPI:getMaxYInSquares() WorldMapVisited.getInstance():setKnownInSquares(x1, y1, x2, y2) end ----- local function replaceWaterStyle(mapUI) if not WATER_TEXTURE then return end local mapAPI = mapUI.javaObject:getAPIv1() local styleAPI = mapAPI:getStyleAPI() local layer = styleAPI:getLayerByName("water") if not layer then return end layer:setMinZoom(MINZ) layer:setFilter("water", "river") layer:removeAllFill() layer:removeAllTexture() layer:addFill(MINZ, 59, 141, 149, 255) layer:addFill(MAXZ, 59, 141, 149, 255) end local function overlayPNG(mapUI, x, y, scale, layerName, tex, alpha) local texture = getTexture(tex) if not texture then return end local mapAPI = mapUI.javaObject:getAPIv1() local styleAPI = mapAPI:getStyleAPI() local layer = styleAPI:newTextureLayer(layerName) layer:setMinZoom(MINZ) layer:addFill(MINZ, 255, 255, 255, (alpha or 1.0) * 255) layer:addTexture(MINZ, tex) layer:setBoundsInSquares(x, y, x + texture:getWidth() * scale, y + texture:getHeight() * scale) end local function overlayPNG2(mapUI, x, y, scaleX, scaleY, tex) local mapAPI = mapUI.javaObject:getAPIv1() local styleAPI = mapAPI:getStyleAPI() local layer = styleAPI:newTextureLayer("lootMapPNG") layer:setMinZoom(MINZ) local texture = getTexture(tex) layer:addFill(MINZ, 255, 255, 255, 128) layer:addTexture(MINZ, tex) layer:setBoundsInSquares(x, y, x + texture:getWidth() * scaleX, y + texture:getHeight() * scaleY) end -- -- -- -- -- Now, after the last set of dashed lines you can add your lootable map definitions with the following code: Spoiler LootMaps.Init.MyLootableMap = function(mapUI) local mapAPI = mapUI.javaObject:getAPIv1() MapUtils.initDirectoryMapData(mapUI, 'media/maps/MyMapMod') -- 'media/maps/MyMapMod' - this should be where your maps worldmap.xml file is MapUtils.initDefaultStyleV1(mapUI) -- Specify the appearance of the map. replaceWaterStyle(mapUI) -- Use solid color for water instead of a texture. mapAPI:setBoundsInSquares(12900, 9900, 14399, 11399) -- (starting x, starting y, ending x, ending y) of the area you want to display and uncover, in World Co-ordinates. overlayPNG(mapUI, 14299, 9900, 0.666, "badge", "media/textures/worldMap/MyLootableMapBadge.png") -- Add your lootable maps banner PNG. overlayPNG(mapUI, 13000, 10000, 0.666, "legend", "media/textures/worldMap/Legend.png") -- Add the legend PNG. MapUtils.overlayPaper(mapUI) -- Draw a paper-like texture overtop the map. end Make sure that your "LootMaps.Init.MyLootableMap" on line 1 matches the name you specified on the "Maps = " line in your map item script you made earlier in this tutorial. The rest of the code is commented to describe what they do. The "textures\worldMap" folder that you created at the start should be used to store your maps name banner png if you have one and is referenced in the above code to make your lootable map look more official. As you can see, no external PNG's need to be created as the map is drawn from the data stored in the maps worldmap.xml file, which is what the "mapAPI:setBoundsInSquares" is using to draw a certain section of the overall world map. And that's it, copy your entire folder structure into your "C:\Users\YourUserNameHere\Zomboid\Mods" folder, load up the game, enable the mod (Your map mod if you made your lootable maps as part of a map mod) and start a new game, you now have your lootable map in game and waiting for you to find, and when you do it will uncover that area automatically on the main in game map. If you need a working example you can always subscribe to Bedford Falls on Steam and check it's workshop folder "steamapps\workshop\content\108600\522891356" . It's handy to verify your folder/file structure etc if you're having problems.
-
This is mainly for Single Player use as you can use the "mods=" for server setups. Also on Steam: http://steamcommunity.com/sharedfiles/filedetails/?id=944054233 First you want to subscribe to and/or download the maps that you want to combine. If you subscribe using Steam you will find the downloaded mods in your "Steam\steamapps\workshop\content\108600" folder, each mod with its own unique id number (for example Bedford Falls is 522891356). Now you want to create the following folder structure (on your desktop): Spoiler MyCombinedMaps media maps MyCombinedMaps Now, inside the first folder, alongside the media folder, you want to place a mod.info file and a poster.png file, you can create your own from scratch, but it's easier to copy them from one of the map mods (e.g, from the "steamapps\workshop\content\108600\522891356\mods\Bedford Falls" folder) and edit them to suit your needs. The mod.info should look like the following: Spoiler name=My Combined Maps id=MyCombinedMaps description=This adds multiple map mods together for use in Single Player poster=poster.png The poster.png file should be a 256x256 image, you can make your own using paint etc or simply use one from one of the map mods you downloaded. Now, for each map mod you would like to combine, navigate to its map data folder (e.g, "steamapps \workshop\content\108600\522891356\mods\Bedford Falls\media\maps\BedfordFalls") and copy across all of the ".lotheader", ".bin" and ".lotpack" files to your own map data folder ("MyCombinedMaps\media\maps \MyCombinedMaps"). Be careful when adding any maps that have cells that overlap, add the map you want be "on top" last. Once done, copy across the "map.info", "objects.lua", "spawnpoints.lua", "spawnregions.lua" and "thumb.png" from ONE of the map mods to the same folder as the files above. Rename the spawnpoints.lua file to something like bedfordspawns.lua or denverspawns.lua depending on the map. Now copy the rest of the spawnpoints.lua files from each map and rename them to something relevant too. Your map data foler should now have multiple "*spawns.lua" (one for each map) files alongside all the rest of the map files (".bin", ".lotheader", ".lotpack" etc). The next thing you need to do is add the objects.lua data from each other map to the one you copied into your map data folder. For each one, open using notepad and copy/paste everything after "objects= {" up to but not including the final "}" in the file, into the objects.lua already in your map data folder, after the final entry but before the final "}". Next, edit the map.info file to: Spoiler title=My Combined Maps lots=Muldraugh, KY description=Adds multiple map mods to the vanilla world The last file you need to edit is the spawnregions.lua file (some maps may not include one of these, but you can easily make your own too), you will need to add/edit entries to point to the "*spawns.lua" files you renamed, it should end up looking somehting like: Spoiler function SpawnRegions() return { { name = "Muldraugh, KY", file = "media/maps/Muldraugh, KY/spawnpoints.lua" }, { name = "West Point, KY", file = "media/maps/West Point, KY/spawnpoints.lua" }, { name = "Rosewood, KY", file = "media/maps/Rosewood, KY/spawnpoints.lua" }, { name = "Bedford Falls", file = "media/maps/MyCombinedMaps/bedfordspawns.lua" }, { name = "New Denver", file = "media/maps/MyCombinedMaps/denverspawns.lua" }, } end This will give you the option of spawning at any of the map mods (or vanilla games) spawn options after selecting your combined mod on the world select screen. All that is left to do now is copy your entire folder structure into your "C:\Users\YourUserName\Zomboid\mods" folder. Now you can load up the game, enable your mod, start a new game, select your combined mod and then spawn in a town of your choice. Some map mods will also come with additional folders inside of their "media" folder, alongside the maps folder, it's important to also copy these across to your combined mods "media" folder as they will be adding things such as lootable maps, additional items/recipes etc. Here's a working example that combines Bedford Falls and Fetzington into a single mod: http://www.filedropper.com/bedfetz_1 (Should only be used as an example as it will become outdated as soon as a new version of Bedford Falls or Fetzington are released).
-
I tried with some codes but not working local Player = getSpecificPlayer(0); local Item = Player:getPrimaryHandItem(); if (instanceof(Item, "Food") and Item:getType() == "Bass") then if Item ~= nil and Item:IsRotten() then luautils.okModal("YES", true); else luautils.okModal("NO", true); end end --SOLVED!!!!
-
WordZed Version 1 - download You can add custom radio data to the game via a mod. The radio data including final translation files should go into "media/radio/" within the mod directory. Optionally this simple mod package can be used to get started quickly: RadioTestMod Note: The current version may contain some bugs, which can be posted here when encountered. Some additional info bits: The following spoiler contains a list of channels from the games radio data, if you intend to use wordzed for custom contentavoid these channels unless you intentionally want to override a certain existing channels. The following tutorial video has some information on the operating basics: Manual: Manual.docx
- 37 replies
-
- 13
-

-
The html code "<br>" works really good on translation tooltips. Adding colors codes can be a really good thing for modding, adding directly on translate txt. Like this example: Tooltip_EN = { Tooltip_Pliers = "<RGB:1,0,1> Can be used to trap a rat.", } Or maybe adding directly to scripts.txt Like this example: Tooltip = <RGB:1,0,1>Tooltip_Pliers, Sorry about my language i speak spanish.
-
On YouTube I've been making tutorials of the basics of project zomboids Map editor tools. right now I am finishing up with the building editor. if I missed anything let me know and I'll make sure to make tutorial covering it here is part one for more tutorials check out my channel Doge's Creator
- 12 replies
-
- 3
-
-
- howtomodpz
- how to
- (and 4 more)
-
So i thought if someday devs would consider creating some kind of tool to make modding easier to do. I don't talk about very very user friendly etc. but just slightly easier by categorazing stuff without searching and doing things through trial and error etc. We got recently a upgraded and very good tool to make maps and stuff so i just thought that some tool to make modding easier would be very nice too. I know that there like 123012301 things much more important atm but it would be very useful to help people in communnity to contribute something just like with map tool.
-
I am making a mod that shows zombie and player locations on PZ Server map project. This requires some alterations of both game and the map. Currently it looks like this and uses JSON to transfer all zombie locations at once: I would rather stream the zombies and their location continuously through event-driven model, ideally in a separate thread. Currently I'm just gonna replace the original zombie registry ArrayList with my overridden ArrayList implementation that registers adding and removal of the zombies. But that doesn't deal with zombie locations.
-
In the /media/sound/banks/Desktop there are several .bank files. Typically when confronted with unknown files, I try to open then with 7zip, but this didn't work out for those files. What's the format of the files and how to properly alter their contents?
-
After a long time away from PZ, I've returned to the game and am loving all the new improvements since I last played! I've of course been equally excited to get back into modding again. I have been re-creating my old outdated mods such as my new professions, but I've hit upon something I never could figure out last and wanted to finally ask: If I want to assign an existing trait (e.g. Graceful) to be given 'free' by a profession, this works fine except that the player can 'remove' that trait if they want to. This is to be expected; these traits weren't designed to be exclusive to a profession. Of course, this is visually ugly (duplicate traits in trait list) and not really the designed functionality. The answer, I would have thought, would be to create a 'duplicate' of the desired existing trait (e.g. "Poised" for "Graceful") and set as an exclusive profession-only trait with a 0 point cost. Makes sense to me! Except... how *do* I duplicate the functionality of an existing trait, such as Graceful or Light Eater or Brave? Unlike the simple traits that increase skill points, I can't find the "mechanics" of these traits anywhere in the game's files (lua or otherwise). In other words, if I make my own "Eats Less" trait, how do I make sure it has the same game effect as selecting "Light Eater"? Presumably, there's some code somewhere that does some sort of "if has this trait, do X" but the place to find this is a total mystery to me, hence I have no idea how to code my own such traits! If any experts here could even just point me in the right direction, I'd really appreciate it!
-
Hi. Just wonder: how can i replace an item stats or modify scripts without needing to change original game files, so my replacements won't be affected by unavoidable updates in most cases? I want to create a separate mod (separate files) with overwriting original content (witch priority is higher: original file records or mod file records). Is this possible at this moment or planned?
-
Making some art for a project, thought i would share in case it is helpful for others. Hope this is right forum section. I give anybody permission to use them for any Project Zomboid mod. From top left to bottom right (after planter box and filled planter box)... Apple, Avocado, Banana, Bell Pepper, Blackberry, Blueberry, Broccoli, Cucumber, Cabbage, Carrot, Cherry, Chinese Cabbage, Corn, Cotton, Coffee, Eggplant, Garlic, Grape, Green Onion, Hemp, Jute, Lemon, Leek, Lettuce, Lime, Orange, Onion, Pear, Peach, Pumpkin, Peanut, Pea, Pineapple, Potato, Poppy, Radish, Rubber, Strawberry, Sunflower, Sweet Potato, Tea, Tomato, Watermelon, Zucchini Lotus, Papyrus, Watercress, Taro, Water Hawthorn, Eel Grass, Lepironia, Sweet Flag, Aloe, Bamboo, Barberry, Basil, Bean, Belladonna, Celery, Cashew, Chamomile, Clove, Date Palm, Elderberry, Eucalyptus, Ginger, Henna, Kava, Lavender, Mango, Maple, Mandrake, Mescal, Mint, Okra, Pepper (chili), Papaya, Passion-fruit, Peyote, Rice, Rosemary, Sage, Spinach, Sugarcane, Thyme, Turmeric, Valerian, Wheat-grass. Also made these non farming related objects.
- 15 replies
-
- 10
-
-
Type = Normal,There are various types of items in Project Zomobid, below you will se each of them with a short description. Normal – A basic item. Drainable – An item that has a certain amount of uses before it's destroyed Food – An item that can be consumed by the character Weapon – An item that can serve as an equpable weapon. Container – An item that can store other items inside it. Clothing – Item worn by the player character. Literature – A readable item like a book or a newspaper. Weight = 1,The weight of an item as seen in-game, it should be a sum of weight + size of the item.Typically used in Item Type: All DisplayName = Example item,Defines the name of the item as displayed in gameTypically used in Item Type: All Icon = ItemIcon,Defines the icon the item will have in-game, the .png file of the icon should be in media/textures folder of the mod and the name must look like this Item_ItemIcon.pngTypically used in Item Type: All UseDelta = 0.1,Defines how many uses a Drainable item has, if it's 0.1 the item will have 10 uses before it's depleted.Typically used in Item Type: Drainable Capacity = 20,Defines the maximum carrying capacity of the container.Typically used with item Type: Container CanBeEquipped = Back,Defines the clothing slot the item is equipped in, typically only used for containers in the form above. BodyLocation = Bottoms,Defines what part of the body a Clothing item is worn on. Can be Bottoms, Shoes or Top Temperature = 8,Defines the temperature resistance a Clothing item gives to the player when worn. CanStoreWater = TRUE/FALSE,Defines if the item can be used to store water. Defaults to FALSE if not used.Typically used in Item Type: Drainable IsWaterSource = TRUE/FALSE,Defines whether or not the item is a source of water. Defaults to FALSE if not used.Typically used in Item Type: Drainable UseWhileEquipped = TRUE/FALSE,Defines if the items has to be equipped in Primary or Secondary slot in order to be used. Defaults to FALSE if not used. ReplaceOnDeplete = Module.ItemID,When the item is depleted (Has no uses left or if you've eaten\drank all of it) it will be replaced by Module.ItemID ReplaceOnUseOn = WaterSource-WaterBottleFull,If the item is used on something it will turn into something else, in the case above, if used on a Water Source (Item\Water Barrel\River) it will become WaterBottleFull IsCookable = TRUE,Defnises whether or not the item can be Cooked using Fire Pits, Stoves or BBQ. If the item is cookable and stores water, it can be used to boil it to remove the tainted water effect. Defaults to FALSE if not used. DangerousUncooked = TRUE,If TRUE, eating the food item without cooking will result in it having a semi-poisonous effect. HungerChange = -20,Defines how much hunger will be removed upon consumption, if the value is Positive, consuming the item will make the character more hungry. ThirstChange = -20,Defines how much thirst will be removed upon sonsumption, if the value is Positive, consuming the item will make the character more thirsty. StressChange = -20,Defines how much stress will be removed upon sonsumption, if the value is Positive, consuming the item will make the character more stressed. UnhappyChange = -20,Defines how much happiness will be removed upon sonsumption, if the value is Positive, consuming the item will make the character more unhappy. BoredomChange = -20,Defines how much boredom will be removed upon sonsumption, if the value is Positive, consuming the item will make the character more bored. FatigueChange = -20,Defines how much fatigue will be removed upon sonsumption, if the value is Positive, consuming the item will make the character more tired. EnduranceChange = 20,Defines how much endurance will be removed upon sonsumption, if the value is NEGATIVE, consuming the item will make the character more fatigued. Alcoholic = TRUE,If TRUE consuming the item will make the character drunk. If used for Bandage items, it will act as disinfectant. DaysFresh = 6,Defines the amount of days before a food item starts to rot. DaysTotallyRotten = 10,Defines the amount of days before the food item rots completely, becoming poisonous. MinutesToCook = 40,In-Game Minutes before the item is cooked, use with Cookable = TURE, MinutesToBurn = 110,In-Game Minutes of Cooking the item before it becomes Burned. Poison = TRUE,Defnines if the item is poisonous upon consumption. PoisonDetectionLevel = 1,Unknown, probably defines the difficulty of detecting poison if used in Evolved Recipe. PoisonPower = 5,Defines the power of poison, the higher the value, the more lethal it is upon consumpion. 5 Is PoisonIvy (White Berry) 45 is Bleach level. UseForPoison = 1,Unknown, possibly amount of PoisonPower goes into Evolved Recipes. FoodType = Fruits,Unknown, no known use as of Build 32 AlwaysWelcomeGift = true,Unknown, no known use as of Build 32 CustomContextMenu = Take,Will replace "Eat" text in the context menu for food items. EvolvedRecipe = Stew:3;Pie:3;Soup:3;Sandwich:3;Salad:3;Roasted Vegetables:3,Item can be used in Evolved Recipes, in the above case, it could be used in Stew, Pie, Soup, Sandwitch and so on... DisplayCategory = Ammo,Will be displayed as the item's category, can be anything but custom Categories need a Translation file. CanBandage = true,If TRUE the item can be used as a Bandage for wounds. BandagePower = 4,Defines how good a bandage is, higher values make the bandage last longer before it goes Dirty. ReduceInfectionPower = 50,If used, it will reduce infection (NOT Zombie Infection, it reduces regular wound infection, it might slow down zombie infection though, uncofirmed) Tooltip = Tooltip_UseOnHealthPanel,Will display tooltip if item is moused over in inventory, requires Translation file that defines the text to display. Known Preset Tooltips: Tooltip_Painkillers,Tooltip_PillsAntidepressant,Tooltip_PillsBetablocker,Tooltip_PillsSleeping,Tooltip_tissue_tooltip,Tooltip_IronSight,Tooltip_Scope,Tooltip_AmmoStrap,Tooltip_Sling,Tooltip_FiberglassStock,Tooltip_RecoilPad,Tooltip_Laser,Tooltip_RedDot,Tooltip_ChokeTubeFull,Tooltip_ChokeTubeImproved,Tooltip_Trap,Tooltip_Generator,Tooltip_UseOnHealthPanel,Tooltip_Vitamins, RequiresEquippedBothHands = TRUE,If TRUE the item HAS TO be equipped in Both Hands in order to even be carried. TeachedRecipes = Make Bread Dough,If Read the item will teach the character how to make Bread Dough, any Recipe name can be used.Typically used with Literature NumberOfPages = 260,Defines the number of pages a Skill Book has.Typically used with Literature Skill Books SkillTrained = Trapping,Defines what skill the Skill Book gives a multiplier to. LvlSkillTrained = 3,Minimum skill level required to read the skill book. NumLevelsTrained = 2,Amount of skill levels the multiplier will apply to beginning with LvlSkillTrainer. CanBeWrite = true,If TRUE the item can be used to write on if the character has a Pencil or Pen Weapon Type Only Below: MELEE/RANGED WEAPONS MinRange = 0.61, Defines the minimum range at which the weapon is effective, if the target is closer, he will be pushed away. Possibly 1 = 1 tile. MaxRange = 1.5,Defines the maximum range at which the weapon is effective. Possibly 1 = 1 tile. WeaponSprite = Fireaxe,Defines the weapon model used. MinAngle = 0.2,Unsure, defines the angle at which the weapon is effective. HitAngleMod = -30,Unsure, as above. SwingTime = 3.0,Defines the default time it will take for the swing animation to play out. MinimumSwingTime = 3.0,Defines the minimum time it will take to swing the melee weapon, affects the speed of animation and DPS. KnockBackOnNoDeath = TRUE,If TRUE the weapon will knock back the target if the strike was not lethal. SwingAmountBeforeImpact = 0.002,Defines the time from start of the swing before it makes an impact. Categories = Axe,Defines the weapon Category. Can be Blunt, Blade, Axe, Improvised, Unarmed SubCategory = Swinging,Defines the weapon Sub Category. Can be Swinging, Stab, Firearm ConditionMax = 15,Defines the maximum durability of the weapon. ConditionLowerChanceOneIn = 30,Defines the chance for weapon condition to lower when used. SplatNumber = 1,Unsure, Possible affects how many blood splats comes out after impact. SplatSize = 5,Unsure, possible affects how much blood comes out with each splat. SplatBloodOnNoDeath = TRUE,Defines whether or not blood comes out if the strike was not lethal. PushBackMod = 0.3,Modifies the strength with which the target is pushed back upon impact. MinDamage = 1,Defines the minimum damage. MaxDamage = 2.5,Defines the maximum damage. MaxHitCount = 2,Defines how many targets can be hit with a single attack. DoorDamage = 35,Defines the amount of damage done to doors. Doors have 100 HP by default. TreeDamage = 35,Defines the amount of damage done to trees. Trees have 100HP by default. IdleAnim = Idle_Weapon2,Defines the idle animation that plays when the character is holding the weapon. SwingAnim = Bat,Defines the swinging animation that plays when the weapon is used RunAnim = Run_Weapon2,Defines the animation that plays when the character runs with the weapon. CriticalChance = 20,Chance to inflict critical, lethal damage upon the target. WeaponWeight = 3,Higher values cause exertion faster. KnockdownMod = 2,Defines the knockdown modifier, higher values mean it will be easier to knock the target down. TwoHandWeapon = TRUE,If true the weapon will be most effective if equipped in both hands. CloseKillMove = Jaw_Stab,Defines the type of close kill move, used for knives and some other stabbing weapons only. CantAttackWithLowestEndurance = TRUE,If TRUE the weapon can't be used if the character is under Extreme Exertion moodle. EnduranceMod = 0.5,Modifies the amount of endurance used up when swinging the weapon. Higher values mean exertion comes on faster. Weapon Type Only Below: RANGED SPECIFICRanged weapons will use a lot of variables, if not all, used by melee weapons, below you will find variables specific for Ranged Weapons, they would probably all work with a melee weapon, you can experiment. AmmoType = BerettaClip,Defines the type of Ammo being used. To the best of my knowledge, reloading requires .lua code. ImpactSound = null,Defines the sound created after impact. SwingSound = 9mmShot,Defines the attack sound. SoundVolume = 75,Defines the volume of attack sound. ToHitModifier = 1.5,Unsure, possibly a modifier for a chance to hit the target. NPCSoundBoost = 1.5,Unknown. No use as of Build 32. Speculated boost to sound if used by NPC so more zombies hear it and come. Ranged = TRUE,Defines if the weapon is a ranged weapon. ProjectileCount = 1,Defines the amount of projectiles created by shooting the weapon. ShareDamage = FALSE,Unknown effect. IsAimedFirearm = TRUE,Defines if the weapon needs to be aimed. UseEndurance = FALSE,Defines if using the weapon uses up endurance. MultipleHitConditionAffected = FALSE,Unknown. SoundRadius = 150,Defines the sound radius, higher values cause more zombies to hear it from more far away. AimingPerkCritModifier = 10,Defines Aiming Skill Bonus to Critical Chance AimingPerkRangeModifier = 1.5,Defines Aiming Skill Bonus to Range. HitChance = 45,Default chance to hit the target. AimingPerkHitChanceModifier = 15,Defines Aiming Skill Bonus to Hit Chance. AimingPerkMinAngleModifier = 0.05,Defines Aiming Skill Bonus to Min Angle. RecoilDelay = 20,Unsure. Defines time that must pass between shots. SoundGain = 1.5,Unknown effect. ClipSize = 15,Maximum amount of ammo that can go into the weapon. Again, .lua code is required for the weapon to be re loadable. ReloadTime = 10,Defines the time needed for the weapon to be reloaded. AimingTime = 40,Defines Aiming Difficulty, lower values increase chance to hit with low aiming time. PiercingBullets = TRUE,If true, multiple objects can be hit by a single projectile if they are in the right angle. Weapon Type Only Below: THROWN SPECIFIC UseSelf = TRUE,If TRUE the item itself will be used up when attacking. PhysicsObject = Aerosolbomb,Defines the thrown item sprite. ExplosionPower = 70,Defines the power of the explosion created upon impact. ExplosionRange = 6,Defines the AoE of the explosion. FirePower = 97,Defines the amount of fire that will be created upon impact. FireRange = 6,Defines the AoE of fire. triggerExplosionTimer = 50,Defines the time before exlosion if placed. ExplosionSound = smallExplosion,Defines the sound of explosion. PlacedSprite = constructedobjects_01_32,Defines sprite used if the weapon is placed as a trap. I hope this helps anyone who wants to create their own items for PZ. Remember, this is just a list of variables, don't use all of them, it's not required. Take a look at items.txt and newitems.txt to see what variables are used by what items and base your items off that.
-
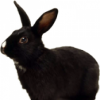
1: Give Recipes IDs Why? Because replacing a vanilla recipe is impossible without replacing the entire recipes.txt file. Let's say I change the functionality of a Base item like the Count value of Nails, it will break the recipe of Open Box of Nails by giving too much or too little and the only way to make it work right would be to replace the entire recipes file. Not to mention being able to make make some recipes NeedToLearn in a mod or removing that restriction would be nice. Or there are many cases where I would like to add some OnCreate lua functionality to base recipes and I can't because I won't make mods that replace base game's files. Recipes Displayed Name could be defined by DisplayName = Make Stuff, like it is for items. 2: Add a Type = xxxx, for items. What? Type = ExampleType, where ExampleType would be used in recipes and .lua it would help streamline some recipes and add many variants of the same item, with the same functionality without the need to make a ton of recipes. Like an alternative for nails that doesn't require modding or remaking the entire Build menu lua code. 3: New Category: Drinks What? Why? A combo between Food and Drainable, items like that would have a straight up UseDelta instead of using Hunger value as UseDelta, would make using liquids more straightforward in recipes as well as being able to remove the Hunger buff from them which doesn't make sense anyway and keep the other stuff. Drinking All\1/2\1/4 would just use 1 0.5 or 0.25 of it, regardless of UseDelta value while recipes would use them up like regular UseDelta. 4: ReplaceOnRot or ReplaceOnAge = X Why? Because it would be nice to have a way to turn some items into different items after they rot or if some item passes (Items Age reaches a certain level) I believe HydromancerX once suggested something like this with the idea of turning a living Rabbit into a Dead Rabbit Or just make something through crafting that you then have to leave be so you can get the final product like, idk, various alcoholic beverages. 5: ReplaceOnBreak and DestroyOnBreak Why? Because some weapons can't be repaired and just remain broken forever while they could be simply removed or replaced by some base material after they break (Eg. get a stone after your stone hammer breaks) 6: RottenHunger, RottenThirst, RottenUnhappines, RottenPoisonPower etc. Having a way to control the item's base stats after it rots would be cool, or making them poisonous over time, yeah. 7: EffectiveOver and EffectiveAfter Why? Because it would enable creation of edible stuff (or simple medicine) where the Hunger, Happiness, Boredom effects are applied over a certain amount of time (Preferably In-Game Hours) and\or after a certain time has passed. 8: RottenNamePrefix Why? Because imagine Molten Icecream done in a simple way without tooling around with temperature. 9: AlcoholPower stat that affects how quickly the given drink get's the character drunk. Because all it does is effect how effective it is as a disinfectant. Or it could be used make an item that reduces drunknes (Realism be damned) Edit: 10: Renameable = True\False Why? Why not? Add it to any item to give players an option to name their favorite plushie or weapon, for fun and roleplaying. It's one option I really wish I had sometimes. ---------- I believe having those would make things a lot easier for modders as well as open the possibility for them to create some really fun mods without having to know .lua much. And I think it would add some neat functionality to the game itself.
-
Now then fellow survivors. For a while now I've been recreating the village I grew up in, which mostly consists of semi-detached and terraced houses. As such, I've been building them in pairs or a big long row in the editor, rather than individual homes. Finally decided to create a mod to test it, realised how easy it was and got annoyed for not doing it earlier, but before long I had spawned in my childhood home. Awesome! However, as I had built both my neighbours house and mine as one, I could lock/unlock both front doors. Not the biggest crime in history I admit, but was wondering if there was something I was missing whilst creating. Is there a way to tell TileZed that there are numerous homes in one building and to spawn seperate keys? Or, do I need to create seperate buildings for each individual home and line them up in WorldEd? Either way, I'm happy. I'm not too far into making the houses as I've been focusing on gettng the pngs right. I can duplicate the buildings I have, split them in 2 and create side A and B. I'd just like to know before going on a building creation rampage and end up making more work for myself in the long run. Thanks for your time and to TIS for making Project Zomboid. It's pretty wizard.
-
All, I am working on my mod which adds new guns and ammos to the PZ world, I am working on a distributions script to give a chance for spare empty magazines to show up, however I don't want them showing up if the reload difficulty is set on easy... I have tried a couple of things testing it out on an item spawning script to no avail... does someone have an idea what that scrip would be? Much thanks in advance!
-
I made a mod for build 25 and 26 where I created my own occupation and traits based on some "The Walking Dead" characters. Now I can't get them to work on build 27. Did something change? What am I missing?
-
I was wondering which method i should use to get custom items to spawn in game correctly. They all have proper item names, display names, icons, and icon names. I'm not sure whether to use a copy of the SuburbsDistributions.lua in my mod with the new items added to the lists like Arican says here, or if i should make a new lua file for the new items only? I don't know if using a copy of the lua will cause problems seeing how base.items will be listed twice. I had a look at the items and recipes tutorials and it was set up like this. I'm guessing that table.insert(SuburbsDistributions) adds into the SuburbsDistributions.lua so is this the preferred way? Also a question about backpacks: why does a pack that has weight reduction 100 with 45 capacity cause the players main inventory to act as if its full? I had the full back pack on and only clothes on and it said 2/8 i believe but i couldn't pick anything up, but i could add items to another bag if i had it in my hands along with the full backpack on my back.
-
Okay, since I haven't seen anyone post a suggestion like this here I'm posting mine. First off, I know multiplayer modding in PZ is not yet quite fully functional because of its possibilty in cheating the game and the server... Anyways, I've just started abit of learning modding PZ and I've been thinking.. I noticed that the main problem in PZ multiplayer modding is its protection right? you can't call all of the function from the client's side and it only reads from the serverside, but what if its possible to do it.. similarly the way MineCraft's Forge modloader works (no idea copyright intended, lol) the client must same mods as the server for it to be able to join, the server modloader checks the joining client's mod files and verifys them, also checks the codes and stuff inside a mod folder?? The server checks a joining client for any active mods it has, if the server doesn't have that mod or doesn't match a mod, it deactivates the mods from the joining client...or possibly the server download its files to the client replacing and files or maybe just kicking the client if it has unmatched or extra files from the client's detected mods. also, before joining a server it show all the mods being used currently. thats all I can suggestion as of now, please if anyone is gonna post a reply, please just use creative or construction replies and critism about my idea/suggestion... PS: Sorry if I had any bad spellings or if my English is bad, my language is not purely English.
-
This might sound like a stupid question, but i need to know it Is it possible to use java for mods? More detailed: For my mod i would need to make some changes to an existing .class file (see my other help thread http://theindiestone.com/forums/index.php/topic/7949-itemcontainerisoobject/). Now im wondering if i can add the altered .class file to my mod folder the same way i add lua files or scripts. do the rules for lua modding apply to java files too? i.e., if i create a directory in my mod folder named like this zombie\iso\objects (instead of media\lua\client etc.) and place the altered file in there, would the altered class be loaded when the mod loads and override the original game class file? or would i have to manually replace the .class file in the game directory in order to work? i hoped i would find a way to solve my problem with lua only, but as the last post in the above linked thread shows i do not see any other possibility...
-
my main question is does anyone know of any modz for build 23 that r like pillow silencer, lockpicking and so on cuz i cant get any of the mods to work for the newer version.... also is there a way to down grade my game version so mods do work on it... and last but not least i have done everything correct for downloading the mods, in steamapps/common/projectzombiod/mods but i cant get any of the mods to show up in the title mod screen! also a list of build 23 mods would help get me started
-
Hi, so I was just thinking about the 3D system that's been added. I haven't got any modding experience with this game but it does interest me. Anyway, will there be some sort of tool that will convert 3D models and their animations into the game format? And then how will you be able to access these in-game? Personally I'd like to see (or make) a mod that adds more asthetic features to the game (characters mainly). I'd like to see: Hats, Jackets, Visible 3D Bags, Variations of existing weapons (visual change only), Different shoe types I would do this by extracting the existing models and animations and then attach my custom model where I'd like it (on the back of the player for a backpack, etc), then remove the player model while keeping the backpack with the animations still on it. I just wonder if the devs have any ideas on how easy or hard this would be to do? Will we be given template models and animations to work from? Also, what about 3D in-game objects such as (non-functional) cars which may have a random rotation on them? Forgive me if this has already been answered, just a thought I had. Thanks, -Ben
-
Hello everyone! inspired by Doublebrain i started to do some sprite work as well, starting from 3ds i speed sculpted. I did some experiment to upload them on my buildings, but for the moment i'm just doing them and waiting for the (hopefully) upcoming update... otherwise it will be nice to have them for my games nonetheless! I'll put here some images, but still i don't have figured out the best way to create the larger file... probably i'll need to write a small program in c++ if there's no another one! impressions? they look pretty well near to the official ones, but some parts can be worked to have less antialiasing, maybe! The function "Posterize" from Photoshop might do the work!