Search the Community
Showing results for tags 'modding'.
-
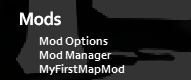
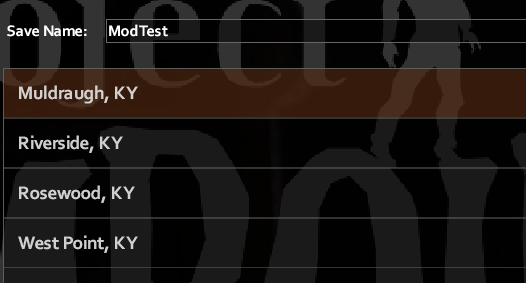
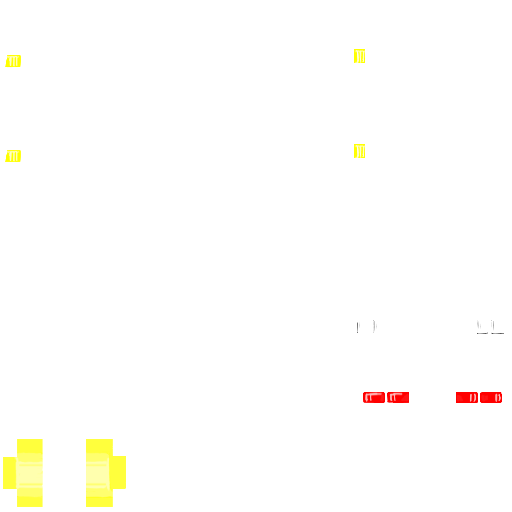
I've created a really simple map just to test everything out. I've went through this tutorial and got everything working except actually being able to spawn into my own map in-game. Here's the repository of my mod: https://github.com/Urbs97/ProjectZomboidTestMap And as an attachment the finished mod I'm using that is the result of generating lots with the repository I've linked. The mod is loaded: But I can only choose the vanilla spawns: Those are the contents of my map.info which you can also look up in the repository and fork the project if you like: title=Hello World Map lots=Muldraugh, KY description=My description fixed2x=true I've tried different "lots" (even the mod name) and also removing it. The result is always the same. In case more information is needed I will try to answer as soon as possible in this thread. Thank you for your time. MyMapMod.zip

-
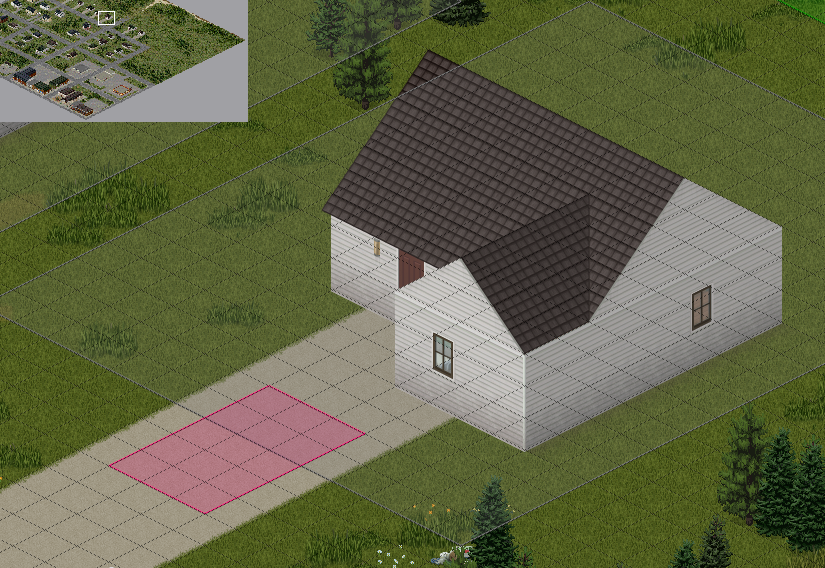
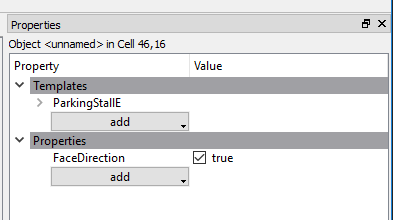
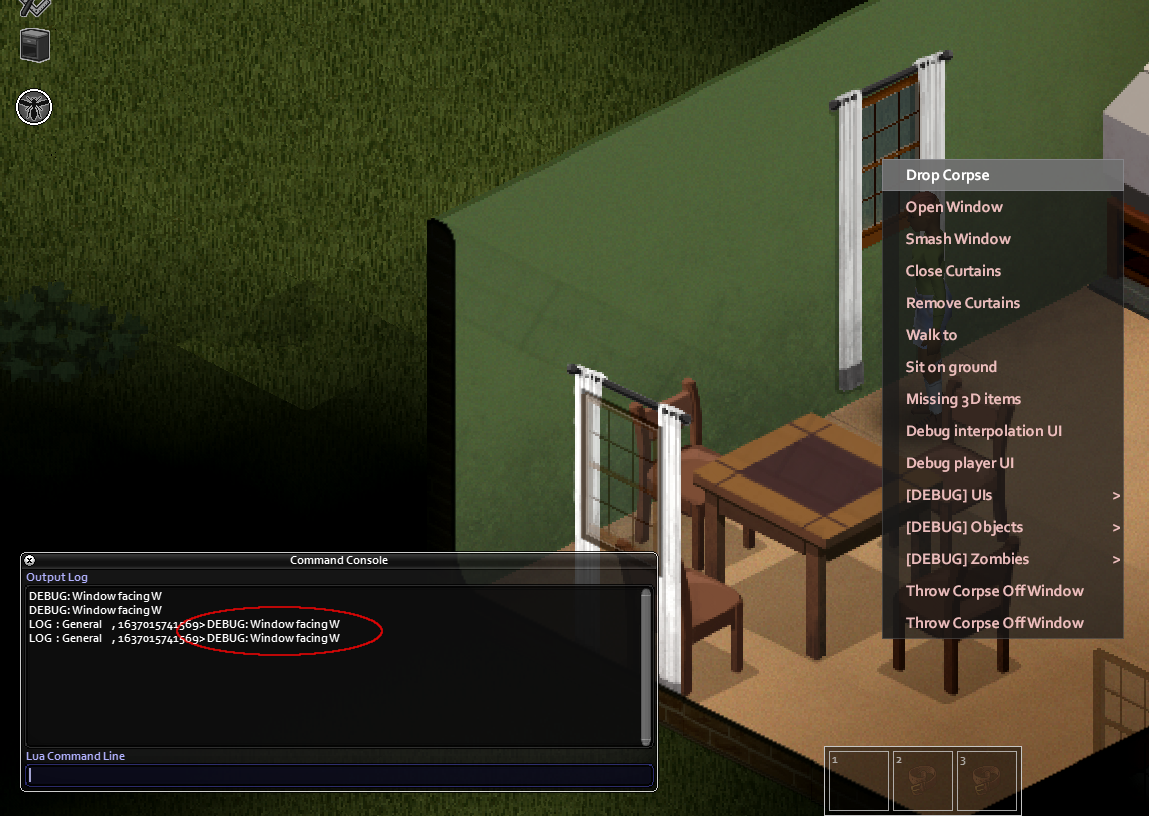
This is very similar to adding foraging zones to your map, (step 6 of this tutorial: https://theindiestone.com/forums/index.php?/topic/21951-the-one-stop-tilezed-mapping-shop/ ) Simply add the following code to your map mods' PZW file the same way as in step 6 of the above guide: <objecttype name="ParkingStall"/> <objectgroup name="ParkingStall" color="#85929e" defaulttype="ParkingStall"/> List of vehicle zone names to use in WorldEd: bad good medium sport farm junkyard trafficjams trafficjamn trafficjame trafficjamw rtrafficjams rtrafficjamn rtrafficjame rtrafficjamw police ranger fire mccoy fossoil postal spiffo radio ambulance burnt The first group is the most common type of vehicle zones used. The second group are for traffic jams pointing in specific directions to immitate the flow of traffic. The ones prefixed with r will spawn less than the regular trafficjam zones. The third group are specific zones for the type of vehicles listed, they are still also spawn random cars but will also spawn the vehicle listed. The final one will add random burn out vehicles. Vehicle zones should be placed as a multiple of 4x3 tiles (4x3, 8x6, 28x3 etc) with 4x3 being a single vehicle, 4 being its side and 3 being its front/back. You can choose any color values you want for the different zones, just make sure they are hex color codes. Once done, load your map mod up in WorldEd, open a cell and add your new vehicle zones as you would foraging zones. Whenever you add a zone you need to use the objects panel on the left of the WorldEd window to give the zone a name (use the names listed above) that will be visible in WorldEd as a tag over the zone, making it easier to keep track of what you have placed where, if these are left blank then the game will default back to grabbing random vehicles from the ParkingStall zone. Example: After you have added vehicle zones to all of your cells, save your map. Once saved, generate your lots and then write objects to lua. You now have vehicle spawns in your map. If you are having trouble with your vehicle zones, you can always take a look at the vanilla objects.lua within the muldraugh folder of your zomboid install, once opened just search for "ParkingStall" to see examples of vehicle zones used in the vanilla vehicle branch. For aligning vehicles in parking stalls: Select a ParkingStall object. In the Properties panel, click the "add" button under Templates. Choose one of the 4 ParkingStallX templates. You should see "Direction=X" where the object name is displayed. The direction controls where the front (or back) edge of each vehicle is aligned. In the picture you can see a Direction=E ParkingStall facing a Direction=W ParkingStall. This is used to ensure the vehicles don't overlap each other, and leaves space for the player (and zombies) to walk between them. For single parking stalls, there is usually no need to choose a direction. The FaceDirection property can be added to ParkingStall objects to align the front of a vehicle to the edge specified by the Direction property. When this property is "false" or isn't assigned to a ParkingStall object, the vehicle will face in a random direction as before. This can be used for parallel-parked vehicles for example.
-
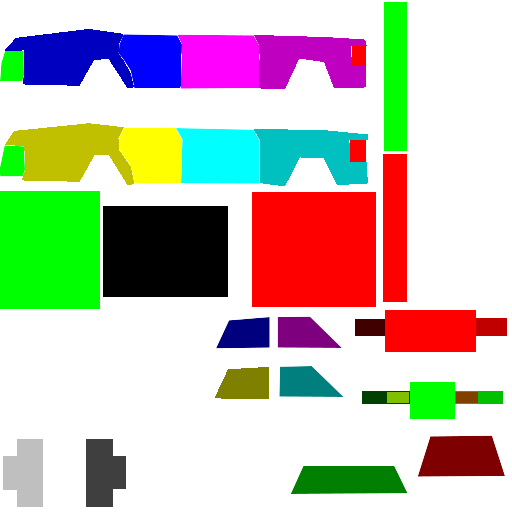
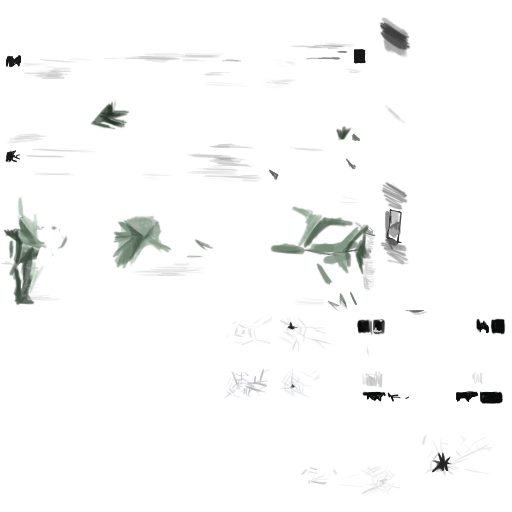
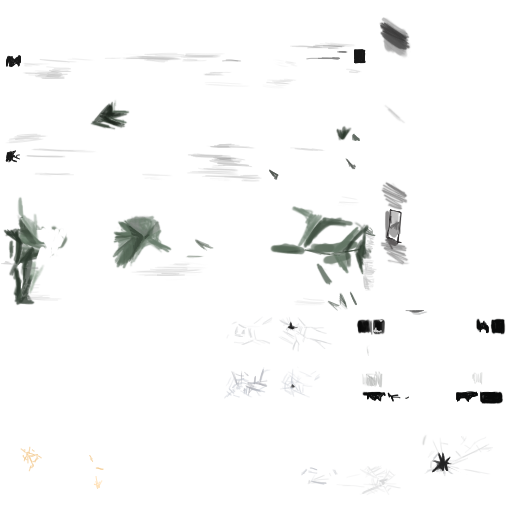
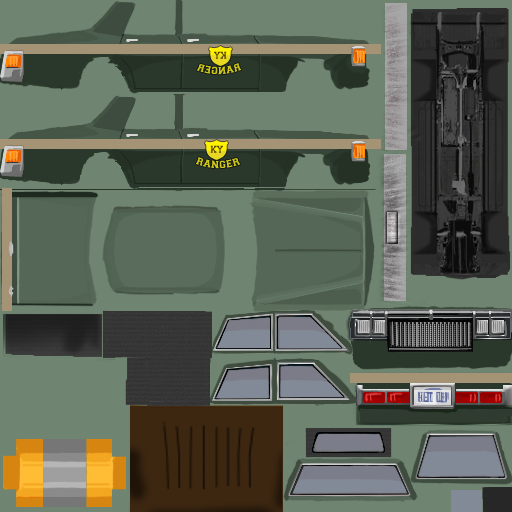
1) The first thing you want to do, as with most mods is to create your mods folder structure, use the image below as a reference, replacing MOD_NAME with the name of your mod: Don't worry about the files shown above, you will be creating them as you follow this guide, just make sure to remember, anytime you see "MOD_NAME" in this guide, replace that with the name you chose for your mod. 2) In your "..mods/MOD_NAME" folder, create your "mod.info" text file which contains the following code: Remember to replace all "MOD_NAME"'s with the actual name of your mod. 3) In the same folder, create/place your MOD_NAME.png , this will be the thumbnail used in game as the poster/picture for your mod. 4) Next up, in your "mods/MOD_NAME/media/lua/client" folder, create your MOD_NAME.lua file with the following code inside: This is the script that will load your model and scripts into the game, it also controls the spawn rate for the car in each type of zone as well as providing the vehicle mechanic overlay. Remember to replace all instances of "MOD_NAME" with the actual name you chose for your mod. 5) Next, in your "mods/MOD_NAME/media/scripts/vehicles" folder, create your MOD_NAME.txt file containing the following code: This script example contains all of the parameters to control the simulation of the vehicle, such as engine power, gear ratios, collision cube and much more. You will (hopefully) find it well commented to give you an idea of what each parameter does. You can look in the games "media\scripts\vehicles" folder for a vanilla vehicle script that more closely reflects the vehicle you are adding rather than starting with the example above, have a good look through them all to get a sense of the different templates you can use and the various changes that can be made to different components. 6) Now you need to (if you have not already) make the 3d model for your vehicle. We suggest using Blender, but as long as you're experienced in 3d modelling, any program that can export .ply files should work, just make sure your faces are triangulated, in Blender you can do this by selecting your model in Edit mode then pressing Ctrl + T. Then drag and drop the exported ply file onto the converter supplied below (unzip the below file, drag your .ply directly onto the .exe, do not double click the exe), it will output a new txt file with the same name as the .ply in the same directory. Copy the new .txt file into your "mods/MOD_NAME/media/models" folder as "Vehicles_MOD_NAME.txt This is the .ply to PZ convertor: PZ_PLYtoPZconverter.zip 7) Now it's time to create your vehicles texture files, these should all go into the "mods/MOD_NAME/media/textures/Vehicles" folder. First up is your "Vehicles_MOD_NAME_Shell.png" , this is the main texture image for your vehicle and needs to be 512x512 pixels, as do all of your textures, below is an example: Next there are 6 different overlay/detail png's to create, the first is for the vehicle lights ("Vehicles_MOD_NAME_Lights.png"): Then the vehicle rust ("Vehicles_MOD_NAME_Rust.png"): The next 2 image examples ("Vehicles_MOD_NAME_Shell_Damaged01.png" and "Vehicles_MOD_NAME_Shell_Damaged02.png") are to show light and heavy damage, respectively, on the vehicle's shell. They are used to represent dents in the bodywork: The next 2 image examples ("Vehicles_MOD_NAME_Overlays_Damaged01.png" and "Vehicles_MOD_NAME_Overlays_Damaged02.png") are very similar to the previous 2 except they are for showing damage on windows and lights as well as scratched on the body work: The last file we need is the vehicle colour mask ("Vehicles_MOD_NAME_Mask.png"), which should also be placed in your "mods/MOD_NAME/media/textures/Vehicles" folder. This tells the game which parts of your vehicle texture correspond to which part of your vehicle model and is needed to display damage, lowered windows and removed elements etc: Here the colour values to be used: Copy your complete mod folder structure into your C:\Users\YourUsernameHere\Zomboid\Mods folder, load the game, turn the mod on in the mod menu and start a new game, your new vehicle is now ready to be found and taken for a spin. Finally, here: ZAZ968M.zip - you can find an example vehicle mod using the above instructions. Notice the included example mod uses a slightly different process with its textures/overlays. The main texture is transparent while the detail has been shifted onto the vehicle_lights .png. This allows the game to automatically and procedurally generate different colours of your car when they are spawned in. Happy Modding!
-
Hello and welcome to my tutorial. It covers full workflow of vehicle creation for PZ. If you are a complete beginner in 3D modelling, you'll have to watch/read additional tutorials, I won't cover every aspect of model creation and 'where this button is located'. I divide vehicle creation in these stages: 1) Modelling 2) Wheels texture and modelling 3) Texturing 4) Packing files in folders 5) Editing scripts and .lua 6) In-game editing and tests 7) Workshop publish STAGE 1 - MODELLING Today I am creating a 1960 Ford Falcon I prefer using blender as it is my everyday 3d modelling software. Now, find references for your vehicle and ideally it will be a blueprint/outline scheme, like this one: There are some tips in modelling for PZ: 1) Do not care too much about topology and good shading. There is no actual shading in game, only windows have reflections. 2) Avoid n-gons or triangulate them before export 3) DO NOT make edges to outline body panels/parts. All dividing of parts will be done with texture mask. You can do it in UVs if there will be a point for that. 4) Place spindiel imitations in wheel wells to hide rear part of wheel models 5) In the UVs parts of body have to be straight-oriented without any non-90 degrees rotation, so pixels in texture will lay parallel with polygon flow. 6) To avoid physics artifacts in game import model of one of vanilla game cars models to your scene and model in consistent scale. Or import mine, that is available in the end of topic. This is what I consider a well done model There is nothing special in UV unwrapping process, just remember to place the least amount of seams possible and keep island aligned. Here are the UVs of my model: I've unwrapped the model without applied mirror modifier, so now we will have to texture just one half of the car. I'll fix mirroring later. STAGE 2 - WHEELS There are many ways to make a wheel and texture it, but I'll show the most efficient one. Make the wheel's face with simple materials, but unwrap the 'road touching part' to flat surface, like this: Then place an orthographic camera facing the wheel, scale it to fit the whole wheel-dish. Place a ring with emission material to light the wheel. Switch your renderer to Cycles and go to camera view, now use a rendered shading mode to adjust materials and lights to your taste. Set rendering resolution to something like 120x120-175-175 for best results Check the 'transparent' box in film settings to have alpha backround in texture: Now increase the sample count to something like 512-1024 and hit render. You will end up with a result of a ready-to-go wheel texture: The example file with scene for rendering and the model of this wheel you can download here: *google drive .blend file* Now make a lowpoly model of the wheel to use this texture on. I prefer using 18-24 edge circles for wheels. The unwrapping will be later, but eventually you'll end up with this: This method takes 10-15 minutes when you get used to it and gives a stunning and clear result. STAGE 3 - TEXTURING NOTE: I use a pretty complicated way of texturing and adding light to model. All rules of using textures the default way are covered in "HOW TO CREATE NEW VEHICLE MODS" topic by RingoD123, one of PZ devs. You can access it here: *boop* I'll show you my way, using Substance Painter to apply lighting and fake chrome parts to model. But first comes the base color and details of the car, so let's dive into it. Create a texture with 0 alpha and resolution 256x256. You can go for 512x512, but personally I like pixelated look of lo-res texture. Here are the settings for initial image: To preview the texture you are painting with different car colors, use this node setup. But switch filtering mode from "Linear" to "Closest", I forgot to do it on screenshot. There are two types of texture details: somewhat transparent and absolutely opaque. Half-transparent parts will be affected by car color, so they are mostly shadow/highlight details. Headlights, fixtures and things like that have to be opaque and painted with 100% brush hardness. It is easier to keep 3d view just to see what are you doing and paint texture in image editing mode, right there: First, paint the outlines of doors and other opening parts. Here are some brush hardness values: 0.2 - Outline shadow 0.5 - Outline 1.0 - Fake chrome and rubber window sealing Some work in progress screenshots Now when you have windows frames, save the image you just painted and go to photoshop and mask out glass sections like that Well, time for Substance Painter. You can use photoshop gradients for windows and blender lighting for lighting of the body, but I'll use SP "Baked lighting" filter for that, and for chrome especially. I will briefly describe what I've done in SP: 1) Mask out windows, give them mirror metal material and add a filter to them 2) Mask out chrome parts, made them mirror metal and added the same filter with slightly different settings. 3) Apply the same filter to all body parts left. 4) Add a position gradient to the windows Now I have this result, it is not shaded model, just basecolor: Also export the AO map you baked in SP. You can download file with this scene to look through and get ideas using this link: *boop* Now paint additional details you want on the car and open Photoshop. This is your layers layout: Now save it as .psd for future color editing and as .png to see what the you've done. Plug .png direcly as BaseColor in shader settings. Set your shading setting like this: And check if everything looks ok. This is my result: And this is the vehicle's look with wheels that we made before Sweet, isn't it? Now, it is time to get rid of mirroring. You can make new UV, bake it and... get A LOT of offset artifacts resulting in jagged pixel edges. There is a lazy but effective method: 1) In the UV editor place cursor in the 0,0 coordinates. 2) Set Pivot to 2D cursor: 3) Scale all UV islands to 0.5 EXACTLY 4) Apply mirror modifier to your model. Now select FACES of any half of the model and move it in UVs on Y by value 0.5 EXACTLY or you'll eventually mess everything up. 5) In Photoshop expand canvas of your PSD file we made before 6) Duplicate everything and move to the upper left corner, like in UVs. You can merge color layer(s) to operate color on export more easily. Now you have half of the texture empty... You do not want to waste it, right? Then drop in the wheel texture here without scaling, and you won't need additional texture file for it! 7) Create a layer beneath all others and paint it black or grey to cover alpha-holes in the textures. 8 ) Now unwrap the wheel to this new texture and let it shine! We painted the car and fixed mirroring. DOWNLOAD THE .PSD FILE: *bloop* There are 3 more types of textures to make: 1) Rust 2) Damage (1 or 2 levels, I'm lazy, I prefer using single one) 3) ID Color Mask or just Mask It wasn't possible to make them right with mirroring. Everything about these textures are explained clearly in Ringo's guide, again: *boop* I'll just show results I ended up with. Now you have to use 512x512 clear images for these textures, do not forget it. RUST Painted it with jitter brush and 0.2 hardness. To see what I am doing used the same node setup, as for base texture. DAMAGE Painted gradients with black and white with 0.1 hardess with repetitive strokes. MASK Mask texture tells game where are separate parts of car: doors, windows, lights and others. Every part has it's own color in palette, you can find color table in Ringo's guide. Copy and paste color HEX to use it in blender brush or fill tools. I've missed some of the parts because they do not really matter. AEUGH Texturing is finished. Go to photoshop and make all color variations you want and save them as .png, name them Vehicles_[vehicle name]_ Vehicle name mustn't containt spaces These are color palettes of my car: Now you have to export your vehicle body and wheel models. Copy them to an empty scene and save as separate file. If you used blender default orientations (front, back, right, left, top), then rotate the car on Z axis by 180 degrees. Game rotates it for some reason, so you'll have to do it. Now position everything in scene like this and continue to export settings. Export body and wheel separately with these settings: STAGE 5 - Packing files in folders The folder hierarchy and naming the files you can find in Ringo's guide. The mod file and all of my project files you will be able to download in the end of this topic. make up an Id name for your car. It has to be short, but unique and do not contain spaces. For this car I use '60falcon'. _____________________________________________ workshop.txt properties of the mod for Steam Workshop _____________________________________________ mod.info properties of the mod for in-game mod menu _____________________________________________ models_X folder -> vehicles this folder contains 3d meshes of the vehicle - body and wheel _____________________________________________ textures -> vehicles easy to guess, all vehicle textures are placed here null.png - completely transparent image, used as placeholder later on _____________________________________________ scripts -> vehicles there shoud be a .txt file named with you vehicle's ID name. Open it up and follow these instructions: change invertX to 'TRUE' if vehicle appears to be mirrored by left and right in game. Do not care about scale, offset and other geometric parameters. Insert all your color variation textures as shown below: All vehicle driving parameters are self-explanatory. Remember to set seats count, I'm creating a car with 4 seats. If you want to make less seats or add new, delete passenger[Seat code] records or add new. Also remember Seat[position] records down below. Add or delete the templates, loaded from Game default files: _____________________________________________ LUA SCRIPTS lua -> server -> vehicles -> [car id name]dis.lua Vehicle trunk type distribution file. There is a file with all vehicle distribution types in game files, I'll put it in project folder in the end if the article. This is game files distibution types, select one of them in respect to the vehicle type you are creating. I'll use CarNormal type for Ford Falcon. This is what distribution lua file has to be: _____________________________________________ lua -> shared -> [car id name]SpawnList.lua This file describes spawn zones of your car in game world with certain chance. I've typed in all default zones of spawn, you just have to change the chance and set [Base.60falcon] to [Base.(your car id name)] _____________________________________________ lua -> shared -> Translate -> EN -> IG_UI_EN.txt This is the name of the car in UI - keys name, mechanics window name and such. STAGE 6 - In-game editing and tests Launch PZ and disable all mod exept the one you will be debugging. Now close the game and go to Steam. In application setting set startup parameter to -debug It enables many debug options in-game. Now launch the Game again and, if menu doesn't appear, you've done something wrong in lua scripts. Check them for probles, and I hope, you'll figure out what is wrong. Now start a new game in world with no zombies and big amount of cars. Leave the house and find any car vibing in the street. Right click, -> Vehicle -> Set Script -> [your car ID name]. Car will switch to yours. This is what I've got on first time in-game spawning: YEET, it is all coming along. But wheel positions are a bit off, and we have to place the entering areas of doors. Go to Right click on car -> [DEBUG] Vehicle -> Vehicle Editor. Chassis Place extents and physics shape to outline the car Areas These are access areas to different parts of the car. There is nothing to describe, really, just place them where you can explain it and continue to next section Right click in mechanics tab to enable cheat options for the car. Now right click in mechanics panel. Here you can get key for that car or repair it. Final result in different variations Make a suitable preview image for your mod and crop it in Photoshop to 256x256. Place it in mod folder as preview.png In game menu go WORKSHOP -> create or update mod -> Go to your profile workshop items and find the new mod. Add the description, more screenshots and set visibility to 'Public' ALL PROJECT FILES: *YEET* ZE END Congratulations if you followed my guide to this point. Comment any issues or mistakes I've made.
-
Is it possible to use the XML markup for probability inside of a subitem branch? <m_items> <itemGUID>cbe793fe-97d9-4585-88e0-bc18be39d714</itemGUID> <subItems> <probability>0.25</probability> <itemGUID>48efaf62-6a65-474a-8773-886e05ea7632</itemGUID> </subItems> </m_items> In the example above, would this work such that one of these items would guarantee to be on the zombie, but Item A (main item GUID) would appear 75% of the time versus Item B (subitem GUID) spawning 25% of the time?
-
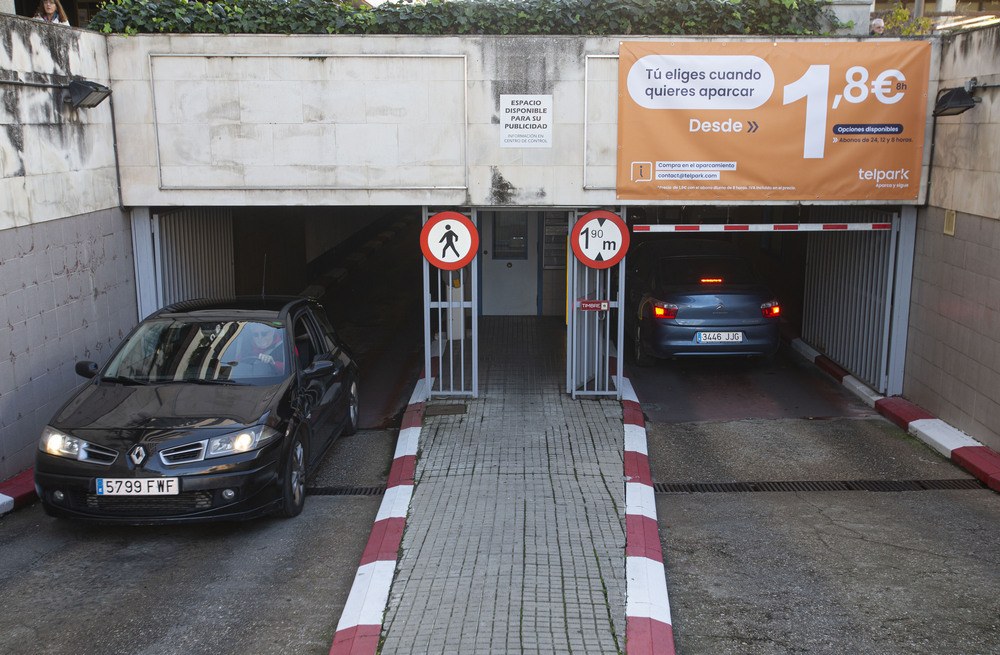
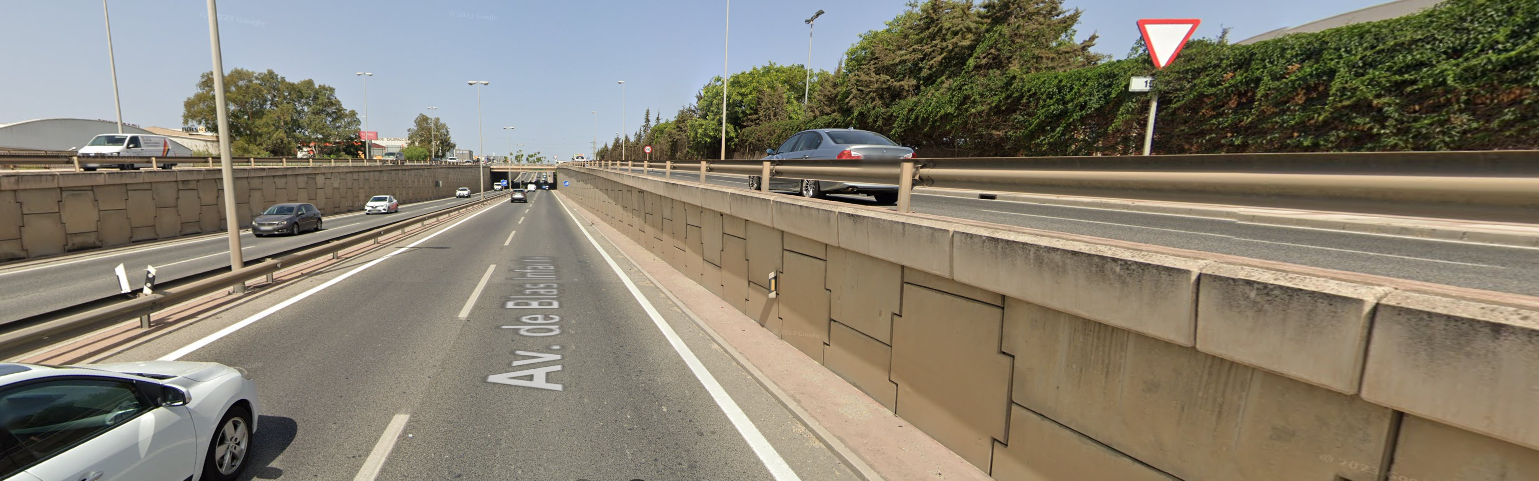
 I have been searching about some info about this, since I started to imagine recreating part of my city on a modded map, I got many questions of how to do some especific buildings. I bring two examples here that may help game developers to give us new experiences and building news. First of all, I know that new build would bring basement on houses, after this, I asked my self if there will be a way to make an underground parking, I mean: Take a build, put garage door and there will be a ramp to enter the parking. It woult be very usefull to implement this on vanilla. My other suggestion has the same mechanic, would be the same but used to connect with other roads or direction changes. The main problem is to make the ramp on vanilla game to have the oportunity to make this examples. That would bring diversity to the scenarios. If anyone who reads this knows something about this ideas, reply me, thanks!
-
I've been working on a Helmet mod and its texture only has problems with baggy clothing on the character, I'm not sure if anyone else has encountered this problem and has a solution or not. I have been comparing it to other mods that add clothing but I can't find anything that jumps out. any help would be appreciated. Some clothing that has been giving it trouble is mostly static model clothing, for example, long shorts, suit jackets/pants.
-
Would there be a way to adjust the rendering pipeline without half re-creating the game? From what I can find the relevant functions are all private in Core, GameWindow and SpriteRenderer. I'm assuming that because I can't because any other mod that does this sort of thing. If I can't modify the perspective of the entire game would it be horribly frowned upon to have a go modding in a new build of PZ to make it first person? Thanks.
-
1) First create a folder structure for your mod, call the first folder something like "MyCarReskinMod". Inside that create a "media" folder, inside your media folder create 2 more folders, one called "textures" and one called "scripts". Inside the texture folder create a folder called "Vehicles" and inside the scripts folder create a folder called "vehicles". Your final folder structure should look like: MyCarReskinMod media textures Vehicles scripts vehicles Don't forget to place your mod.info and poster.png files inside your first folder alongside the media folder. 2) Copy, paste and rename the vehicles main texture that you want to edit/reskin from the ProjectZomboid/Media/Textures/Vehicles folder to your media/textures/vehicles folder. Use this texture along with the vehicles texture mask (also found in the same folder) as a template for your skin. The vehicle mask is listed in the code snippet below ("textureMask = ...") and dictates what part of your vehicle texture gets assigned to each part of the 3d vehicle. 3) Find and copy the original script of the vehicle you want to reskin from the ProjectZomboid/Media/Scripts/Vehicles folder and paste it into your media/scripts/vehicles folder. Below is what the start of your vehicle script should look like, in this example we are editing the taxi skin: Change the line "texture = Vehicles/Vehicle_CarTaxiShell" to "texture = Vehicles/"YourVehicleSkinPNGNameHere" and save. Add your entire mod folder structure into your users/zomboid/mods folder, enable the mod on the in game mods page and play, your edited vehicle skin should now be in game. You can download an example here: RingoCarSkinEdit.zip
-
First, create the following file structure (if you are adding the lootable map to your own map mod then create all folders within the media folder below in your map mods media folder instead): Spoiler MyLootableMapsMod >media >>lua >>>server >>>>Items >>>client >>>>ISUI >>>>>Maps >scripts >textures >>worldMap Next up create a .txt file in the scripts folder called something like "mylootablemap" (except make it more unique to avoid any possible compatability issues with other mods that might use the same names), it should include this code: Spoiler module Base { item MyLootableMap { DisplayCategory = Cartography, Type = Map, DisplayName = Your map name here, Icon = Map, Weight = 0.1, Map = MyLootableMap, WorldStaticModel = Map, } } The above code is adding a new item with the internal name "MyLootableMap" (so again make sure yours is something unique) into the vanilla pool of items, the above settings work for maps. The next file you need you will want to create in the "media\lua\server\Items" folder, call it something like MyLootableMapDistribution.lua but again make it's a unique name to avoid any possible mod imcompatability with other mods. It should contain the following code: Spoiler local function preDistributionMerge() table.insert(ProceduralDistributions.list.MagazineRackMaps.items, "MyLootableMap"); table.insert(ProceduralDistributions.list.MagazineRackMaps.items, 50); end Events.OnPreDistributionMerge.Add(preDistributionMerge); In the above code you can see that we are adding our new Item "MyLootableMap" into the "MagazineRackMaps" loot table inside of ProceduralDistributions.lua, this will affect any roomDef of any building that pulls from the MagazineRackMaps loot table. We are doing it this way as the definition we want to add to has the "procedural" tag in Distributions.lua and is therefore using the procedural loot tables. The number 50 is the "weight" of the item you are adding, higher number = more chance. To find the current room and container definitions, navigate to your "steamapps\common\ProjectZomboid\media\lua\server\Items" folder and open the Distributions.lua file. If the definition you want to add your item to is not procedural (does not have the "procedural = true" line) then you want to add this code instead of the above code: Spoiler local myMapdistributionTable = { all = { shelves = { rolls = 5, items = { "Magazine", 20, "Newspaper", 20, "Book", 20, "SheetPaper2", 20, "Notebook", 20, "BookTailoring1", 2, "BookTailoring2", 1, "BookTailoring3", 0.7, "BookTailoring4", 0.5, "BookTailoring5", 0.3, "BookCarpentry1", 2, "BookCarpentry2", 1, "BookCarpentry3", 0.7, "BookCarpentry4", 0.5, "BookCarpentry5", 0.3, "BookCooking1", 2, "BookCooking2", 1, "BookCooking3", 0.5, "BookCooking4", 0.3, "BookForaging1", 2, "BookForaging2", 1, "BookForaging3", 0.7, "BookForaging4", 0.5, "BookForaging5", 0.3, "BookFarming1", 2, "BookFarming2", 1, "BookFarming3", 0.7, "BookFarming4", 0.5, "BookFarming5", 0.3, "BookFishing1", 2, "BookFishing2", 1, "BookFishing3", 0.7, "BookFishing4", 0.5, "BookFishing5", 0.3, "BookTrapping1", 2, "BookTrapping2", 1, "BookTrapping3", 0.7, "BookTrapping4", 0.5, "BookTrapping5", 0.3, "BookFirstAid1", 2, "BookFirstAid2", 1, "BookFirstAid3", 0.7, "BookFirstAid4", 0.5, "BookFirstAid5", 0.3, "BookMetalWelding1", 2, "BookMetalWelding2", 1, "BookMetalWelding3", 0.7, "BookMetalWelding4", 0.5, "BookMetalWelding5", 0.3, "BookElectrician1", 2, "BookElectrician2", 1, "BookElectrician3", 0.7, "BookElectrician4", 0.5, "BookElectrician5", 0.3, "BookMechanic1", 2, "BookMechanic2", 1, "BookMechanic3", 0.7, "BookMechanic4", 0.5, "BookMechanic5", 0.3, "FishingMag1", 1, "FishingMag2", 1, "HuntingMag1", 1, "HuntingMag2", 1, "HuntingMag3", 1, "HerbalistMag", 1, "FarmingMag1", 1, "CookingMag1", 1, "CookingMag2", 1, "ElectronicsMag1", 1, "ElectronicsMag2", 1, "ElectronicsMag3", 1, "ElectronicsMag4", 1, "ElectronicsMag5", 1, "MechanicMag1", 1, "MechanicMag2", 1, "MechanicMag3", 1, "EngineerMagazine1", 1, "EngineerMagazine2", 1, "MetalworkMag1", 1, "MetalworkMag2", 1, "MetalworkMag3", 1, "MetalworkMag4", 1, "Journal", 2, "Radio.RadioBlack",2, "Radio.RadioRed",1, "MyLootableMap", 50, } }, } } table.insert(Distributions, 2, myMapdistributionTable); This would add your map to the existing "all>shelves" definitions, which would be every shelves container in the game world not inside a roomdef defined inside Distributions.lua, so for example your map would not spawn on shelves that are placed inside a "bookstore" room def as that room def already exists in Distributions.lua with a rule for shelves. You can also check this thread: for a more in-depth guide to working with the loot tables. Lastly, inside of your "media\lua\client\ISUI\Maps" folder create a new file called something like MyLootableMapDefinition.lua (make it unique to your mod instead of a generic name) and include the following code: Spoiler require "ISMapDefinitions" MapUtils = {} function MapUtils.initDirectoryMapData(mapUI, directory) local mapAPI = mapUI.javaObject:getAPIv1() local file = directory..'/worldmap-forest.xml' if fileExists(file) then mapAPI:addData(file) end file = directory..'/worldmap.xml' if fileExists(file) then mapAPI:addData(file) end -- This call indicates the end of XML data files for the directory. -- If map features exist for a particular cell in this directory, -- then no data added afterwards will be used for that same cell. mapAPI:endDirectoryData() mapAPI:addImages(directory) end function MapUtils.initDefaultMapData(mapUI) local mapAPI = mapUI.javaObject:getAPIv1() mapAPI:clearData() -- Add data from highest priority (mods) to lowest priority (vanilla) local dirs = getLotDirectories() for i=1,dirs:size() do MapUtils.initDirectoryMapData(mapUI, 'media/maps/'..dirs:get(i-1)) end end local MINZ = 0 local MAXZ = 24 local WATER_TEXTURE = false function MapUtils.initDefaultStyleV1(mapUI) local mapAPI = mapUI.javaObject:getAPIv1() local styleAPI = mapAPI:getStyleAPI() local r,g,b = 219/255, 215/255, 192/255 mapAPI:setBackgroundRGBA(r, g, b, 1.0) mapAPI:setUnvisitedRGBA(r * 0.915, g * 0.915, b * 0.915, 1.0) mapAPI:setUnvisitedGridRGBA(r * 0.777, g * 0.777, b * 0.777, 1.0) styleAPI:clear() local layer = styleAPI:newPolygonLayer("forest") layer:setMinZoom(13.5) layer:setFilter("natural", "forest") if true then layer:addFill(MINZ, 189, 197, 163, 0) layer:addFill(13.5, 189, 197, 163, 0) layer:addFill(14, 189, 197, 163, 255) layer:addFill(MAXZ, 189, 197, 163, 255) else layer:addFill(MINZ, 255, 255, 255, 255) layer:addFill(MAXZ, 255, 255, 255, 255) layer:addTexture(MINZ, "media/textures/worldMap/Grass.png") layer:addTexture(MAXZ, "media/textures/worldMap/Grass.png") layer:addScale(13.5, 4.0) layer:addScale(MAXZ, 4.0) end layer = styleAPI:newPolygonLayer("water") layer:setMinZoom(MINZ) layer:setFilter("water", "river") if not WATER_TEXTURE then layer:addFill(MINZ, 59, 141, 149, 255) layer:addFill(MAXZ, 59, 141, 149, 255) else layer:addFill(MINZ, 59, 141, 149, 255) layer:addFill(14.5, 59, 141, 149, 255) layer:addFill(14.5, 255, 255, 255, 255) layer:addTexture(MINZ, nil) layer:addTexture(14.5, nil) layer:addTexture(14.5, "media/textures/worldMap/Water.png") layer:addTexture(MAXZ, "media/textures/worldMap/Water.png") -- layer:addScale(MINZ, 4.0) -- layer:addScale(MAX, 4.0) end layer = styleAPI:newPolygonLayer("road-trail") layer:setMinZoom(12.0) layer:setFilter("highway", "trail") layer:addFill(12.25, 185, 122, 87, 0) layer:addFill(13, 185, 122, 87, 255) layer:addFill(MAXZ, 185, 122, 87, 255) layer = styleAPI:newPolygonLayer("road-tertiary") layer:setMinZoom(11.0) layer:setFilter("highway", "tertiary") layer:addFill(11.5, 171, 158, 143, 0) layer:addFill(13, 171, 158, 143, 255) layer:addFill(MAXZ, 171, 158, 143, 255) layer = styleAPI:newPolygonLayer("road-secondary") layer:setMinZoom(11.0) layer:setFilter("highway", "secondary") layer:addFill(MINZ, 134, 125, 113, 255) layer:addFill(MAXZ, 134, 125, 113, 255) layer = styleAPI:newPolygonLayer("road-primary") layer:setMinZoom(11.0) layer:setFilter("highway", "primary") layer:addFill(MINZ, 134, 125, 113, 255) layer:addFill(MAXZ, 134, 125, 113, 255) layer = styleAPI:newPolygonLayer("railway") layer:setMinZoom(14.0) layer:setFilter("railway", "*") layer:addFill(MINZ, 200, 191, 231, 255) layer:addFill(MAXZ, 200, 191, 231, 255) -- Default, same as building-Residential layer = styleAPI:newPolygonLayer("building") layer:setMinZoom(13.0) layer:setFilter("building", "yes") layer:addFill(13.0f, 210, 158, 105, 0) layer:addFill(13.5f, 210, 158, 105, 255) layer:addFill(MAXZ, 210, 158, 105, 255) layer = styleAPI:newPolygonLayer("building-Residential") layer:setMinZoom(13.0) layer:setFilter("building", "Residential") layer:addFill(13.0f, 210, 158, 105, 0) layer:addFill(13.5f, 210, 158, 105, 255) layer:addFill(MAXZ, 210, 158, 105, 255) layer = styleAPI:newPolygonLayer("building-CommunityServices") layer:setMinZoom(13.0) layer:setFilter("building", "CommunityServices") layer:addFill(13.0f, 139, 117, 235, 0) layer:addFill(13.5f, 139, 117, 235, 255) layer:addFill(MAXZ, 139, 117, 235, 255) layer = styleAPI:newPolygonLayer("building-Hospitality") layer:setMinZoom(13.0) layer:setFilter("building", "Hospitality") layer:addFill(13.0f, 127, 206, 225, 0) layer:addFill(13.5f, 127, 206, 225, 255) layer:addFill(MAXZ, 127, 206, 225, 255) layer = styleAPI:newPolygonLayer("building-Industrial") layer:setMinZoom(13.0) layer:setFilter("building", "Industrial") layer:addFill(13.0f, 56, 54, 53, 0) layer:addFill(13.5f, 56, 54, 53, 255) layer:addFill(MAXZ, 56, 54, 53, 255) layer = styleAPI:newPolygonLayer("building-Medical") layer:setMinZoom(13.0) layer:setFilter("building", "Medical") layer:addFill(13.0f, 229, 128, 151, 0) layer:addFill(13.5f, 229, 128, 151, 255) layer:addFill(MAXZ, 229, 128, 151, 255) layer = styleAPI:newPolygonLayer("building-RestaurantsAndEntertainment") layer:setMinZoom(13.0) layer:setFilter("building", "RestaurantsAndEntertainment") layer:addFill(13.0f, 245, 225, 60, 0) layer:addFill(13.5f, 245, 225, 60, 255) layer:addFill(MAXZ, 245, 225, 60, 255) layer = styleAPI:newPolygonLayer("building-RetailAndCommercial") layer:setMinZoom(13.0) layer:setFilter("building", "RetailAndCommercial") layer:addFill(13.0f, 184, 205, 84, 0) layer:addFill(13.5f, 184, 205, 84, 255) layer:addFill(MAXZ, 184, 205, 84, 255) end function MapUtils.overlayPaper(mapUI) local mapAPI = mapUI.javaObject:getAPIv1() local styleAPI = mapAPI:getStyleAPI() local layer = styleAPI:newTextureLayer("paper") layer:setMinZoom(0.00) local x1 = mapAPI:getMinXInSquares() local y1 = mapAPI:getMinYInSquares() local x2 = mapAPI:getMaxXInSquares() + 1 local y2 = mapAPI:getMaxYInSquares() + 1 layer:setBoundsInSquares(x1, y1, x2, y2) layer:setTile(true) layer:setUseWorldBounds(true) layer:addFill(14.00, 128, 128, 128, 0) layer:addFill(15.00, 128, 128, 128, 32) layer:addFill(15.00, 255, 255, 255, 32) layer:addTexture(0.00, "media/white.png") layer:addTexture(15.00, "media/white.png") layer:addTexture(15.00, "media/textures/worldMap/Paper.png") end function MapUtils.revealKnownArea(mapUI) local mapAPI = mapUI.javaObject:getAPIv1() local x1 = mapAPI:getMinXInSquares() local y1 = mapAPI:getMinYInSquares() local x2 = mapAPI:getMaxXInSquares() local y2 = mapAPI:getMaxYInSquares() WorldMapVisited.getInstance():setKnownInSquares(x1, y1, x2, y2) end ----- local function replaceWaterStyle(mapUI) if not WATER_TEXTURE then return end local mapAPI = mapUI.javaObject:getAPIv1() local styleAPI = mapAPI:getStyleAPI() local layer = styleAPI:getLayerByName("water") if not layer then return end layer:setMinZoom(MINZ) layer:setFilter("water", "river") layer:removeAllFill() layer:removeAllTexture() layer:addFill(MINZ, 59, 141, 149, 255) layer:addFill(MAXZ, 59, 141, 149, 255) end local function overlayPNG(mapUI, x, y, scale, layerName, tex, alpha) local texture = getTexture(tex) if not texture then return end local mapAPI = mapUI.javaObject:getAPIv1() local styleAPI = mapAPI:getStyleAPI() local layer = styleAPI:newTextureLayer(layerName) layer:setMinZoom(MINZ) layer:addFill(MINZ, 255, 255, 255, (alpha or 1.0) * 255) layer:addTexture(MINZ, tex) layer:setBoundsInSquares(x, y, x + texture:getWidth() * scale, y + texture:getHeight() * scale) end local function overlayPNG2(mapUI, x, y, scaleX, scaleY, tex) local mapAPI = mapUI.javaObject:getAPIv1() local styleAPI = mapAPI:getStyleAPI() local layer = styleAPI:newTextureLayer("lootMapPNG") layer:setMinZoom(MINZ) local texture = getTexture(tex) layer:addFill(MINZ, 255, 255, 255, 128) layer:addTexture(MINZ, tex) layer:setBoundsInSquares(x, y, x + texture:getWidth() * scaleX, y + texture:getHeight() * scaleY) end -- -- -- -- -- Now, after the last set of dashed lines you can add your lootable map definitions with the following code: Spoiler LootMaps.Init.MyLootableMap = function(mapUI) local mapAPI = mapUI.javaObject:getAPIv1() MapUtils.initDirectoryMapData(mapUI, 'media/maps/MyMapMod') -- 'media/maps/MyMapMod' - this should be where your maps worldmap.xml file is MapUtils.initDefaultStyleV1(mapUI) -- Specify the appearance of the map. replaceWaterStyle(mapUI) -- Use solid color for water instead of a texture. mapAPI:setBoundsInSquares(12900, 9900, 14399, 11399) -- (starting x, starting y, ending x, ending y) of the area you want to display and uncover, in World Co-ordinates. overlayPNG(mapUI, 14299, 9900, 0.666, "badge", "media/textures/worldMap/MyLootableMapBadge.png") -- Add your lootable maps banner PNG. overlayPNG(mapUI, 13000, 10000, 0.666, "legend", "media/textures/worldMap/Legend.png") -- Add the legend PNG. MapUtils.overlayPaper(mapUI) -- Draw a paper-like texture overtop the map. end Make sure that your "LootMaps.Init.MyLootableMap" on line 1 matches the name you specified on the "Maps = " line in your map item script you made earlier in this tutorial. The rest of the code is commented to describe what they do. The "textures\worldMap" folder that you created at the start should be used to store your maps name banner png if you have one and is referenced in the above code to make your lootable map look more official. As you can see, no external PNG's need to be created as the map is drawn from the data stored in the maps worldmap.xml file, which is what the "mapAPI:setBoundsInSquares" is using to draw a certain section of the overall world map. And that's it, copy your entire folder structure into your "C:\Users\YourUserNameHere\Zomboid\Mods" folder, load up the game, enable the mod (Your map mod if you made your lootable maps as part of a map mod) and start a new game, you now have your lootable map in game and waiting for you to find, and when you do it will uncover that area automatically on the main in game map. If you need a working example you can always subscribe to Bedford Falls on Steam and check it's workshop folder "steamapps\workshop\content\108600\522891356" . It's handy to verify your folder/file structure etc if you're having problems.
-
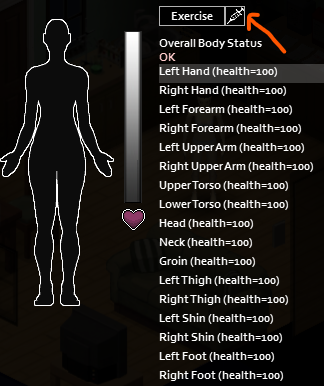
 For the past month or so I've been working on further developing the DrHyde's Vaccine mod to suit the needs of PZ roleplaying servers. There is one feature I'd really like to implement but am unable to. Vaccinating OTHER PLAYERS -- how can I code a function that will change the other player's bodyDamage()? So far I've successfully added a UI-button to the HealthPanelUI that opens up when medically checking right-clicked player, but I just can't manage to add function that will change right-clicked player's stats. The code I'm using is simple: adds UI-button and a 'confirmPress' function that runs when that button is pressed. But how do I change the local function confirmPress(button, args) to apply changes to the other player's stats and not the one that initiates the button press (me)? Any help is appreciated-- please help me solve something that I couldn't figure out in a month worth of time.. -- Functions for button of UIs local function confirmPress(button, args) local player = getPlayer(); if player:getInventory():getItemFromType('CmpSyringeWithVirus') then if player:getInventory():getItemFromType('AlcoholedCottonBalls') then player:getBodyDamage():setInfected(true); player:getInventory():Remove("CmpSyringeWithVirus"); player:getInventory():Remove("AlcoholedCottonBalls"); else player:Say("Cotton balls?"); end--if else player:Say("Nothing to inject with.."); end--if end--function -- Add HealthPanelUI Syringe Button local ISHealthPanel_createChildren = ISHealthPanel.createChildren function ISHealthPanel:createChildren() ISHealthPanel_createChildren(self); self.fitness:setWidth(self.fitness:getWidth()/1.5); self.TOCButton = ISButton:new(self.fitness:getRight(), self.healthPanel.y, 20, 20, "", self, confirmPress); self.TOCButton:setImage(getTexture("media/ui/iconForMenu.png")); self.TOCButton.anchorTop = false self.TOCButton.anchorBottom = true self.TOCButton:initialise(); self.TOCButton:instantiate(); self:addChild(self.TOCButton); if getCore():getGameMode() == "Tutorial" then self.TOCButton:setVisible(false); end end local ISHealthPanel_render = ISHealthPanel.render function ISHealthPanel:render() ISHealthPanel_render(self); self.TOCButton:setY(self.fitness:getY()); end
-
As the crafting system is being overhauled soon I'm hoping that items will be given traits to make Modding much easier to accomplish and maintain as well having an easier time adding new recipes and items for the developers. As a simple example: Hammer: 3 Hammering Quality 3 Nail Pulling Quality 2 Destruction Quality 1 Screw Driving Quality Metal Item These qualities allow the item to be used to pull nails out of furniture and boards with a reliable frequency. It can be used to construct advanced furniture and deconstruct them as well. It's destruction quality is high enough to hammer items to scrap them losing fine components, but not high enough to quickly destroy walls. Using the nail pulling part one *could* drive screws (Mostly Flat-heads and Phillips) but it would be slower and unsuitable for most advanced disassembly. Another: Screwdriver: 3 Screw driving Quality 1 Nail pulling Quality 1 Hammering Quality Metal Item The screwdriver is an excellent screwing tool. But as an aside it could be used to pry nails out of items, but would be likely to wreck the nails. The handle could be used to drive nails- though clearly it wouldn't work well. - These 'qualities' are used when determining the amount of time and likelihood of success during crafting and construction/mechanics. In crafting recipes there would be a recommended minimum quality. If under this quality there would be a higher chance of failure and the recipe would take much longer- some recipes would have a Minimum Quality required. As a benefit this would make adding new items much easier for both modders and staff. Once the qualities are in, adding a new tool would require no manual changes to recipes. At most a change to the math that factors in crafting, destruction, etc would be needed if the item changes the scale of the math. - Lets say we add a Jackhammer to the game as a higher tier of sledgehammer. In the game as is it would require a good amount of changing to the current destruction system to add the proper time reduction to the action and factor in fuel potency and amount. The sledgehammer: 3 Destruction Quality 2 Hammering Quality Metal Item It takes 10 Minutes to destroy a hole in a wall after math and skill is calculated (Example) The Jackhammer: 4 Destruction Quality 1 Hammering Quality It takes 1 Minute to punch a hole in a wall. - A very similar system is used in CDDA, PZ's sister from other misters. And through this system, modding would be much easier and FAR less likely to have compatibility issues. As a clear example most popular mods have their own crafting tree. Why? Because changing a vanilla recipe could easily break hundreds of players games due to a mod conflict that relies on that recipe. So to avoid it they make their own recipes from scratch. This means that two items with the same name from different mods CAN'T be used for their recipes because... they simply can't. The item Id's don't match what the recipe looks for and the mod creator can't make a patch for everything. However with recipes only looking for Qualities then the tools from any mod could be used with any other mod as long as they share the correct Quality.. Even vanilla tools could be used without fear of conflict due to the recipes ignoring any uneeded trait. So if I give a cooking pot a Chemical Synthesis Trait it won't suddenly be unable to be used to make a soup because the recipe only looks for the 'Soup Making' Quality. - As well once the math is in place the system will be easy to understand and use. Most of what needs to be done is defining the timescale and how each level of quality affects that equation. Then it is very similar to determining time in normal crafting with it's base time scale modified by tool qualities and skill. Lets say I want to make something that requires Screw-driving 3 but I only have a Screw-driving 1 tool. Now the recipe is 3 times more likely to fail and takes 3 times as long. But if I have something with Quality 5 it will be more likely to succeed and faster. (This example disregards skill to make it easier to understand/read) Now the developers have talked about item qualities- but it seems they are more talking about base materials (poor, Common, uncommon, rare, superior) rather than tools individual traits. I believe that this system would make both development and modding go forward easier and smoother- which would help with multiplayer server compatibility greatly. Edit: This may be able to apply both to medical and Cooking as well with Qualities such as: Food: Savory, Sweet, Hot, Cold, Spicy, Mellow, etc Medicine: Anesthetic, Pain Relief, Clotting, Calming, Depressive, Stimulant etc along with interactions when mixing certain qualities like certain calming medications could interact poorly with Anesthetic medications
-
Please add a hook to WeaponHit in IsoThumpable.java. Something like this: public void WeaponHit(IsoGameCharacter var1, HandWeapon var2) { IsoPlayer var3 = (IsoPlayer)Type.tryCastTo(var1, IsoPlayer.class); Thumpable var4 = this.getThumpableFor(var1); if (LuaHookManager.TriggerHook("WeaponHitObject", var1, var2, var4)) { if (GameClient.bClient) { if (var3 != null) { GameClient.instance.sendWeaponHit(var3, var2, this); } if (this.isDoor()) { this.setRenderEffect(RenderEffectType.Hit_Door, true); } } else { //Thumpable var4 = this.getThumpableFor(var1); if (var4 != null) { ... This will allow modders to determine if a specific thumpable can be attacked. Perhaps you want players to only be able to attack particular objects with particular weapons. Perhaps you want a specific skill requirement before a player can attack a particular thumpable.
-
Type = Normal,There are various types of items in Project Zomobid, below you will se each of them with a short description. Normal – A basic item. Drainable – An item that has a certain amount of uses before it's destroyed Food – An item that can be consumed by the character Weapon – An item that can serve as an equpable weapon. Container – An item that can store other items inside it. Clothing – Item worn by the player character. Literature – A readable item like a book or a newspaper. Weight = 1,The weight of an item as seen in-game, it should be a sum of weight + size of the item.Typically used in Item Type: All DisplayName = Example item,Defines the name of the item as displayed in gameTypically used in Item Type: All Icon = ItemIcon,Defines the icon the item will have in-game, the .png file of the icon should be in media/textures folder of the mod and the name must look like this Item_ItemIcon.pngTypically used in Item Type: All UseDelta = 0.1,Defines how many uses a Drainable item has, if it's 0.1 the item will have 10 uses before it's depleted.Typically used in Item Type: Drainable Capacity = 20,Defines the maximum carrying capacity of the container.Typically used with item Type: Container CanBeEquipped = Back,Defines the clothing slot the item is equipped in, typically only used for containers in the form above. BodyLocation = Bottoms,Defines what part of the body a Clothing item is worn on. Can be Bottoms, Shoes or Top Temperature = 8,Defines the temperature resistance a Clothing item gives to the player when worn. CanStoreWater = TRUE/FALSE,Defines if the item can be used to store water. Defaults to FALSE if not used.Typically used in Item Type: Drainable IsWaterSource = TRUE/FALSE,Defines whether or not the item is a source of water. Defaults to FALSE if not used.Typically used in Item Type: Drainable UseWhileEquipped = TRUE/FALSE,Defines if the items has to be equipped in Primary or Secondary slot in order to be used. Defaults to FALSE if not used. ReplaceOnDeplete = Module.ItemID,When the item is depleted (Has no uses left or if you've eaten\drank all of it) it will be replaced by Module.ItemID ReplaceOnUseOn = WaterSource-WaterBottleFull,If the item is used on something it will turn into something else, in the case above, if used on a Water Source (Item\Water Barrel\River) it will become WaterBottleFull IsCookable = TRUE,Defnises whether or not the item can be Cooked using Fire Pits, Stoves or BBQ. If the item is cookable and stores water, it can be used to boil it to remove the tainted water effect. Defaults to FALSE if not used. DangerousUncooked = TRUE,If TRUE, eating the food item without cooking will result in it having a semi-poisonous effect. HungerChange = -20,Defines how much hunger will be removed upon consumption, if the value is Positive, consuming the item will make the character more hungry. ThirstChange = -20,Defines how much thirst will be removed upon sonsumption, if the value is Positive, consuming the item will make the character more thirsty. StressChange = -20,Defines how much stress will be removed upon sonsumption, if the value is Positive, consuming the item will make the character more stressed. UnhappyChange = -20,Defines how much happiness will be removed upon sonsumption, if the value is Positive, consuming the item will make the character more unhappy. BoredomChange = -20,Defines how much boredom will be removed upon sonsumption, if the value is Positive, consuming the item will make the character more bored. FatigueChange = -20,Defines how much fatigue will be removed upon sonsumption, if the value is Positive, consuming the item will make the character more tired. EnduranceChange = 20,Defines how much endurance will be removed upon sonsumption, if the value is NEGATIVE, consuming the item will make the character more fatigued. Alcoholic = TRUE,If TRUE consuming the item will make the character drunk. If used for Bandage items, it will act as disinfectant. DaysFresh = 6,Defines the amount of days before a food item starts to rot. DaysTotallyRotten = 10,Defines the amount of days before the food item rots completely, becoming poisonous. MinutesToCook = 40,In-Game Minutes before the item is cooked, use with Cookable = TURE, MinutesToBurn = 110,In-Game Minutes of Cooking the item before it becomes Burned. Poison = TRUE,Defnines if the item is poisonous upon consumption. PoisonDetectionLevel = 1,Unknown, probably defines the difficulty of detecting poison if used in Evolved Recipe. PoisonPower = 5,Defines the power of poison, the higher the value, the more lethal it is upon consumpion. 5 Is PoisonIvy (White Berry) 45 is Bleach level. UseForPoison = 1,Unknown, possibly amount of PoisonPower goes into Evolved Recipes. FoodType = Fruits,Unknown, no known use as of Build 32 AlwaysWelcomeGift = true,Unknown, no known use as of Build 32 CustomContextMenu = Take,Will replace "Eat" text in the context menu for food items. EvolvedRecipe = Stew:3;Pie:3;Soup:3;Sandwich:3;Salad:3;Roasted Vegetables:3,Item can be used in Evolved Recipes, in the above case, it could be used in Stew, Pie, Soup, Sandwitch and so on... DisplayCategory = Ammo,Will be displayed as the item's category, can be anything but custom Categories need a Translation file. CanBandage = true,If TRUE the item can be used as a Bandage for wounds. BandagePower = 4,Defines how good a bandage is, higher values make the bandage last longer before it goes Dirty. ReduceInfectionPower = 50,If used, it will reduce infection (NOT Zombie Infection, it reduces regular wound infection, it might slow down zombie infection though, uncofirmed) Tooltip = Tooltip_UseOnHealthPanel,Will display tooltip if item is moused over in inventory, requires Translation file that defines the text to display. Known Preset Tooltips: Tooltip_Painkillers,Tooltip_PillsAntidepressant,Tooltip_PillsBetablocker,Tooltip_PillsSleeping,Tooltip_tissue_tooltip,Tooltip_IronSight,Tooltip_Scope,Tooltip_AmmoStrap,Tooltip_Sling,Tooltip_FiberglassStock,Tooltip_RecoilPad,Tooltip_Laser,Tooltip_RedDot,Tooltip_ChokeTubeFull,Tooltip_ChokeTubeImproved,Tooltip_Trap,Tooltip_Generator,Tooltip_UseOnHealthPanel,Tooltip_Vitamins, RequiresEquippedBothHands = TRUE,If TRUE the item HAS TO be equipped in Both Hands in order to even be carried. TeachedRecipes = Make Bread Dough,If Read the item will teach the character how to make Bread Dough, any Recipe name can be used.Typically used with Literature NumberOfPages = 260,Defines the number of pages a Skill Book has.Typically used with Literature Skill Books SkillTrained = Trapping,Defines what skill the Skill Book gives a multiplier to. LvlSkillTrained = 3,Minimum skill level required to read the skill book. NumLevelsTrained = 2,Amount of skill levels the multiplier will apply to beginning with LvlSkillTrainer. CanBeWrite = true,If TRUE the item can be used to write on if the character has a Pencil or Pen Weapon Type Only Below: MELEE/RANGED WEAPONS MinRange = 0.61, Defines the minimum range at which the weapon is effective, if the target is closer, he will be pushed away. Possibly 1 = 1 tile. MaxRange = 1.5,Defines the maximum range at which the weapon is effective. Possibly 1 = 1 tile. WeaponSprite = Fireaxe,Defines the weapon model used. MinAngle = 0.2,Unsure, defines the angle at which the weapon is effective. HitAngleMod = -30,Unsure, as above. SwingTime = 3.0,Defines the default time it will take for the swing animation to play out. MinimumSwingTime = 3.0,Defines the minimum time it will take to swing the melee weapon, affects the speed of animation and DPS. KnockBackOnNoDeath = TRUE,If TRUE the weapon will knock back the target if the strike was not lethal. SwingAmountBeforeImpact = 0.002,Defines the time from start of the swing before it makes an impact. Categories = Axe,Defines the weapon Category. Can be Blunt, Blade, Axe, Improvised, Unarmed SubCategory = Swinging,Defines the weapon Sub Category. Can be Swinging, Stab, Firearm ConditionMax = 15,Defines the maximum durability of the weapon. ConditionLowerChanceOneIn = 30,Defines the chance for weapon condition to lower when used. SplatNumber = 1,Unsure, Possible affects how many blood splats comes out after impact. SplatSize = 5,Unsure, possible affects how much blood comes out with each splat. SplatBloodOnNoDeath = TRUE,Defines whether or not blood comes out if the strike was not lethal. PushBackMod = 0.3,Modifies the strength with which the target is pushed back upon impact. MinDamage = 1,Defines the minimum damage. MaxDamage = 2.5,Defines the maximum damage. MaxHitCount = 2,Defines how many targets can be hit with a single attack. DoorDamage = 35,Defines the amount of damage done to doors. Doors have 100 HP by default. TreeDamage = 35,Defines the amount of damage done to trees. Trees have 100HP by default. IdleAnim = Idle_Weapon2,Defines the idle animation that plays when the character is holding the weapon. SwingAnim = Bat,Defines the swinging animation that plays when the weapon is used RunAnim = Run_Weapon2,Defines the animation that plays when the character runs with the weapon. CriticalChance = 20,Chance to inflict critical, lethal damage upon the target. WeaponWeight = 3,Higher values cause exertion faster. KnockdownMod = 2,Defines the knockdown modifier, higher values mean it will be easier to knock the target down. TwoHandWeapon = TRUE,If true the weapon will be most effective if equipped in both hands. CloseKillMove = Jaw_Stab,Defines the type of close kill move, used for knives and some other stabbing weapons only. CantAttackWithLowestEndurance = TRUE,If TRUE the weapon can't be used if the character is under Extreme Exertion moodle. EnduranceMod = 0.5,Modifies the amount of endurance used up when swinging the weapon. Higher values mean exertion comes on faster. Weapon Type Only Below: RANGED SPECIFICRanged weapons will use a lot of variables, if not all, used by melee weapons, below you will find variables specific for Ranged Weapons, they would probably all work with a melee weapon, you can experiment. AmmoType = BerettaClip,Defines the type of Ammo being used. To the best of my knowledge, reloading requires .lua code. ImpactSound = null,Defines the sound created after impact. SwingSound = 9mmShot,Defines the attack sound. SoundVolume = 75,Defines the volume of attack sound. ToHitModifier = 1.5,Unsure, possibly a modifier for a chance to hit the target. NPCSoundBoost = 1.5,Unknown. No use as of Build 32. Speculated boost to sound if used by NPC so more zombies hear it and come. Ranged = TRUE,Defines if the weapon is a ranged weapon. ProjectileCount = 1,Defines the amount of projectiles created by shooting the weapon. ShareDamage = FALSE,Unknown effect. IsAimedFirearm = TRUE,Defines if the weapon needs to be aimed. UseEndurance = FALSE,Defines if using the weapon uses up endurance. MultipleHitConditionAffected = FALSE,Unknown. SoundRadius = 150,Defines the sound radius, higher values cause more zombies to hear it from more far away. AimingPerkCritModifier = 10,Defines Aiming Skill Bonus to Critical Chance AimingPerkRangeModifier = 1.5,Defines Aiming Skill Bonus to Range. HitChance = 45,Default chance to hit the target. AimingPerkHitChanceModifier = 15,Defines Aiming Skill Bonus to Hit Chance. AimingPerkMinAngleModifier = 0.05,Defines Aiming Skill Bonus to Min Angle. RecoilDelay = 20,Unsure. Defines time that must pass between shots. SoundGain = 1.5,Unknown effect. ClipSize = 15,Maximum amount of ammo that can go into the weapon. Again, .lua code is required for the weapon to be re loadable. ReloadTime = 10,Defines the time needed for the weapon to be reloaded. AimingTime = 40,Defines Aiming Difficulty, lower values increase chance to hit with low aiming time. PiercingBullets = TRUE,If true, multiple objects can be hit by a single projectile if they are in the right angle. Weapon Type Only Below: THROWN SPECIFIC UseSelf = TRUE,If TRUE the item itself will be used up when attacking. PhysicsObject = Aerosolbomb,Defines the thrown item sprite. ExplosionPower = 70,Defines the power of the explosion created upon impact. ExplosionRange = 6,Defines the AoE of the explosion. FirePower = 97,Defines the amount of fire that will be created upon impact. FireRange = 6,Defines the AoE of fire. triggerExplosionTimer = 50,Defines the time before exlosion if placed. ExplosionSound = smallExplosion,Defines the sound of explosion. PlacedSprite = constructedobjects_01_32,Defines sprite used if the weapon is placed as a trap. I hope this helps anyone who wants to create their own items for PZ. Remember, this is just a list of variables, don't use all of them, it's not required. Take a look at items.txt and newitems.txt to see what variables are used by what items and base your items off that.
-
Would be great to have an option in the `mod.info` to prevent my mod of loading if an other mod ID is found to be enabled. This way we can have multiple mods into a single workshop project that offer different flavor without overwriting each other when people auto-enable them all. Example: disableIf=OtherModID name=FlavourRed id=FlavourRed disableIf=FlavourBlue disableIf=FalvourYellow
-
RoboMat's Modding Tutorials - An introduction to modding for Project Zomboid - I - Introduction I1 - Where to start I2 - What is needed I3 - Lua Tutorials I4 - Other Resources II - The first steps II1 - Getting the connection II2 - The entry point: Events III - The first mod III1 - Preparations III1a - Folders III1b - Our mod's identification card III1c - The actual lua script III2 - Adding items to the inventory III3 - Handling keys III4 - Detecting the correct key IV - Custom professions IV1 - Creating a custom profession IV1a - The foundation IV1b - Creating the profession IV1c - Creating a new trait IV1d - Custom Spawnpoints IV1e - Custom Profession Clothing IV1f - Putting it all together IV2 - Linking Professions / Traits to game mechanics I. Introduction Hello there, this is my attempt to write a few modding tutorials for the community. I will try to update this whenever I have some spare time. 1. Where to start First things first. When I started looking into the code of Project Zomboid and the different mods I was a bit confused. There was the source code in Java, the additional code in Lua and the scripting language and I didn't really know which one to look into. To spare you this confusion I'll explain their purpose shortly: Java: Most of the source code of Project Zomboid is written in Java. While you can modify the java files it is not recommended. According to the developers changing the java source code won’t be necessary in future versions of Project Zomboid, so we won’t look into that. Eggplanticus has made a nice post about how to spelunk in the Java source if you want to try it nonetheless. Lua: There already are parts of the source of PZ that have been ported to lua. If you really want to get into modding, you won't get around learning its syntax. Scripting: At the moment it is only used for easily adding items to the game. While we will cover some of the basics of the scripting language we will mostly work with lua coding. 2. What is needed Basically to edit a lua file you can use any standard text editor that is capable of saving simple (unformatted) text files. So Wordpad (Windows) or TextEdit (Mac OS) will do. While it is possible to create a script with those programs they miss many features a specific IDE will give you (syntax-highlighting, auto-formatting, etc...). I prefered working with Eclipse IDE with an extra lua plugin installed for quite some time, but recently switched to IntelliJIdea - haven't been looking back ever since. There are other free alternatives like gedit, Notepad++, ZeroBraneStudio or XCode for example. Find one that works for you and stick with it. Remember: It's not the program that does the work. None of them will turn you into a RobertJohnson over night, they only make your life easier. 3. Lua Tutorials If you have some experience with programming already Lua will probably be fairly easy to pick up for you. I mainly used the official manual to learn the language, but of course there are many other great tutorials out there. From time to time I check the lua wiki and of course stack overflow. Just to be as clear about this as possible: This won't be a tutorial about lua. It will be a tutorial about modding Project Zomboid. If you don't understand parts of my code, you probably should learn some basic lua syntax first. If there is one thing I don't like then it's people who don't even take the time to read through the tutorial notes, then copy&paste the code and finally spam the thread with questions about "why it doesn't work". Don't be that person (unless you are Rathlord). 4. Other Resources For more tutorials you should visit pz-mods.net and the tutorial section on the indiestone forums. If you have further questions you can post them in the modding help section of the the indiestone forums and one of the many coders will help you for sure. TOC Last updated: 12.11.2013 II. The first steps Okay now that we got that out of the way let's move on to the actual modding part. 1. Getting the connection To mod the game we somehow have to interact it. Lua's main purpose lies on extending existing programs written in other programming languages. As mentioned in the previous chapter the main base of Project Zomboid was written in Java. That's where the connection between lua and the java source code happens. With lua we can access all the public functions written in the Java source code. -- lua function function doStuffInLua(_player) -- getSpecificPlayer() is a public method defined in the java source code -- that returns the player. We can access it through lua. getSpecificPlayer(_player); end But how do we know which methods there are!? Well, we can look at the javadoc. It's basically a complete list of all methods in the Java source code and it has even been updated to 2.9.9.15 recently. If you want to be on the save side I suggest that you open the source code and look through it yourself. I use a small programm called JD-GUI for that purpose. It has a useful search function that can search through the whole source code. In the course of this tutorial I will mark methods we call from java so you don't have to worry too much about that at the moment. Eggplanticus also released a good tutorial on how to decompile the java source over here. 2. The entry point: Events So now we know that we can call Java methods from our lua code, but we still don't know how we actually execute our lua code. We need something that runs our code, when Project Zomboid runs. This will be done with Events. You can think of events as entry points to the source code of the Project Zomboid source code. Once Project Zomboid encounters an Event from a mod it calls the associated function. -- the function we want to execute function sayStuff() -- Java: we get the first player local player = getSpecificPlayer(0); -- Java: let the player speak player:Say("I like turtles."); end -- this event will be fired every ten ingame minutes. -- In this case sayStuff() is the associated method and -- thus will be executed every ten minutes. Events.EveryTenMinutes.Add(sayStuff); This short "mod" lets the player talk about his love for testudines every ten minutes in the game. Nothing great but it gets the point across. There are already many different events added to the game which we can use for our mods and the developers are constantly adding new ones. For a somewhat complete list check out the Event Reference on pz-mods.net. Don't worry though, we will use some of them throughout this tutorial so you will slowly get the hang of it. TOC Last updated: 01.10.2013 III. The first mod Let's continue with a little more complex example. We will create a small cheat script that adds some items to the player's inventory when a certain key is pressed. 1. Preparations At first we're going to set up a proper folder structure and all the files we'll need to get the mod to work with Project Zomboid. Please note that this tutorial has Version 2.9.9.17 and later in mind and thus is going to use the structure needed to work with the modloader. If everything is done right our mod will later on appear in the game like this: The almighty RobertJohnson has released a more in-depth tutorial about the modloader and mod.info functions. Once that version is released I'm going to update this post too! a.) Folders Please note, that the folder structure might slightly variate depending on what IDE you are using. I'm going to show you the end-structure which I use when I release my mods: I named the topmost folder (we are going to call this the base folder from now on) after our mod: CheatMod. This base folder is going to contain ALL of our mod files. The "media/lua" folder is basically the location of the vanilla lua files. When we drop our mod into the modloader it is going to copy the files in our base folder to their specified location in the PZ source files. This way our mods don't overwrite any base files and the mod can be removed from the game at any time without breaking it. Yay for the nifty modloader! b.) Our mod's identification card The modloader needs some way of identifying the mods given to it. This is done by the so called mod.info file. It is a simple (unformatted!) text file which contains some important information about our mod. It must be put into the base folder: To make it work we will have to fill it with information of course. Copy this to your mod.info file: name=Cheat Mod (1.0.0) poster=poster.png description=This mod is used to explain modding for Project Zomboid. It is going to show several aspects of modding from start to finish. -by RoboMat id=CheatMod name: The name of the mod. poster: The image file that is displayed in the mod menu in PZ. description: A short description of your mod. I am not sure how many characters this supports. id: The id of our mod. This is used to identify our mod. The id must have the same name as the base folder of our mod (in this case: CheatMod). If you drop you folders into your Project Zomboid "mods" folder now it would already display it as a mod in the game: Of course this isn't really a mod yet. We still need to give it some functionality c.) The actual lua script The last file we need to create is the lua script file. We are going to call it "AddItems.lua" and put it into "media/lua/Mods/CheatMod". Make sure that you really are using the correct suffix of ".lua". Now we are set and ready to begin working on our first mod! 2. Adding items to the inventory We are going to start with a simple script that allows us to add a few items to the player inventory as soon as a certain key is pressed. Adding items is a fairly easy task as you will see. Open your AddItems.lua and enter the following code. local function addItems() local player = getSpecificPlayer(0); -- Java: get player one local inv = player:getInventory(); -- Java: access player inv -- Java: add the actual items to the inventory inv:AddItem("Base.Axe"); inv:AddItem("Base.RippedSheets"); inv:AddItem("camping.TentPeg"); end As with the previous examples our starting point is the player. We need to "get" him first with getSpecificPlayer(0). We then can access his inventory with the getInventory() call. "getInventory()" returns an ItemContainer which happens to be the player's main inventory. This means we now can use all the java functions defined for the ItemContainer.class and one of them happens to be the nifty AddItem(...) function. If you look at the javadoc of this function you will notice that it expects a String as a parameter. What it doesn't tell you is, that it actually needs the module of the item you want to add and the name of the item itself. You can read our example above as "add item Axe from module Base". The code above would give the player an axe, some bandages and a tent peg from the camping module. How do you find out the modules and names of the items? Of course by looking through the source files. All items are currently located in "/media/scripts/items.txt", "/media/scripts/newitems.txt", "/media/scripts/camping.txt" and "/media/scripts/farming.txt". Just take a look at these files - the rest should be self explanatory. 3. Handling keys As we haven't defined an event yet, the function is pretty useless right now. We want the items to be added whenever the player presses a key and luckily the devs have given us the great OnKeyPressed event for that purpose. Let's add it to our mod: local function addItems() local player = getSpecificPlayer(0); -- Java: get player one local inv = player:getInventory(); -- Java: access player inv -- Java: add the actual items to the inventory inv:AddItem("Base.Axe"); inv:AddItem("Base.RippedSheets"); inv:AddItem("camping.TentPeg"); end -- Will be fired whenever we press a key. Events.OnKeyPressed.Add(addItems); This event will be called whenever a key is pressed in the game. The only problem is, that the event doesn't care which key that is. If we would leave our mod like this, the player would get spammed with countless items. We need to fix that! 4. Detecting the correct key One of the great things about events is, that some of them pass useful parameters to the function which is called through the event. The OnKeyPressed event for example passes the number of the pressed key to the function. The called function in this case is of course "addItems()". To use the parameter we have to slightly modify our code another time: -- We added the parameter to the function which -- will be passed to the function as soon as the -- event fires. local function addItems(_keyPressed) local key = _keyPressed; -- Store the parameter in a local variable. print(key); -- Prints the pressed key to the console. -- We test if the correct key is pressed. if key == 25 then local player = getSpecificPlayer(0); -- Java: get player one local inv = player:getInventory(); -- Java: access player inv -- Java: add the actual items to the inventory inv:AddItem("Base.Axe"); inv:AddItem("Base.RippedSheets"); inv:AddItem("camping.TentPeg"); end end -- This will be fired whenever a key is pressed. Events.OnKeyPressed.Add(addItems); Notice the _keyPressed parameter that was added to our function. You might wonder about the leading undaerscore. It is just a thing of coding style that I like to do, to be able to distinguish parameters from local variables in the function's body. The same goes for storing the parameter in the local variable "key". It might seem superfluous at first, but if you want to change the content of this variable later on, you can easily do that by changing its declaration at the top of the functions instead of having to track down every single occurence. Anyway, they _keyPressed parameter will receive a number corresponding to the pressed key and pass it into our function. Unfortunately I'm not to sure which numbering method is used in Project Zomboid, but I think it might be the one from LWJGL. You can use the print(key) call in the function to easily find out all numbers you need to know anyway. Basically we just have finished our first real mod. Save the AddItems.lua and copy your base folder into the Project Zomboid-mods folder. Now you can go into the game and enable your mod (restart the game afterwards!). Once you are in the game now, you should be able to cheat items into your character's inventory by pressing the 'P' key on your keyboard. TOC Last updated: 12.11.2013 IV. Custom professions Admittedly our first mod isn't very impressive so we are going to expand it a bit. The biggest problem at the moment is, that the player can cheat weapons into his or her inventory every playthrough, which might ruin legit savegames. 1. Creating a custom profession That's why we are going to create a custom "Cheater" Profession and link the cheat code to it. a.) The foundation Of course we need to create a new lua script. I'm gonna call it "CheaterProfession.lua" and save it in its own folder (Note: Basically it doesn't matter where you save your lua files, but good structuring will make it easier for you and others to organize and understand your project). After creating the file open it and add the following lines: -- CheaterProfession.luarequire'NPCs/MainCreationMethods';require'NPCs/ProfessionClothing'; This basically makes sure that the file is loaded after those two files which enables us to use their functions. (If someone has a more technical explanation feel free to PM me or comment below!). b.) Creating the profession Now we can start with actually creating the new profession. Add these lines to your CheaterProfession.lua -- CheaterProfession.lua require'NPCs/MainCreationMethods'; require'NPCs/ProfessionClothing'; local function initProfessions() -- Java: Create a new profession. local cheater = ProfessionFactory.addProfession("cheater", "Cheater", "Prof_rm_Cheater"); -- Java: Add a custom trait called Undesireable (no one likes cheaters ). cheater:addFreeTrait("rm_undesireable"); -- Java: Add the vanilla trait Nightowl. cheater:addFreeTrait("NightOwl"); end Lets go through the code. The part of it which actually creates / registers the new profession is: local cheater = ProfessionFactory.addProfession("cheater", "Cheater", "Prof_rm_Cheater"); It calls the addProfession(String type, String name, String IconPath) function of the ProfessionFactory. The parameters are used like this: type: Used to identify the profession internally in the game's code. name: Human readable name which appears in the game's menus etc. iconPath: Name of the custom icon to be displayed in the game. If we would leave the code here it would create a fine new profession without any traits though. That's where the remaining two lines come into play: cheater:addFreeTrait("rm_undesireable"); This adds a (you probably guessed it) trait to the profession we just created. "rm_Undesireable" is the trait we are going to create in a few seconds whereas "NightOwl" is one of the vanilla traits. Of course PZ doesn't know "rm_undesireable" yet, so we still have to actually create it. Lets do it. c.) Creating a new trait We add a new function above the one we created above to initialise the traits. local function initTraits() TraitFactory.addTrait("rm_undesireable", "Undesireable", 0, "Allows you to cheat.\nShame on you!", true); end Quite similar to the ProfessionFactory we used above, the TraitFactory class allows us to add a new trait by calling addTrait(String type, String name, int cost, String desc, boolean profession). Let me explain those parameters: type: This is the internal name used in the games code. It's also the name of the custom icon to be displayed in the game. ! Has to be lower case ! name: The human readable name displayed in menus etc. cost: Determines how many trait points it will cost to select this trait. desc: The description which appears when you hover over the trait. profession: If set to true the trait won't appear as a selectable trait but instead stays a "profession-only" trait. It really is as easy as that Now you actually already have a fully functional profession which you could play with. But it still is lacking two important parts of the profession system: Spawn points and custom clothing colours. d.) Custom Spawnpoints Spawnpoints determine where in the Gameworld the player will appear when the game starts. Before we can add a new spawnpoint though we of course need to find out its coordinates in the game. For this purpose I have created the "Coordinate Viewer", which displays the player's coordinates as a small overlay in the game. So if our cheater profession should start in the large warehouse (where else!?) the game will show us a player position of X: 3110 and Y: 1809. Unfortunately we can't use those "absolute" coordinates for the spawning code. We have to calculate the "relative" coordinates instead. Don't worry though - it is pretty easy. Basically you just need to divide the absolute coordinates by 300 to get the cells, but more importantly you have to ignore the remainder. Our coordinates for the big warehouse would be X: 10 and Y: 6 then. Now we have the cell in which the player should spawn. Relative to that position we need the exact coordinates and this is where the remainder comes into play. Still using the above coordinates the remainders of the division would be for X: 110 and for Y: 9. This probably sounds more complicated than it is. I suggest that you read through this post by The_Real_AI who maybe explains it a bit better. Now that we have calculated the coordinates, we need to tell the game to use them. -- Set custom spawn points for this profession. -- Modelled after spawn code by RegularX. Thanks to -- The_Real_Ai for his explanation on how to calculate -- them. local function initSpawnPoints() local spawn; -- Create a Spawnpoint in the large Warehouse. spawn = { { worldX = 10, worldY = 6, posX = 110, posY = 8, }, } -- Add our profession to the list of spawnpoints for Muldraugh. BaseGameCharacterDetails.spawnPoint.MuldraughKY.cheater = spawn; spawn = { { worldX = 39, worldY = 23, posX = 138, posY = 100, }, } -- Add our profession to the list of spawnpoints for West Point. BaseGameCharacterDetails.spawnPoint.WestPointKY.cheater = spawn; end Basically we have created a local table which holds our calculated coordinates and added it to the global table BaseGameCharacterDetails.spawnPoint. Take a look at the last line of the function: BaseGameCharacterDetails.spawnPoint.WestPointKY.cheater = spawn; We create a new index cheater and give it the value of our spawnpoint. It is essential that this index uses the type (check the parameters above) of your profession or else it won't work. It is probably self evident but MuldraughKY holds all spawns for Muldraugh, whereas WestPointKY creates spawns in West Point. e.) Custom Profession Clothing Finally we are going to add some custom colors for the profession clothing. The System is quite similar to the spawn points above: Basically we are going to create a table which holds all values for male and female "cheaters". ----- Set custom clothing and clothing colors for this -- profession. local function initClothing() local clothes = {} ProfessionClothing.rm_Burglar = clothes; end We create a table called clothes which will hold all of the necessary values. Then we have to make two nested tables to separate the "male" and "female" clothes (this means the guy can have blue and the lady pink colors for example - yay ). local function initClothing() local clothes = { male = { }, female = { }, } end Now we will add all the values need to create the clothes. First we declare which type of clothing item the character should wear. The male character is going to wear a Shirt and Trousers and the female character gets a Blouse and Skirt. ----- Set custom clothing and clothing colors for this -- profession. local function initClothing() local clothes = { male = { topPal = "Shirt_White", top = "Shirt", bottomPal = "Trousers_White", bottom = "Trousers", }, }, female = { topPal = "Blouse_White", top = "Blouse", bottomPal = "Skirt_White", bottom = "Skirt", }, } end You probably are wondering why there are two variables (top and topPal) for each item for example. As far as I understand the system the "pal" stuff just sets the color palette for the specific item. Why we have to do that ... I don't know It is something we gotta have to ask the devs. Last but not least we are going to give some colours to those clothes. Those values will be stored in two seperat tables called topCol and bottomCol. As you probably figured the first determines the colours of the top the character wears, whereas the latter determines the clothes for pants, skirts, etc. PZ uses the three values Red, Green and Blue (RGB) to calculate the final colour. Those values have a floating point range from 0 to 1 which was a bit strange for me at first considering that most programs and games I've used use values from 0 to 255 I will leave it to you to figure out which values return which colour. In my example here all clothes will be black: ----- Set custom clothing and clothing colors for this -- profession. local function initClothing() local clothes = { male = { topPal = "Shirt_White", top = "Shirt", bottomPal = "Trousers_White", bottom = "Trousers", topCol = { r = 0.1, g = 0.1, b = 0.1, }, bottomCol = { r = 0.1, g = 0.1, b = 0.1, }, }, female = { topPal = "Shirt_White", top = "Shirt", bottomPal = "Trousers_White", bottom = "Trousers", topCol = { r = 0.1, g = 0.1, b = 0.1, }, bottomCol = { r = 0.1, g = 0.1, b = 0.1, }, }, } ProfessionClothing.cheater = clothes end Just like the spawnpoints we add the table of our cheater profession to the global table called ProfessionClothing with the last line of the function. f.) Putting it all together We still need to tell PZ to call our functions once the game boots so that our custom values are initialised. We wlll use our beloved Events for that. Add these lines to the end of your CheaterProfession.lua file: Events.OnGameBoot.Add(initTraits); Events.OnGameBoot.Add(initProfessions); Events.OnGameBoot.Add(initSpawnPoints); Events.OnGameBoot.Add(initClothing); We are done here. Congratulations you have created your first custom Profession The complete file should look like this: TOC Last updated: 12.11.2013 2. Linking Professions / Traits to game mechanics What we want to do now is link a special game mechanic to the trait of the profession we just created. Of course this isn't a must, but it doesn't make much sense to implement a trait that doesn't have any effect in the game, does it? You will see that it is actually pretty easy. Let's get to it. Coming soon™... TOC Last updated: 08.11.2013
- 80 replies
-
- 17
-

-
 So, this one is a bit tough to explain, please bear with me. I discovered this issue (painfully) while I was working on one of my mods. I wanted to add a new item, so I simply created the file media/scripts/items.txt in my mod folder and added the following content: module Base { item GrassCuttings { DisplayCategory = Material, Weight = 0.1, Type = Normal, DisplayName = Grass Cuttings, Icon = GrassCuttings, WorldStaticModel = GrassCuttings, } } At that point, I had not created the Icon and the WorldStaticModel yet. In the meantime, I discovered my mod name was invalid in mod.info, due to a mistake in my previous release. So I switched to fixing that issue first, because it seemed important enough (the mod was still working, but it was hard to find in mod list due to the invalid name). I updated my mod.info, published a new release to Steam workshop, and went back to working on my new item. That's where the pain started... Unfortunately I wasn't careful enough and my new release included the new items.txt file mentioned before. In the next few hours, I received a multitude of messages on my workshop page about my mod being responsible for breaking saved games, for both single and multiplayer. In particular, my subscribers where complaining about the following issues: - The mod triggers errors when starting a new game - The mod breaks vanilla items (objects disappearing, not available, or not working when interacted with) - The mod breaks vanilla recipes (not possible to use some recipes) - The mod breaks ripping cloth (trigger a red square error when right-clicking any cloth item that prevents users from interacting with cloth) So of course at first I was a bit skeptical because I couldn't imagine how my mod could be responsible for all these problems, especially since it doesn't do anything related to items or recipes or ripping cloth. But then I couldn't deny the facts when I discovered in horror it was all true after I tried it myself. When I realized the issue was related to this new items.txt file, I simply deleted it from my repository and published a new release, fixing the problem for my subscribers. I can't deny I have my fair share of responsibility for this whole issue. I'm aware I've been sloppy and that I really f*cked up at multiple stages. But I also strongly believe a game (or any software in general) shouldn't fail in such dramatic ways for a simple mistake like the one I made, which is to unwillingly ship a mod with an incomplete item. The consequences are way too heavy to wear on my single shoulders alone. The game engine should have failsafes to prevent this kind of issues and just ignore the bogus items when it can't find the corresponding Icon or WorldStaticModel (and of course show an error message in console.txt for easier troubleshooting). Anything that comes from a mod should be checked before use and ignored in case it's not valid, with a proper message sent to console.txt I've included the following files: - broken-items.txt (errors about broken items) - broken-recipes.txt (errors about broken recipes) - errors-on-start-new-game.txt (errors on starting a new game) - error-when-right-clicking-a-cloth-item.txt (error on right-clicking a cloth item) Please don't let sloppy modders like me break your beautiful game! Implement more failsafes to prevent this kind of issues in the future! I'm available if you need more info, or anything really. Just reach out to me on your discord. broken-items.txt broken-recipes.txt errors-on-start-new-game.txt error-when-right-clicking-a-cloth-item.txt
 -
When an IsoWindow is oriented either East or South, the property Facing of the window indicates a wrong value, respectively West and North. For example, given an IsoWindow that is oriented East, the following code would print W in the console instead of E: print(isoWindow:getProperties():Val("Facing")) When the IsoWindow objects are oriented either North or West, then we get the proper values, respectively N and W Here's the code I'm using to print the values in the console: function onFillWorldObjectContextMenu(player, context, worldobjects, test) for _, object in ipairs(worldobjects) do if instanceof(object, 'IsoWindow') then local orientation = object:getProperties():Val('Facing') print('DEBUG: Window facing ' .. orientation) end end end Events.OnFillWorldObjectContextMenu.Add(onFillWorldObjectContextMenu) Note: I had to crop the screenshots to fit the 4MB upload limit, but I can provide the full version if needed, just ask.
-
Hello! I want to create mod that will add new skin colors in "Create character" tab, but can't find what method from SurvivorDesc class I should use. It is quite understandable with adding new hair or trouser colors: BaseGameCharacterDetails.DoHairColorNew = function() SurvivorDesc.addHairColor(ColorInfo.new(0.60000000000000000,0.33000000000000000,0.66000000000000000, 1)) SurvivorDesc.addTrouserColor(ColorInfo.new(0.60000000000000000,0.33000000000000000,0.66000000000000000, 1)) end Events.OnGameBoot.Add(BaseGameCharacterDetails.DoHairColorNew); But how can I add my own skin body colors? Please, help. Thank you in advance!
-
WordZed Version 1 - download You can add custom radio data to the game via a mod. The radio data including final translation files should go into "media/radio/" within the mod directory. Optionally this simple mod package can be used to get started quickly: RadioTestMod Note: The current version may contain some bugs, which can be posted here when encountered. Some additional info bits: The following spoiler contains a list of channels from the games radio data, if you intend to use wordzed for custom contentavoid these channels unless you intentionally want to override a certain existing channels. The following tutorial video has some information on the operating basics: Manual: Manual.docx
- 37 replies
-
- 13
-
-
Im making a mod , and when i try to load it into the game it crashes on reloading the lua , this is my first time making a mod and i cant figure what im doing wrong , i attached the mod zip so anyone can check and see what im doing wrong. Armored_contact.zip
-
Hello everyone, So My wife bought me Project Zomboid a week ago and since I've been playing. Well Today I decided to try to mod in a feature which seams to be missing. What I want to do is be able to put dirty rags and bandages In a washer and dryer so you can wash them like you do dirty clothes. What I'm asking i guess is what files would be the ones to look out
-
 Automatically Click to start option in the settings I don't think I need to say more to describe this addition, this is more of a quality of life addition. Better for recurring players and especially modders when they would like to check if their mod is functional. The implementation would be simple. Settings screen Accessibility tab: Automatically click to start Checkbox = true/false When game is loaded: Automatically send click (or just start, however the game is coded after the loading screen of THIS IS HOW YOU DIED)
-
Greetings! I'm trying to use for modding a cooking recipe similar to the "Disinfect Bandage" like the way of using an item while is hot to craft another, but I can't find the script or code related in the media file to the whole heat system. Is it controled by some Lua code or some item script? I think that the logical way that the heat value works is only because of the WaterSource items like FullKettle or WatterPot. I mean I´ve tried something like a stone for frying an egg for example: recipe Fry egg On Stone { Stone, Egg/WildEgg, Salt;1, Result:FriedEgg, Time:50.0, Heat:-0.22, Category:Cooking, } The recipe won't happen because there is no base item to be heated, also how does the scale of the heat value works, it's just setting Heat:-0.22? . Thanks!
-
Hello survivors ! Since the last big update, the weather update, i was thinking about creating a mod that plays with the actual weather update. What i want to do, is create a mod that make the weather way more dangerous. There is a challenge that makes the weather in winter mode in July, which is a great idea. In 2018, with the climate change, weather is becoming way more extreme and this is exactly what i want to do. The thing is, im trying to read script and files about other mods but the weather files are kinda different. I want to locate how exactly the events in weather (suck as rains, snow, wind and temperature) act. So thats why i need a little help. Maybe pointing me a exact line in one of the file so i can learn and ask question as i go through my mod !? Thanks in advance !