Search the Community
Showing results for tags 'tiles'.
-
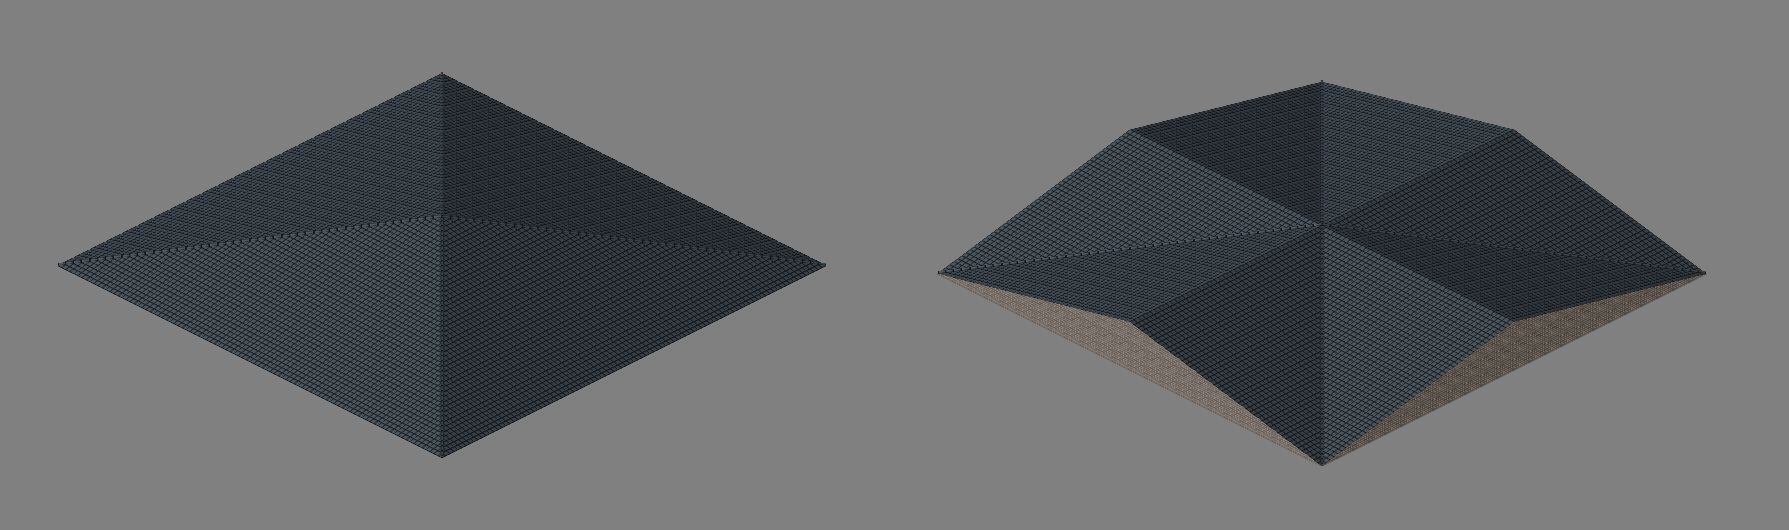
I've extended the Roofs_01-05 and walls exterior_roofs01-09 to fill out the lower roofs including those that didn't have any. The new files have "_extension" added to the end so you'll have to update Tilesets.txt to see them in the editor. Ive include a txt with the code snippets in the file below. (question for devs, some of the tiles displays a lot of white tiles at the bottom? and I don't know how to fix it.) Download

-
 Is there a resource I can check out that shows how to restrict or filter specific items that can go into a container? For example - if I made a custom toolchest and wanted it so only "tools" could go inside of it.
 -
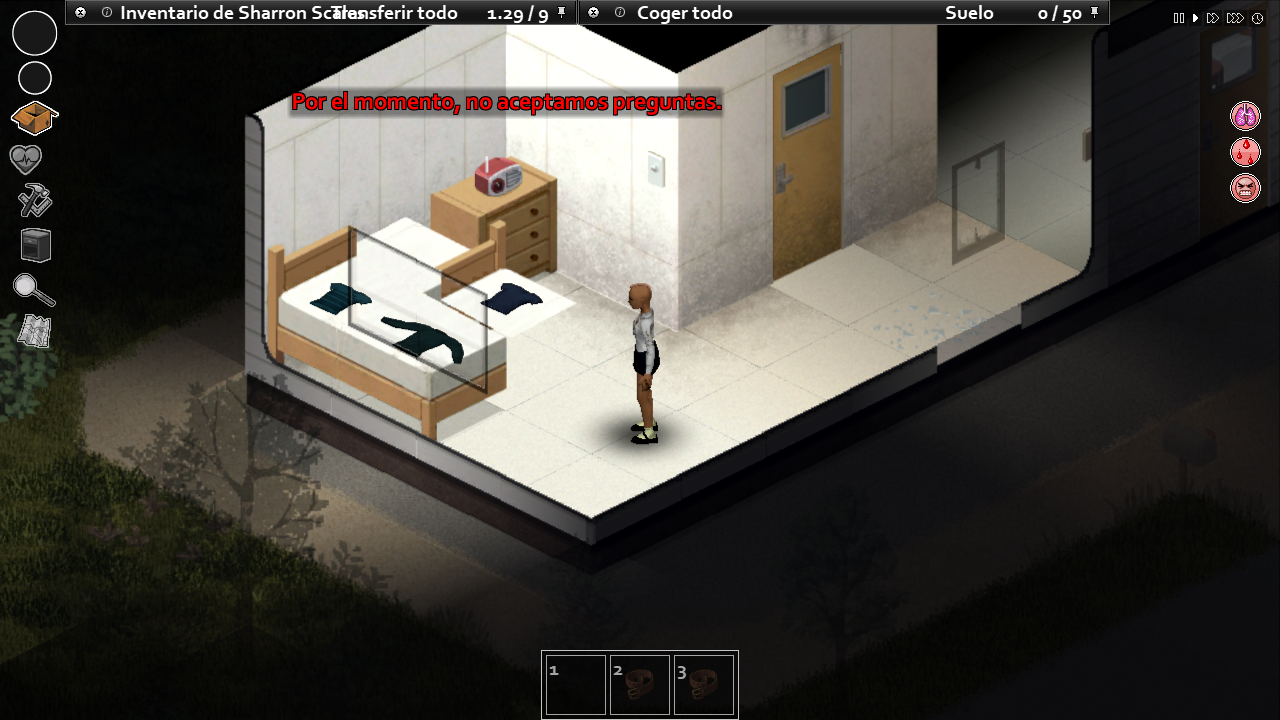
Hello! Im the maker of the map mod "Tandil", im having a problem with beds and rugs having some of their tiles misplaced when in game. I added 3 screenshots of how i see the beds in tiled, worlded and in game. I updated the tileset to the latest version (https://www.dropbox.com/s/rv176fybui76fym/Tiles-Feb-07-2022.zip?dl=0). Im not sure if i have to edit the tiledefinitions of the beds or what to do... Any help would be appreciated. Thank you! SOLUTION: thanks to RingoD123 The fix is to have: fixed2x=true as the last line in your map.info file.
-
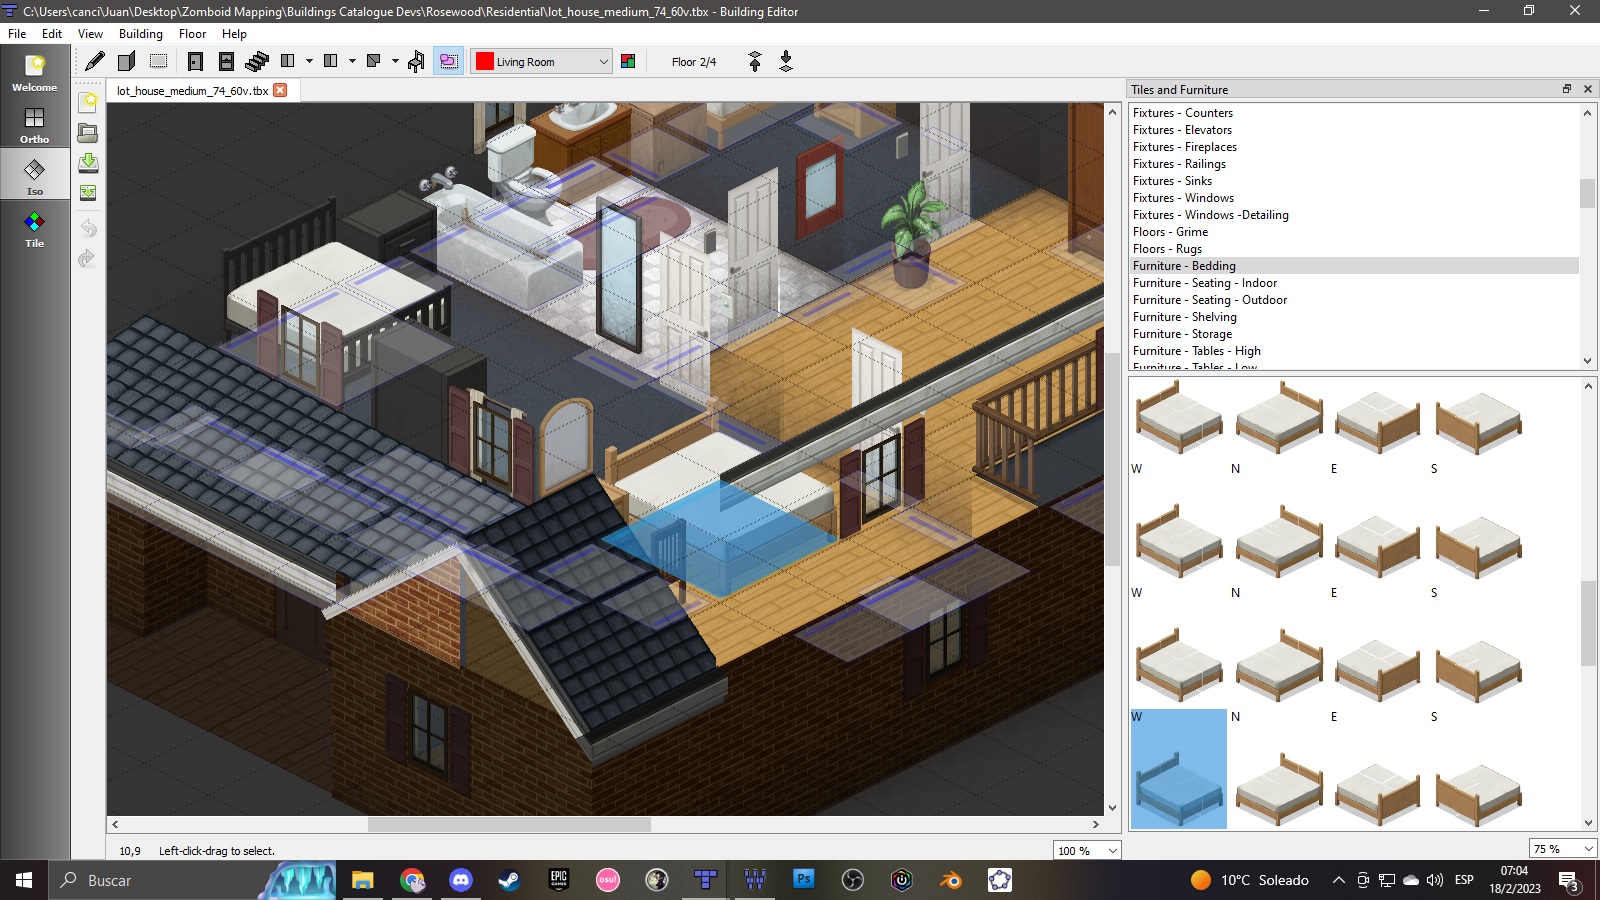
If your BuildingEd screen often looks like this, and you don't know why - make sure you select the correct layers often. The layer you've got selected (and checked or unchecked) will impact the way your tiles render as you create your building.
-
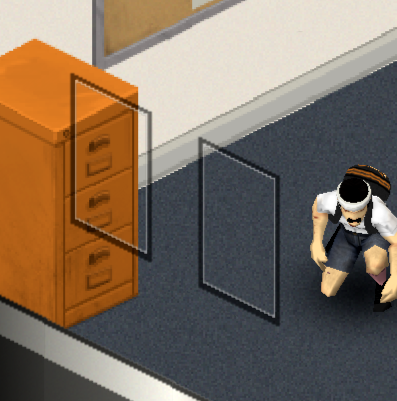
Hello, I am a long time Zomboid player and a couple days ago I started learning the mapping tools, at first things went smoothly, the image to vegetation map on WorldEd is intuitive and smart, the BuildingEd is powerful and I was having a good time. But since yesterday it has been a slow descent into madness as I tried to make more complex stuff. I thought to myself "hey wouldn't it be nice if I put a big radio tower there" or "hey let's put some military stuff over there for narrative purposes" and I was deeply disturbed by the fact that a lot of furniture is unavailable in the Iso mode of the BuildingEd. So I checked more tutorials, dug into the editor and the tilesets stuff. Apparently a lot of furniture is straight up not available as furniture but only as a bunch of tiles and I have to manually assign and assemble them as furniture in the furniture window. Needless to say that this is incredibly tedious. But even worse is the fact that some stuff like radio towers is straight up not doable in this window since some parts are meant to be on the same tile but different layers which is not possible there. So I thought "maybe I am meant to draw it manually in Tile mode, make it a tbx and place it in WorldEd instead of as furniture" which would be fine if I wasn't faced with this issue: I tried everything, drawing on different layers, different floors, make part of it furniture and part of it tiles but I CANT GET THIS DAMN RED BEAM UNDERNATH THE WHITE ONE, and it's driving me crazy, it's like it's automatically drawn on top or underneath other tiles depending on it's position on the x/y axis regardless of the layers. Aside from that, am I the only one finding it weird that a lot of stuff is not available as furniture? Like I can understand that a huge radio tower that can be assembled in different ways isn't available as just "furniture" but what about the military crates, industrial vats, tent walls etc? Also, if anyone has a BuildingFurniture.txt or something to give me those missing furniture I'd be forever grateful.
-
It would be cool to see a water tile that blends with the normal ones, but are shallow enough to walk across, so could have animated water over rocks or some such. Cool way to add small streams and things without fully blocking overland travel. Bridges would have to be built otherwise, or have ugly breaks between water and land tiles. It could also be a unique foraging zone, yielding more stones. Who doesn't like rock? 'twas the 90's, after all.
-
I've been having difficulties with getting custom double window tiles to work Similar tiles can be found in the Sun Star Hotel and Trailer that show as a double window from the inside. Ive matched all the tile definition properties, but no matter what combination I do it still renders as a single window from within. I've asked others and they feel it might be hardcoded to those specific windows Any insight into this?? How could I go about checking render options?? Top: Outside view Bottom: Inside view
-
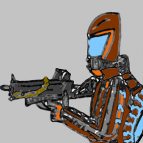
Blender template for creating custom Project Zomboid Tiles Hello. Recently been experimenting with creating custom tiles for Project Zomboid, and tried to create some model for it in the Blender software. So ive decided to prepare and share some instructions/template for people who would want to create their models/furniture in blender - but they are still a bit confused how to start with it, to fit with the default PZ dimensions. Heres project file for Blender (currently 2.92.0 version), which contains a basic workspace for creating Project Zomboid tilesets in 3D environment. Download: https://drive.google.com/drive/folders/1B_wVyOKwibm3PxI6-ZQsP_hgV0U3OQGi?usp=sharing Camera angle is set up to fit properly the isometric view of tiles used in PZ (you can see camera view by pressing Numpad0 key). Also theres included additional ‘helper grid’ (just an image reference) to keep track of proper size for the model (this grid is only visible in the camera view). Ive included also an example of bookshelves modeled by me - with base texture, normal map and specular map - also with two lights to create shadows and give an additional effect of accent to the final render. These maps are optional, but they helps in adding more depth to your model. You can also change or remove (or add more) the lights, but its generally good to have at least one light in scene. Important note - to fit into general style of tiles ingame, remember to set up lighting affecting your models in a similar style as it is visible on original tiles. To help you with understanding the lighting style of tiles in PZ, ive prepared some quick helper images below: In blender project, ive also enabled Ambient Oclussion option in the scene properties, as well with Bloom effect for making the render looks more soft and smooth for the eye. These options can be adjusted and disabled as well. The process of creating a model can be a bit complicated and overwhelming at beginning, so before using this template - make sure to look up the basics of modeling, creating uv map and texturing in blender. Personally i would recommend learning from the “Blender Guru” channel (made by Andrew Price). He’s got very good tutorials especially for beginners, with a calm pace of narration through it, while explaining each step in details. General steps for creating your model are as below: 1) Start modeling the shape of your object/furniture. There are many different methods how to do it, and its good to look up for tutorials and find the method best fitting for yourself. Example: Here 2) When you will have a finished model, you need to unwrap your mesh to UV Map. By default it is made by selecting all faces of your mesh in edit mode (with A key, or manually) - and then pressing U key, and choosing one of the options to unwrap it into UV map. Theres few ways to do that as well - if your model isnt very complicated and detailed, i think simple and practical way is just to use Smart UV Project option, and then setting some small value for the Island Margin (so you can edit easily each face of the mesh in UV map later). Heres another video which may explain you more about unwraping the mesh (and also marking seams, which allows you to manually project your mesh in parts): Link 3) Once you have your model and UV map prepared, you need to find or create some textures. Please keep in mind that not everyone is okay with using their textures by someone else - but you should be able to find some nice, free textures for non-commercial projects (or commercial if its needed). Texture ive used in the template, i found on this site: https://freestocktextures.com/texture/ The authors of these photos give you license to use the textures for free in both commercial and non-commercial way - also with possibility to modify the texture as you would want to (which i did, making the texture a lot darker). 4) With prepared texture, you need to create new material for you model, and apply the texture to it. You can do it by going to the node view (in Shading tab), and adding Image Texture Node, choosing your texture in it, and finally linking it to the Output Node. Once you have your texture linked, you can go to the UV Editing tab on the top, where you will be able to see two viewports - uv mesh editor on the left, and 3d view on the right. Hover your mouse cursor on the view on right side, make sure to change mode to Edit mode, and then press Z key, and choose Rendered view, to see your render (with applied texture) in the real time (thanks to new Eevee render engine in blender). Now you can select different faces of your mesh in this viewport, and with each select you will see in the left viewport a highlighted face projected from our mesh. Use this UV Editor to adjust your uv map (change shape or scale), to make sure texture appears properly on your model. 5) All necessary steps are completed. You can also add the normal map and specular map to give your model more depth. This can be done as well with the nodes in the Shading tab. You can look up the basic example in the template, in the same node view. Making normal maps and specular maps can be done in a few ways as well. But for this tutorial - you can find online free tools which would help you generate those maps, based on the base texture. Theres also a way to generate normal maps in Krita (as well like in Gimp or Photoshop), by using proper filter. 6) Remember to add some light to your scene, its nice to have at least a subtle one. You can also change the overall world lighting in the World properties/Surface. How to use a template Simply open the project in blender, and start by hiding the bookshelves model (make it visible when you will need a reference, you can remove it later). Do it, by hiding not just model, but the individual collections (which are like layers in the graphics software) - like ive prepared in the project, as seen below: Notice also that theres four different collections of bookshelves models - two for the different sides in front view, and two for the different sides in back view. Also each of them is placed in the slightly different position - it is intentional to make the same light effect on them, but with light covering them accordingly from proper side (and fitting to the original PZ lighting style), in the final render (so you need to render and save them separately - just check current collection, and uncheck the rest). The lighting setup ive prepared in the project isnt perfect and ideal, but should work properly with your models, and for the most important - it should fit the original style. Dont be afraid to experiment with setting different lighting - and changing its shape, power, or even colors. Theres helper grid of original isometric tiles from project zomboid, which appears only in the Ortographic view in the camera (access camera view by Numpad0 key). You can use it when you are done with final model, to align the model/furniture as it would appear in the TileZed editor - to make sure, for example, if it fits on the one or more isometric tiles. The angles for the camera in blender, to work with the isometric view of PZ, are set up as below: Orthographic Scale is set to 10. To fit the original tiles size it should be on 20, but we are using 10, because (in my opinion) as you will see later - it will help us create better, clean effect (instead of blurry) in the final render and exporting to tileset. When you are happy with look of your model, render it and save as image (separately for all front and back sides). Also useful tip: To prepare back view of your model - simply duplicate your model, select it, and then just press S (scale) key, and then X (x axis), and finally write -1 and press Enter key to accept. This will rotate the object in the opposite direction, exposing its back properly to the camera view (remember to place it in the proper position, having in mind the style of covering lighting). Also one more useful tip: To change a model to appear in different sides (front or back), in the eyes of your camera, as in the template project - you can select your model, duplicate it, and then press R (rotate) key, then press Z key (z axis), write number 90, then press minus (“-”) key (to make value as negative 90), and finally press enter to accept it. This will rotate your model accordingly in 90°. You can repeat the same process, but without using minus, to rotate model in opposite direction. Now we will add our rendered images to the tileset. To do that, find the image of one of the tilesets for Project Zomboid, which are available here: For this tutorial we will use “furniture_shelving_01” tileset image. Open it in your favorite graphics editor/software (in my case Krita). Then in the next tab open one of the rendered images. Change the scale of the whole image of your rendered model (should be in 1920x1080 resolution), by dividing original value by 2 - and choosing Scaling method as: Nearest Neighbour (or as Closest, or Pixel Perfect, in different software). Now you should have your image in 960x540 resolution. Select and copy your rescaled image, and go back to the “furniture_shelving_01” tileset, and paste your image there on new layer. After this, try to line up layer of your new tile on top of the original one (in this case bookshelves), having the original one below your new one , and then select and delete the original tile from the first layer, leaving only your tile in the place. This way you should achieve effect as below: As you can see, we got our new tile in a crispy (as Popeyes Chicken) look, instead of anti-aliased or too blurry - if we would set our previous value already as 20 in render settings in blender. This way the new tile got more pixel-like look, and (at least in my personal view) more fitting to the original PZ style. Thats all for this tutorial. Thank you for reading this - hope it could help someone. Good luck and have fun with creating your own tiles - nheve
-
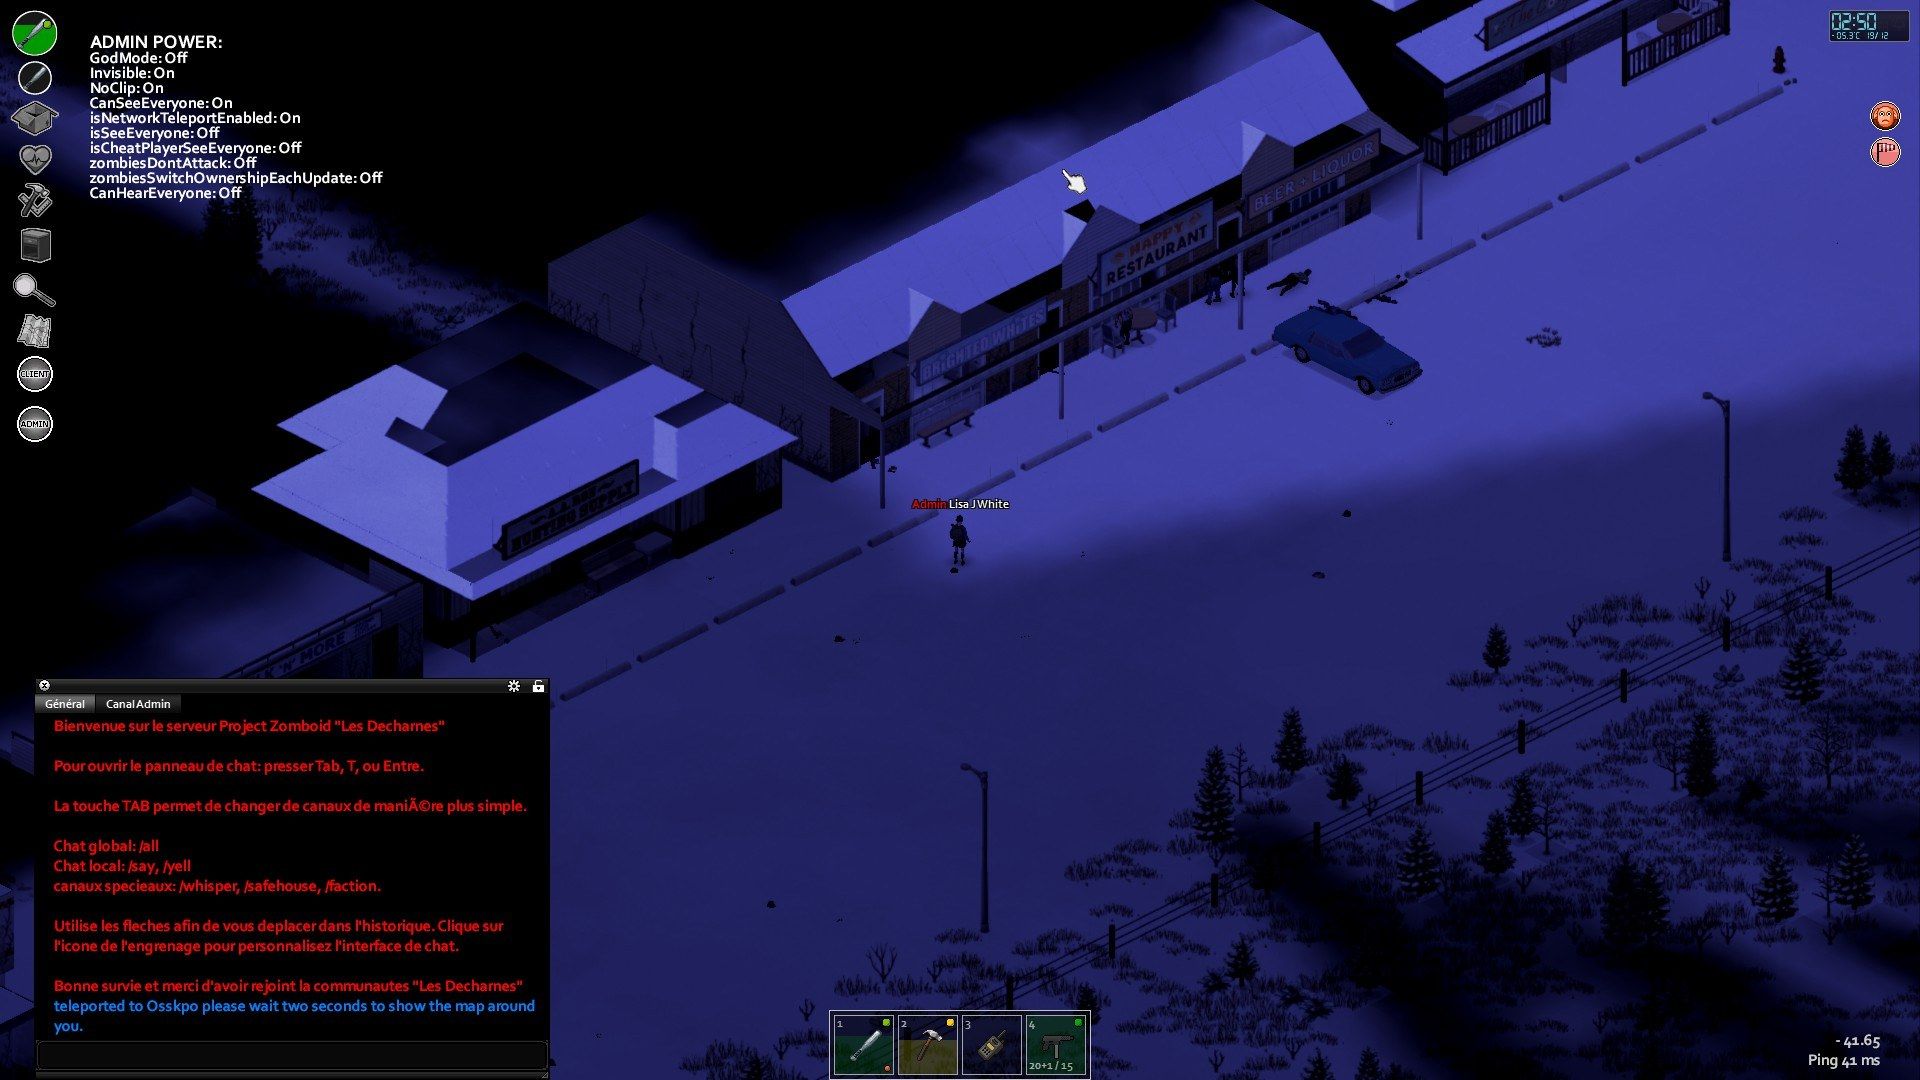
• Version: The 41.65 • Singleplayer/Multiplayer: Multiplayer / Solo • Host or dedicated: Dedicated by RoxServers, • Mods: Yes Actual mod used • Reproduction steps: No special steps need. The roof somes tiles of the roof are transparent • Location: 13971,3223 https://map.projectzomboid.com/#0.8580913158065621,0.18942206458153354,381.7928617252663
-
Hi, i started playing PZ a couple of weeks and i really liked the game and now i want to make a mod that adds a new wall. The objetive of the mod is make a wall that only works as a fence, be indestructable and the zombies dont get atracted but i can't find a way to do that, im not new at programing but i am new at modding, if anyone known how to make this type of mod or knows abot a tutorial i will be really thankful.
-
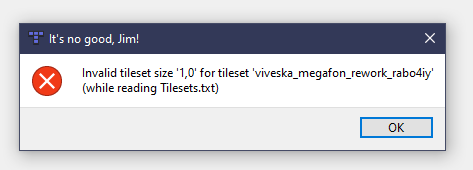
I`m so exhausted. Since I started a new project in the WorldEditor it doesn`t open anymore. All I get is an error (pic related) when I`m trying to open TileZed or WorldEditor. I`ve reinstalled it, deleted all the files, checked "Tilesets.txt", but there`s nothing about this tile and there is no such tile, because I deleted it a while ago. I can`t check anything in the program itself, because every time I press Ok it shuts down. The only two things I haven`t done yet is reinstalling the game itself (which I think is unrelated) and checking for corrupted regedit`s files (but what exactly should I check?). What`s your opinion about this? Also, I didn`t find anything about this error.
-
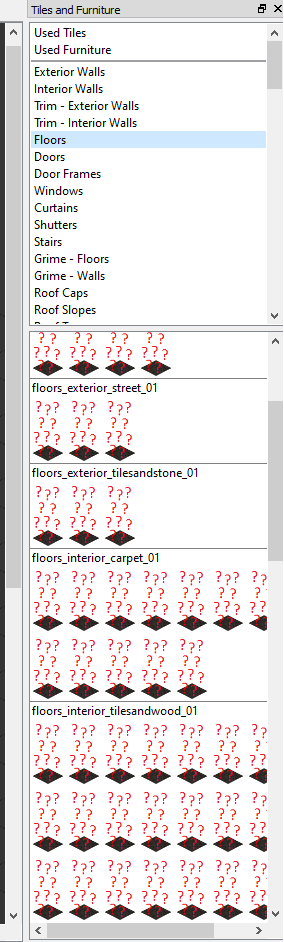
Hello, I’m totally a newbie at this editor and am trying to get it to work. I’m not sure I’m doing something wrong or where its supposed to be installed at, but currently when I enter the building editor I’m unable to see any of the objects. All I’ve done so far is download the editor and tiles and extracted them, I'm not sure how to tell the editor where the tiles are that are missing. I wanted to mess around with the building editor before I started mapping cells. Would appreciate the help (:
-
Good afternoon. I attempted to search through the Vanilla rendition of PZ's files to find the script that represents the White Microwave, to no avail. Much to my chagrin, it does not exist in the SCRIPTS file and is only referenced in the Translation file. The Microwave sound effect is there, but for the likes of me, I can't see where the Microwave itself is located. The reason I want to know the answer to this is because the "Hydro Craft" Mod has several items that can spawn in cabinets that are exact, but non-functioning, duplicates of placable Furniture. For example, you can find a microwave (HCMicrowave), a mini-fridge (HCMinifridge), and a washing machine (HCWashingmachine). All three of those items have equivalents in the Vanilla rendition. None of the HC versions really do anything outside of being disassembled. I know that it is completely possible to disassemble a placable Furniture piece (e.g. a television or radio), but what about the opposite? What I want to write is a Crafting Recipe that takes the non-functioning HC versions of furniture and converts them to the Vanilla rendition furniture. With this ability in place, likewise, I also want to create a Recipe for the opposite, so that the special parts HC adds to those things can be gathered more fairly. I know or a fact that Vanilla rendition Furniture has a reference as an Item, because you can pick them up and interact with them. Where are the files for the Vanilla rendition, placeable Furniture located? What can I do with them, and how? Thank you. -TURTLESHROOM
-
@Connall , @RobertJohnson Feature for mod.info (pack=....) needs to be updated to choose .packs. Example: pack1x=... (only load this pack when the game settings is 1x) pack2x=... (only load this pack when the game settings is 2x)
-
Hi all, I've been working with the mapping tools for a little while now, and decided to look at adding some custom tiles. I've pretty much got it. But when in TileZed, and using the Tile Properties, I've added tilesets, but where can I define if something is a Tv for example? I've noticed not all options are available in the Tile Properties options, but when highlighting a Tv it shows other options that are not available in the sidebar. I've read about a 'Tileproperties.txt' but can't seem to find the file anywhere? So... how can I edit these other options? Or, where can I find the txt file? Thanks in advance -TG
-
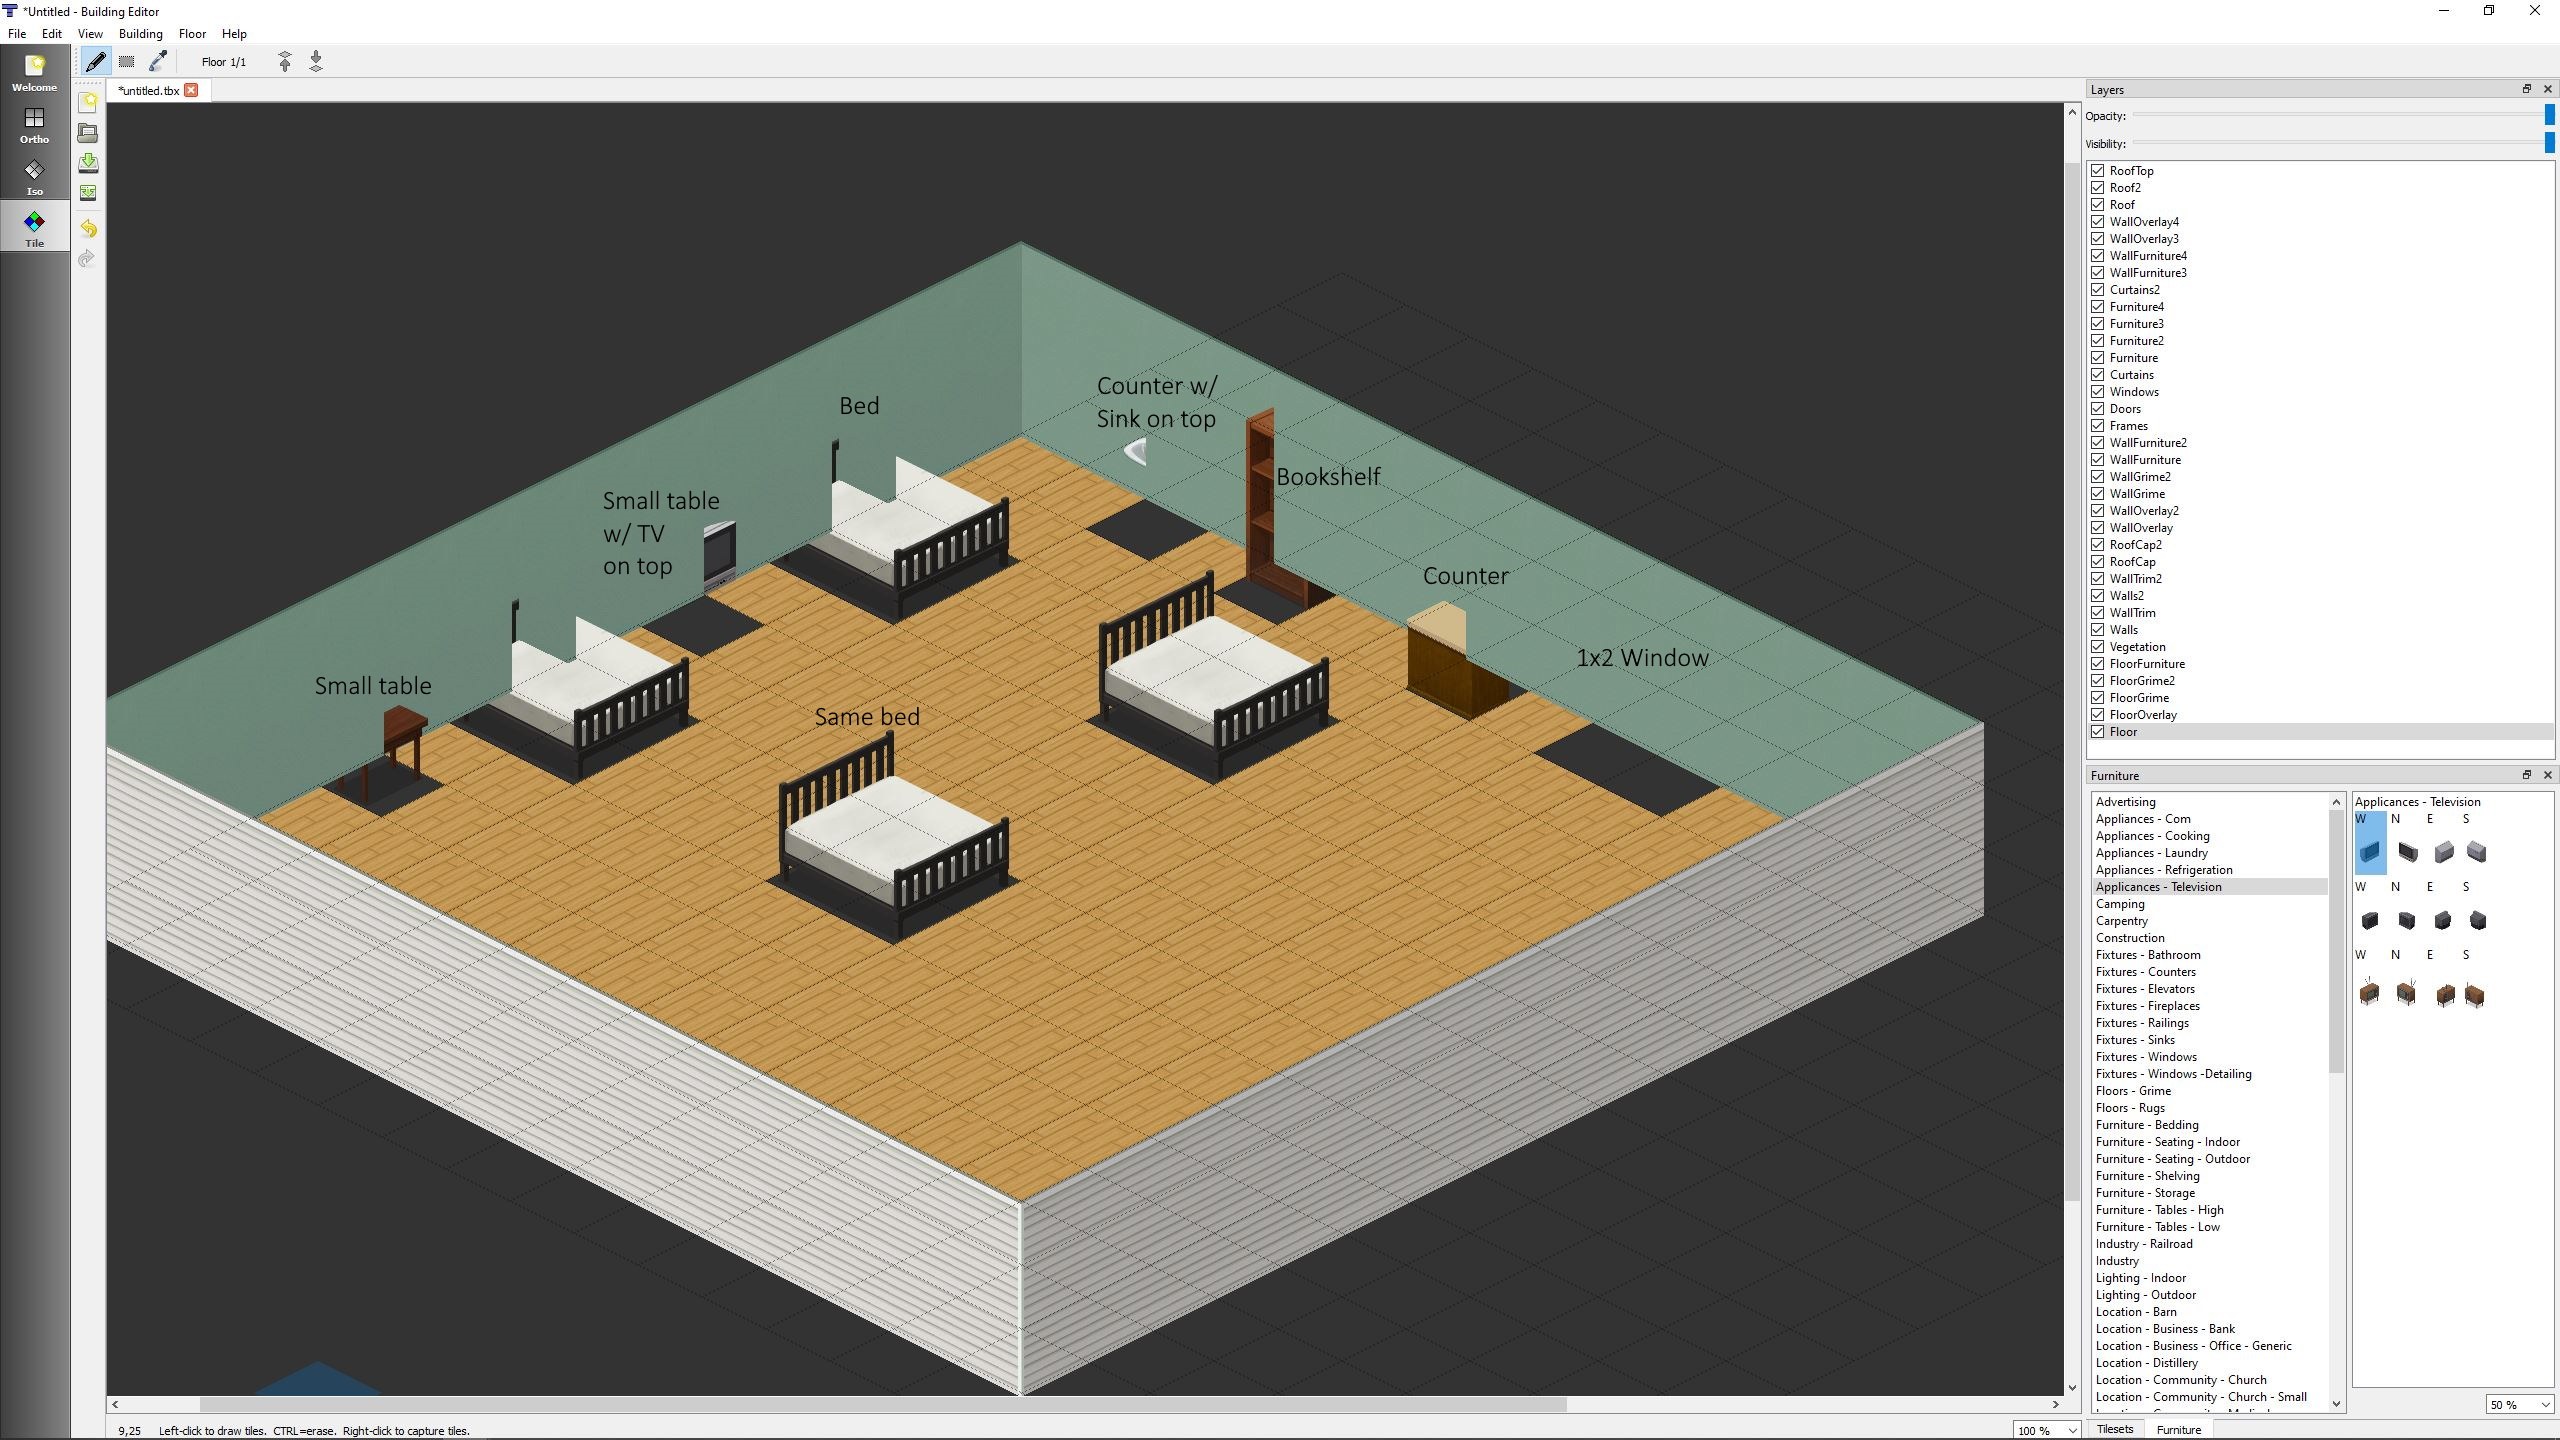
I want to make a mod where you can alter existing furniture items to make them aesthetically different. For example you have the plain beds now with no sheets, just a mattress. I'd like to be able to add sheets and pillows to them by upgrading them through a crafting menu, like you have to pick the item up or disassemble it, add some resources to it then finish it and set it back in the world. The trouble is I feel like I can create a tileset, but I'm not sure how to make an item that would be placeable in the world. Likewise I'd like to make more pictures to hang on walls, decorative items, etc, to add more variety to the game, but IN ADDITION to the items that already appear in game, not as replacements. Any ideas on how I might do this?
-
How can we make proper custom tiles for both 1x and 2x size textures? Can I add 2 different pack files and somehow define one as 1x and the other as 2x?
-
Ok so I looked for every tutorial I could find. Most of which are dead links, outdated or incomplete. So I used http://projectzomboidatoxwar.blogspot.com/ By Atoxwarrior Sadly it wasn't in english so I had to replay it a few times to make sure I got everything (of course this is with the old tools as well too). But I managed to do it. I've added my tiles to tilzed. I've created a new tileset definitions I've created a .pack file I've modified my mod structure to include the new texturepack folders as well as modify my mod.info file No matter what I do I always get an error in WorldEd trying to generate lots "Some Tilesets missing in a map cell 0,0" The directory points to the same tiles directory read by TileZed so I double checked that. I've made it this far but now there are no more tutorials to cover this that I can find. So any info would be greatly appreciated. Thanks - Capt_Paradox Oh yeah, though i did play with my tiles folder earlier trying to switch directories between Tiles and 2X which caused my buildings to disappear in TileZed but still appear in WorldEd (after switching it back of course since that didn't help). So if anyone knows of a fix for that either let me know
-
I managed to load my custom tiles into TileZed. I'm trying to add my custom tiles to the building editor. I can find them if I go under the "tiles" tab and browse that way. What I'd like to do is create a new Category and select my tiles from the "ISO" tab instead for building. I went to my .TileZed folder and tried to modify the buildingtiles.txt but it gave me an error after modifying. So I'm obviously missing something......... here's my text But like I said still tossing me an error........ any suggestions?
-
Anyone know what will happen if you start a game with 2x tiles, but on a map that uses custom 1x tiles? Will they just look shittier or will it display as question marks? Or I guess will it not work at all or force it back into 1x?
-
I am struggling to remove the tiles I have placed. It seems that when you later re-open a file you can't delete any of the tiles you placed earlier? Screenshot here: How do I go about removing these glitched objects?
-
The water in PZ is aesthetically flat and a little confusing. There are pixel animations within the game and I was hoping maybe the water tiles could be re-done to look more like moving water, with waves lapping at the shore. This can be done in 3D and turned into pixel sprites, to more seemlessly integrate into the atmosphere of the game. I am very impressed with the 2x Tiles and I'm not trying to devalue anyone's work. But I think creating the world's tiles in 3D would fix a lot of the perspective problems, confusing details, aesthetic inconsistencies and make animations easier. Just a thought. You guys have done amazing work on the game art so far, and I know you're focused more on making the game work well and diversifying gameplay aspects. The water of the PZ world could use a little pixel-love is all. There are some shading issues that make certain aspects of the map look flat, rather than raised. I'm just thinking making some things, like structure, in 3D would help pop out the bridges, along with better shading beneath structures. Perhaps in the distant future boats, docks, floating homes, swimming, and travel via water might be a playable aspect of the game, and with that would need a water overhaul. So really, this is isn't an immediate issue. Just ideas floating around in my brain for future possibilities.
-
I would like to make a small mod for corn for myself for the feature I suggested here, but I can't figure how to change the tile graphics for the empty/full containers, just like the various kind of shelves are? I tried fiddling with TileZed, but I couldn't find the location of the full tiles nor any kind of tile properties related to this.
-
I have some ideas to make the game more apocalypticy: Bedrolls. While I feel that a portable sleeping aid would be overpowered, I would love to see bedrolls strictly as an alternate placed bed, in slummy parts of the city/towns and especially in the woodsey cabins and hunting shacks. I kind of maybe really want/need (subjective) a bedroll asset for the map tools.Moar medical assets. Think hospitally assets. Oxygen tanks, life support machines, dentisty tool tables, those overhead lights, gurneys, uhh, you know, hospitally stuff. If you're planning on building a city, you would assume they would build a big hospital no? (Also shamelessly sort of maybe need these assets)Related to the above, but more military-esque contamination assets. Plastic flaps, overhead sprays e.c.t.More graffiti with meaning. I mean like, think Fallout NV classic white words of (not) wisdom. Zombie related. Apocalypse related. People related. I'm not creative, maybe something like "I'm dying!" (< no creative talent right here) or "I got bit" or "Blame the military" (Or insert government, umbrella or specific dodgy company here) As a general suggestion, just a lot of shit-tier stuff. Slummy, dirty stuff. Think cardboard box houses e.c.t. Sewer assets maybe? (I know there are some already, I mean containers and stuff to populate the ground). knocked-over garbage cans, broken tvs, microwaves, fridges missing doors. Garbage clutter. Make PZ look less like a nuclear town and more like a ransacked apocalypse scenario (This is not an insult, I love the current assets I just think they look a little too clean for my [dirty] tastes)More industrial stuff. I feel PZ atm is focused more on residential areas than industrial, I'd like to see more industrial stuff. Girder stacks, brick pallets, pallets in general, pipe stacks, shipping crates. Expand on the construction and industrial asset trees. Trees? Trees. Probably categories. But trees.Security cameras you can chuck in the top corners of walls. Don't have to move at all, considering I work for a company that distributes them from Germany, I can tell you 90% don't move, nor need to. Okay sorry, mini-rant over. More security stuffs in the security "tree". Oh gawd don't google image that.Dirty bathroom assets. Not everyone who has to go and is potentially being chased by a zombie has time to flush. I swear that's not me. I take time and flush. What's a widdle zombie bite for proper toilet etiquette? Placeable dead bodies (Map tools). Dead people. Bullet holes in their heads. Scratches all over their bodies. Bites too. Dead zombies with spiked baseball bat marks, stab wounds, gunshot wounds, chests blown out by shotguns, half-eaten corpses, skeletons with minuscule flesh remaining. (Also probably been suggested before a bazagillion times, but decomposition that ALSO affects these dead bodies too! Like dynamic tile updates? Yes? No? Hell yes!Sorry if this is a mess. TL;DR/English version: Bedrolls on the ground, usually in remote places. Map tools assets. Non-OP, non-pickupableMore medical assets. Hospital-related mostly - oxygen tanks, life support machines, doctor tool tables, overhead surgery lights, gurneys e.c.tDecontamination/military-medical assets. Plastic flaps, overhead sprays e.c.t.Common general word graffiti - "Blame the military" "Got bit. RIP me 2k15"Dirty, slummy assets. Knocked over garbage cans, broken microwaves, tvs and fridges, soggy cardboard boxes e.c.tMore Industrial assets, more construction assets. Girder stacks, brick pallets, pallets in general, pipe stacks, shipping crates. Security cameras on walls and more security assets. Consoles, screens, alarm boxes, klaxons (maybe not) air raid siren poles.Dirty bathroom assets, fallout style.Placeable dead bodies (Map tools). Dead people. Dead zombies with wounds, half-eaten corpses, skeletons with minuscule flesh remaining (from being eaten). (Also dynamic tile updates, in this case: decomposition)EDIT: Added another suggestion
-
Greetings PZ survivors. Alas it's a been a while since I've gotten some good PZ play time in. How long a has the zombie cam been in play when you die(Watching your survivor who just turned go shuffling around was rather interesting). That one was new to me last time I fired up PZ. Anyway, Just wanted to let you know that my company is making a sequel to our original zombie themed game ZPocalypse. You start off on the loan apocalyptic streets having just escaped the recently nuked urban zombie infested wasteland. You’re tired, wounded, and hungry. You need SHELTER, a safe house, where you can lick your wounds and regroup. Not just any house will do though. First you need to make sure it’s safe inside. Clear it out, board up those windows, clean out those beds. Setup guards for early warning systems, and get patrols to go out on scavenging runs, b/c food is in short supply. But they keep coming, every night. What will you do? How long will you last? Is their any end in site for this zombie apocalypse? So much so, have I enjoyed the crafting and base building of PZ that we felt we needed to incorporate some of those aspects into our physical game Zpocalypse 2 which is up on kickstarter right now. ATM we are funded, but we'd really love to open up some , what I feel are vital stretch goals, to really get this game fleshed out and fully specked. (Aka, I'm talking about campaign mode). Campaign mode is going to take alo of time, play testing and play testers to get it so you can play jsut like in PZ to literally see how many days you can survive. So far we've added new foods types (Good Food, Raw food, Rad Food, Coffee, Booze, smokes). You can combine the Raw food and Rad food, using a camp fire upgrade to make various pots of stew which remove the negative status effects that raw and rad food give you if eaten unprepared. Next we got our resources conversion upgrades, such as the Workbench, which lets you build other upgrades, in addition to granting the ability to disassemble armory cards into scrap for you use in building other things. Reload bench lets you craft more ammunition and make improvised bombs. Infirmary lets you remove negative status effects with a night of rest. Beds lets you regain hit points faster overnight, instead of just idly sitting on the ground attracting more zombies to your safe house. You can now build pit traps, upgrade those pesky sandbags with spikes, and maybe even make a propane bomb. The game is being redesigned so you the player have alot more decision and choices for what your survivors do each day. These choices dictate how bad nightly combat will be(if there even is any combat), all the while trying to improve the fortifications’ of your base, feed your survivors, find more survivors, and of course kill as man of those ghoulish zed heads as possible! Anyway, it's up on kickstarter for another 2-3 weeks. Please check it out. There are some areas of the game which are purposely unfinished as we are trying to get community direction on where to take the game. Which new locations, mechanics, and concepts will we put into the game? (I'd personally love to add the cloth part type, and allow hung sheets crafting to block line of sight, just like you can in PZ). Zachary Parkes Vice President of Greenbrier Games Inc. Lead Designer for Zpocalypse 2: Defend of the Burbs https://www.kickstarter.com/projects/gbg/zpocalypse-2-defend-the-burbs press pics for Zpocalypse 2 defend the burbs