Search the Community
Showing results for tags 'Map'.
-
While editing the wiki page, I found out about An Unnamed Gas Station near the military surplus store in Doe Valley. Since it wasnt resembling any theme of the main Gas Station chains, nor had any clear signs on it, I thought that its a new, undocumented gas station. However, upon closer investigation with debug menu showed that zombies within it will spawn like in Gas2Go Zombie type. There is clearly something amiss, since there are no Gas 2 Go theme anywhere around nor within it, apart from gas pump style. I think it either should be either rethemed to fit its category, since it ruins overall theme consistency within the Gas 2 Go chain. Or renamed officially with a new logo clearly visible somewhere. Coordinates of the Unnamed Gas Station: 5473x9709|
-
Sources posted below. In 1993, Kentucky's primary crop was tobacco. Its secondary crops were beef & dairy. Knox County itself had three types of commodities in 1988: tobacco, beef, and dairy. By 1993 the dairy farmers had stopped exporting. Jefferson County itself was almost 100% tobacco by 1993, along with nearby counties. It would be nice if these tobacco & beef farmers were represented ingame instead of having corn everywhere. There are a few major advantages to doing this: 1) It increases difficulty. Tobacco is not exactly edible like corn is. 2) Tobacco would not be easily converted into cigarettes. In Kentucky, most farmers cut & cured the tobacco themselves. They would harvest it, chop it into the valuable parts, hang it in a barn to dry, then take it all to an auction warehouse to be sold. 3) Tobacco farming has its own tools. These tools are generally (besides the machete) not very useful for combat. 4) Beef cattle could work well with the new animal system coming up. These cattle would may have some zombie problems and/or starve and/or freeze and/or become a tasty snack and/or use their fierce hooves & horns to maul a player since the whole Zombie Apocalypse thing may make cattle less friendly toward humanity.... 5) Beef cattle do not produce much milk, making them less useful. Moreover, short of players having freezers set up or curing methods set up, a lot of their meat could go to waste. 6) It would enable you to make very spooky barns. Whether they're dark slaughterhouses full of dead cattle from a zombie that snuck in before panicked cattle broke down the doors & ran, or hard to see rooms full of hanging tobacco leaves a zombie could be lurking in to ambush the player, there's lots of options! It would also help with the players asking for tobacco seeds. Kentucky historically HAD lots and lots of these seeds. Farmers also grew corn, tomatoes, and cantaloupe but these were all less common. A farm co-op near Knox County, Cumberland Farm Products in Monticello KY, also was known for paying farmers well to produce cabbage, bell peppers, and tomatoes. This area was a tourist area too, with many Ohioans descending upon Lake Cumberland. Locally these out of states were known as the Ohio Navy for all the camping & boating they did. Source: https://uknowledge.uky.edu/gradschool_diss/576/ mainly around pages 102-103, and maps a dozen or so pages back.
-
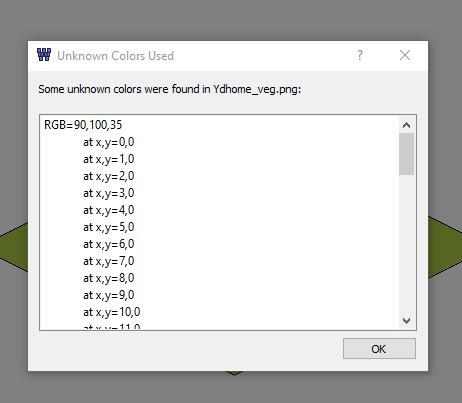
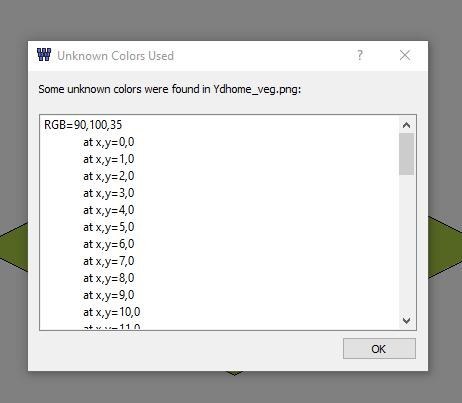
Here you will find a (hopefully) comprehensive guide to map modding using TileZed, from scratch, to uploading to Steam Workshop. Step 1) Installation and setup Spoiler - Download the latest version of TileZed here: https://theindiestone.com/forums/index.php?/forum/64-mapping/ 3 Step 2) Creating a new map - Creating A Master Image Spoiler The first thing you need to do to create a new map mod is to create some basic images you can import into WorldEd. You will need a paint program such as Paintshop, Gimp or Paint.Net (I use paint.net and it works great). Open your paint program of choice and create a new image, each pixel of the image will correlate to 1 tile when in game, so, if you want to create a map that is a single "cell" in size, you would create a 300x300 pixel image. If you wanted to make a 2x2 cell map you would create a 600x600 pixel image etc. Once you have created your new blank image save it as a png file (eg. MainMaps.png), this is so you can work with multiple layers, which will make your life way easier! - Creating The Base Map Image Spoiler Now you have your blank map image up and ready we need to setup the exact colours we will be using to draw the game world (when importing your image into WorldEd every pixel gets read and converted into the relevant tile (if the colour is recognised by WorldEd)). Use your programs colour palette to enter the colours below using the RGB values given: -----Base Map Colours---- Dark Grass | 90 100 35 Medium Grass | 117 117 47 Light Grass | 145 135 60 Sand | 210 200 160 Light Asphalt | 165 160 140 Dark Asphalt (main roads) | 100 100 100 Medium Asphalt | 120 120 120 Gravel Dirt | 140 70 15 Dirt | 120 70 20 Dirt Grass | 80 55 20 Dark Pothole | 110 100 100 Light Pothole | 130 120 120 Water | 0 138 255 ----Veg Map Colours---- Dense Forest | 255 0 0 Dense Trees + grass | 200 0 0 Trees + grass | 127 0 0 Fir Trees + grass | 64 0 0 Mainly grass, some trees | 0 128 0 Light long grass | 0 255 0 Bushes grass + few trees | 255 0 255 Dead corn 1 | 255 128 0 Dead corn 2 | 220 100 0 None (black) | 0 0 0 Now you are ready to start drawing your base map, for now you should ignore all the colours listed after water as you will be drawing these onto separate vegetation map layers. Example: Spoiler MAKE SURE TO TURN ANTIALIASING OFF AND CHANGE BLEND MODE TO OVERWRITE BEFORE HAND! (otherwise you will get colours not recognized by WorldEd, leading to extra work later). - Creating The vegetation Map Image Spoiler Now you have created your base layer which should contain your main roads (using the dark asphalt colour), paths and side roads (light asphalt, dirt, gravel dirt), dirt, water, sand and grassy ground (dark/medium/light grass), save this image as a BMP (eg. MyMap.BMP) (if warned about flattening the image just select yes/continue/ok) it's now time to start drawing the vegetation map on a new layer. Close the BMP image you just saved and create a new layer on your original .png,have it above your base layer (it should put itself there automatically), copy your original layer and paste it onto the new layer, then hide/untick your base layer. On this new layer start by selecting the None(black) colour from above and flood fill all the roads (and any other area where you do not want vegetation to grow such as water, sand etc (erosion vegetation will still work fine)) and delete any/every other colour from this layer, leaving just the black areas you just created. Now start drawing the other five colours (the ones you ignored when creating your base map) on places where you do want vegetation to spawn. Start off with using a seperate layer for each colour, starting with the Light long grass, just flood fill that entire layer with it, then drag your black "no veg" layer above it, this allows you to see the road/building layout easily. Then work your way up through the other colours (creating new layers for each one, each one above the last in the order list) as needed, all the way to the dense forest one. Save your PNG now, you're going to make some temporary changes you dont want to save. To save this as a vegetation image, make sure your base layer is still hidden/unticked (so only your vegetation layers are visible) and then start merging your vegetation layers together, from the top down. You should now be left with 2 layers, a single vegetation layer, and your hidden base layer, save the image as a BMP (eg. MyMap_veg.BMP) (if warned about flattening the image just select yes/continue/ok), note that this image MUST be saved with the same name as your base map BMP with the added "_veg" at the end, it must also be saved in the same folder as your base map BMP. Once you have saved the veg map BMP, close that image and then close your PNG WITHOUT saving, unless you want your vegetation layers to be permanently merged, making it a lot harder to make edits, if needed, in the future. Example: Spoiler - Creating The Zombie Spawn Map Image Spoiler You will also need to create a new image called a zombie spawn map to tell the game about the density of zombies in our map, this is a black and white image that is 10x smaller than your base and vegetation images, so, if your map image is 600x600 pixels, your zombie spawn map would be 60x60. Start by flood filling it black (black means no zombies), then add white and grey lines/circles/patches where you want zombies to spawn, white is highest density, getting lower and lower with darker greys. (example), Save this in the same folder as your base map and veg map, again giving it the same name but this time with the "_ZombieSpawnMap" suffix (eg. MyMap_ZombieSpawnMap.BMP). It can be handy to make sure anti-aliasing is enabled when creating this image as it will naturally add shades of darker grey around any white or greys you place. You now have all the required images to create a new world in WorldEd. Example: Spoiler - Importing into WorldEd Spoiler Open TileZed, click on the Tools menu and then Click on WorldEd, this will open a new window, click on New, give it the size of your map (e.g. 2 cells x 2 cells) and click ok, you will now see a number of numbered squares depending on the size of your map. Each one of these squares represents an in game Cell (300x300 tiles). Now, navigate to the folder where your map mod images are stored and drag and drop the base image (MyMap.BMP) into the WorldEd window, making sure it covers all the numbered squares correctly. Once done, click on File and then BMP to TMX, on the window that pops up, click on the 3 dots in export directory and create a new folder (e.g. MyMapMod) for your mod and click on select folder, then before you press ok, make sure "Assign generated maps to world" and "Report unknown colours" are both ticked, then click ok. Click ok on the sanity check (make sure you aren't accidentally overwriting the wrong mod etc) and WorldEd will do it's magic. You MUST have at least your base map image and your veg image made and in the same folder before WorldEd will allow you to import a map image. Now, if you forgot to turn anti-aliasing off, WorldEd will probably pop up and tell you your image contains rogue colours, it will then list each rogue colour found along with the co-ordinates (in pixels) of every pixel with this rogue colour, you will need to open your images, find ALL of these pixels/colours, replace them with the correct colour(s) from step 2 then re-import into Worlded, otherwise you will end up with errors in your game world when it comes time to play. If WorldEd didnt throw up any colour errors then all you need to do now is click on file and save, give your world a name (I like to use the same name as the map to avoid confusion) and save, you now have the basics of a new map, to which you can now start adding buildings and world detail! Step 3) Creating/Adding custom buildings Navigate to your TileZed folder and create a new folder inside named Buildings, this is where you are going to save any buildings you make or download. - How to create custom buildings Spoiler Open TileZed. Click on Tools then Building Editor In the new window click on New Building. In the settings window that pops up you can choose a template and the plot size for your building. The templates provide pre-made room definitions for certain types of buildings, which are crucial for spawning the correct loot in the right places. For now choose “none” for the template and leave the plot size at 20x20 tiles. It's always best to make your plot a bit bigger than your actual building and surroundings will be as you can shrink your plot to match your finished building later. Click OK. You will be presented with a grey screen with a grid of 20x20 squares. For now, make sure Iso is selected on the left of the window. The first thing you need to do now is create some room definitions for your new building, this will allow the game to spawn the correct loot into the right places, such as food into kitchens, clothes into bedrooms, medicine into bathrooms etc. At the top of the window, click on Buildings and then Rooms (or you can use the Rooms icon on the toolbar). In the small window that popped up. click on the + in the bottom left to add a new room type. On the right you can now give your new room a name which can be anything you want, and an internal name, which MUST match one of the names in this list: You can now draw your new room on the tile grid by clicking and dragging with the left mouse button (make sure the Draw Room tool is selected at the top of the window). Notice how the colour of the tiles turns to the colour you selected for your room in the previous step. Once you let go of your left mouse button your room will appear. You can change the shape of the room by clicking and dragging more pieces that connect up, or by holding CTRL and clicking/clicking and dragging to delete parts of a room. You will see that placing tiles of the same room type next to each other will automatically delete the internal wall between them, and placing tiles of different room types (e.g. living room and kitchen) next to each other will maintain the internal walls. You can create new internal walls (or delete internal walls) using the Place Wall tool (located to the right of the Draw Room tool). Simply click on the Place Wall icon, select the tiles you want to use for it's interior and exterior facing walls as well as grime etc and then left click and drag your wall on the tile grid, right clicking on a wall you place will delete, to edit it's length, left click on one of its "ends" and drag. So now you've finished placing the rooms for your ground floor you probably want to place some windows and doors. Click on the Place Doors tool at the top left of the window, then using the tile and furniture menu on the right, use the Doors and Door Frames options to select the door you want to use, then simply click on the tile grid where you would like the door to go. Exactly the same method is used for placing windows, except using the Place Windows tool at the top of the window instead (located to the right of Place Doors). You've now placed your windows and doors, but maybe you realised that your building is 1 tile too wide and you need to make it smaller. Just select the Draw Room tool, hold CTRL and click and drag on the area you want to delete. That worked, but your doors and windows that were on that side of the building are now floating in thin air, 1 tile out from the "new" wall. You can easily get around this by selecting the Select and Move Objects icon at the top of the window, then clicking and dragging the area select over the doors/windows etc you want to move, then clickng and dragging one of the rectangles at the base of one of the objects, all objects will move together as one, making bulk/mass changes easier to deal with. Now it's time to place some furniture down, simply use the Tiles and Furniture menu on the right of the window to browse through and select the furniture piece you want, then at the top of the window the Place Furniture icon should now be clickable, once selected simply left click on the tile grid where you would like your furniture to go. Right click will delete a previously placed piece. You will notice that items will automatically orient themselves to have their backs to the wall if placed against one. If put up against 2 walls (such as the corner of a room) you can change its' orientation by moving your mouse cursor within the tile it's to be placed on. You can also select the orientation of furniture by holding the left click down as you place it and moving your mouse round, once in the desired orientation, simply let go of the left mouse button. If you are placing multiple objects on the same tile then the last object added will be drawn on top, so if you want to have a chair on top of a rug, make sure you place the rug first and then the chair. Your ground floor is complete, now it's time to add some stairs and a first/top floor. Click on the Place Stairs icon on the toolbar at the top of the window, select the stairs you want to use in the Tiles and Furniture menu on the right and then left click on the tile grid where you would like to place your stairs. Right clicking on previously placed stairs will delete them. Now click on the Floor icon on the toolbar, this will pop up a new window that lists the floors of the current building (currently only Floor 1). Click on the blue + icon to add a new floor, you should see that it has added Floor 2 to the list, above Floor 1, click OK. Now that you are back to the tile grid you will notice that your building currently looks darker, however if you look at the toolbar you will also notice that the floor icon has changed (now reads Floor 2/2), indicating that you currently have your new floor selected, and any room/items you place will be on this floor. You can now place rooms and furniture etc like before (making sure the correct tool is selected in the toolbar), notice that when you add a room that sits above your previously placed stairs on the floor below, BuildingEd will automatically "cut holes" in the floor to allow the player to move between floors. If any of your lower floors are not covered by rooms on higher floors then don't forget to add some roof pieces over the gaps. To do this, navigate to the floor above and then click on the Place Roof icon in the toolbar and select a roof type (e.g. Flat Top), then on the right of the window select Roof Tops (or Caps/Slopes depending on the roof type being used) under Tiles and Furniture and select a roof tile to use in the area below. Then click on the tile grid where you would like to place the roof tile (e.g. a flat roof tile to cover a ground floor room is placed on the "floor" of the next floor up). When you want to add a roof to your top floor, create a new floor using the Floor icon like before, then select the Place Roof icon in the toolbar, select the type of roof tile you want to add and place on that new layer. Flat roof tiles are by far the easiest to add, bu the prettier sloped roofs can be figure out with a little bit of trial and error, again using right click to remove any previously placed pieces, just remember to have the correct roof type selected in the Place Roof tool depending on what tile you're trying to add. Finally you might want to add detail around the outside of the house such as gardens and paths. To do this, first click on Tile (underneath Iso) on the left side of the window, you should notice that the options on the right of the window have changed. At the top right is a list of every layer, ticked layers have all tiles placed on that layer visible in the tile grid, un-ticking them makes those tiles invisible, allowing you to hide the buildings walls when placing flowers or ground tiles for example. At the bottom right as a list of all of the different tiles you can use. Click on the category and then the desired tile on the right. Left clicking on the tile grid will place the selected tile on the selected layer, overwriting any tile that is already at that location and on that layer. Hold CTRL and left click to remove a tile from the currently selected layer. Lastly you will need to add a room definition for any full tile roof peice that is not over an internal room of your building. This is to allow the new roof occlusion system to function correctly. For any bits that are above an internal room, simply make sure that room has a room definition (all room in buildings should, even hallways etc). If the roof bit is over an outside area (such as a porch) then instead of giving it an internal room definition, which could possibly mess with loot tables etc, use the new room definition made for this situation - emptyoutside. In the example below you can see that this building has a porch roof outside the front door, all other bits of roof are already over a pre-existing room definition and so we don't need to worry about them. We do need to add an emptyoutside room definition on/under the porch roof however as there currently is no room definition outside the building. In this example, the porch roof is on the roof layer of floor 2. If we check Ortho view you can see that a room definition of emptyoutside yellow) has been applied to the corrosponding tiles on floor 2. If you're having problems getting it to work properly, remember: every "full tile" roof peice (the little overhang peices you see in the example above do not need to adhere to this rule, just leave them as is if you have any) must be "over/on" a room definition, so make sure every room in your buildings has a room definition (including hallways etc). Add a room definition of "emptyoutside" (without " ") to any full tile roof peices that do not sit "over/on" an internal room definition. Now your building is complete, its time to save it. If you havn't already, create a folder inside you TileZed folder called buildings, you can create any number of sub-folders in here to help organise your buildings if you like. Now, in BuildingEd, click on File and Save As, navigate to your buildings folder, give your building a name and save it. To make life easier when creating similar buildings in the future it's a good idea to save your buildings template, so when you create a new building you can select it's template and have all of your room definitions, wall tiles etc already set up for you. To do this, click on Building and the Properties, here you can see the default tiles that will be used on any building created with this template. To the left is also a button for checking/editing the room definitions. Clicking on Save Template will ask you for a name and then save it to the list of templates. As you can see you can quickly edit and create multiple templates rather fast using this method. - How to add buildings to your map Spoiler If it's not already open, open WorldEd (open TileZed, clikck Tools and then WorldEd) and load your previously saved map. You can now edit your map by double clicking on one of the cells, it will open a new tab (named cell x,x) containing a preview of what that cell will look like in game. You can use the sliders to navigate the camera around the map as well as holding down control and using your scroll wheel to zoom in/out. To the right of the preview window you will see a couple of areas, one labeled "maps" and one labeled "history", in the maps section, navigate to your buildings folder, you will see all of your buildings listed as tbx files (you can create multiple folders within the buildings folder if you like to help organise your buildings to make them easier to find). All you need to do now is click and drag a tbx from the section on the right onto the preview window (make sure "Select and move lots" is selected on the toolbar at the top of the screen), you will see the building moving with your mouse cursor over the world, just drop it wherever you want it to go. Once you have placed all the buildings you want on this cell click on File and then Save and then close the tab (named cell x,x). You should now be back to seeing your entire map. You can now repeat the process for each other cell. Once you are finished adding buildings (you can always add more later if you want to start off small and test a few things first) come back to the world view and save your map. Step 4) Exporting and testing the map - Exporting Spoiler Before adding world detail such as lamposts, road markings, road signs etc you probably want to load your map up and run around in game to make sure everything is as you want it because any world detail changes you make will be lost if you need to make edits to your BMP files and re-import them into WorldEd. The first thing you are going to need to do is add a spawn point (or more) on your map. To do this you will first need to create a spawnpoints.lua file, just navigate to the folder you created when you imported your BMP's into WorldEd (e.g. MyMapMod) which by default will have been created in your TileZed folder. Once there create a new text document, open it and then click on save as, change Save as type to All files, name it spawnpoints.lua and click save. Then open WorldEd and load your map, double click on the cell you want to add a spawn point to, once it opens, click on the "add spawn point" tool at the top of the window and click on the map where you want your spawn point to go, it will place down a prism to allow you to keep a visual track of your spawn points as well as opening a dialogue box to select the profession that can spawn here (if no boxes are ticked then nothing will be added to the spawnpoints.lua file when you write spawn points). Once finished, save the cell, come back to the world view (close the cell's tab) and click on File and then Write Spawn Points, on the dialogue box which pops up, navigate to and select the spawnpoints.lua you created above and save. Once you have created your spawn point(s), save your map then click on File and then Genrate Lots>All Cells. Here you will be asked for 4 things, the first being the directory your lot files will be saved in, click on the 3 dots and navigate to the folder you created for your map mod when you imported your BMP into WorldEd, then right click and create a new folder called Lots, select this folder. Secondly it needs your zombie spawn map, just click on the 3 dots and navigate to your zombie spawn map and select it. Third is the Tile Definitions folder, again click on the 3 dots and this time navigate to your Project Zomboid Steam Install folder (c:\Program Files\Steam\SteamApps\Common\Project Zomboid), click on the Media folder and then click Select Folder. The last thing is the World Origin. If you are making a stand alone map which is not connected to any other maps then you can just leave this as is. If however you are wanting to add your map to an exisiting world or overwrite a cell(s) in an existing world you will need to change these values. The cell of your map that is at 0,0 (the one furthest to the north west) will be given the values you use here, allowing you to offset your map to make existing maps bigger or overwite cells of an existing map. Once ready, click ok - Getting it in game Spoiler OK now you have all of the files you need to test your map in game, so lets go ahead and do that. First, create a new folder on your desktop (or somehwere easily accesible) and give it a name (e.g. MyMapMod), inside create another folder called media, inside there create a 3rd folder called maps and then inside there, create a final folder called MyMapMod (or whatever the name of your map is). Inside this final folder is where you want to put all of the .lotheader, .lotpack and .bin files that were created when you generated the lots for your map, as well as the spawnpoints.lua file and and objects.lua (dont worry about this for now, you will create one when you add foraging zones later). You also want to create a text file(it will actually be saved as a .info file), using Notepad, in this folder, called map, include the following: Spoiler title=Your map name here lots=Muldraugh, KY description= Your map description here fixed2x=true (in this example were adding/overwriting cells in the base games map, but all the files will be kept seperate so the mod only appears when selected in game(hence the lots=Muldraugh, KY)). Click on File and Save as, now instead of saving it as a text file, at the bottom, select Save as type and choose All Files, then name the file map.info The next file you need in this folder is a PNG file called thumb.png, this is the thumbnail used in the games menu for your mod, for now you can just create a blank one using your paint program and save it in this folder. From this folder, navigate up 3 folders until your in the first one and can see the Media folder, in this first folder, alongside the media folder you want to create 2 final files, the first is a mod.info file, again just create a txt file (saved as .info instead of .txt) this time called mod and include this info: Spoiler name=The Name Of Your Mod Here id=The Name Of the First Folder You Created Here (e.g. MyMapMod) description=Description Of Mod Here poster=poster.png The very last file you need is another png, just copy your thumb.png you created a little earlier, paste it here and rename it to poster.png All that's left to do now is drag and drop (or copy and paste) that entire folder structure into: C:\Users\YourUsernameHere\Zomboid\mods Then load up Project Zomboid, click on Mods, enable your mod, create a new game and select your map on the world selection screen. You should find yourself spawning in on one of the spawn points you created earlier. Step 5) Adding world detail Spoiler Now that you have had a run around your map in game and are happy with the layout, vegetation, bulding placement etc it's time to start beautifying your map by adding detail. To start, open TileZed and then open WorldEd, load your map. Right click on the cell you want to add detail to and then click on "open in tileZed". Bring TileZed to the front (or minimise WorldEd) and you will notice you have a zoomed in view of that cell. In map window to the right of the screen, click on the layers tab halfway down, the window above should populate with a number for layers with different names, these are what you will use to place your various bits of detail, allowing you to stack multiple things on top of each other without overriding the previous one (such as road markings on roads, trees on tiles with grass etc). Below this will be a tilesets window listing all of the different tilesets currently used in game, clicking on one of the names will display its contents directly to the right, as you will see, most tilesets have multiple tiles. Adding detail to your world is simply a matter of finding the item you want to place from the tilesets, making sure you're on the correct layer (so placing a tree wont delete the ground tile etc) and then clicking where you want to peice to go (making sure the stamp brush tool at the top of the window is selected). There's a lot of useful tools listed along the top to help you, such as undo and a rectangular select to allow you to copy and paste areas of detail, for example, simply place down some road markings from the street_trafficline_01 tileset on to the FloorOverlay layer, then select the Rectangle Select tool, select the cells with the road markings on, press CTRl+C and then CTRL+V, now you can click away, placing copies of that area (only tiles on the currently selected layer) with a single click, allowing you to place large amounts of detail rather quickly. Once you are finished adding detail to your cell, click on File and Save then close the tab. You can now go back to WorldEd and repeat the process with each other cell, once complete come back to WorldEd, click on File and Generate Lots. Your world detail has now been saved and can be seen in game. Any time you make changes to your map and want to test it in game you will want to re-copy all the .lotpack, .lotheader and .bin files along with your spawnpoints.lua and objects.lua into the folder structure you created in the step above "Getting It In Game", overwriting old files as you go, then copy into: C:\Users\YourUsernameHere\Zomboid\mods as you did before, again overwriting if asked. Step 6) Zoning Your Map Spoiler A - Foraging and Loot Respawn Zones Find the .pzw file for your map mod (generally in the parent folder to your mods .lot files) and open it in a text editor (e.g. Notepad). Look for the line(s) that starts with "<bmp path= ...", after the last one, paste this chunk of code: Spoiler <objecttype name="TownZone"/> <objecttype name="Forest"/> <objecttype name="DeepForest"/> <objecttype name="Nav"/> <objecttype name="Vegitation"/> <objecttype name="TrailerPark"/> <objecttype name="Farm"/> <objectgroup name="TownZone" color="#aa0000" defaulttype="TownZone"/> <objectgroup name="Forest" color="#00aa00" defaulttype="Forest"/> <objectgroup name="Nav" color="#55aaff" defaulttype="Nav"/> <objectgroup name="DeepForest" color="#003500" defaulttype="DeepForest"/> <objectgroup name="Vegitation" color="#b3b300" defaulttype="Vegitation"/> <objectgroup name="TrailerPark" color="#f50000" defaulttype="TrailerPark"/> <objectgroup name="Farm" color="#55ff7f" defaulttype="Farm"/> Save the file and close it. It is possible that your pzw file will already contain this code, in which case it is not necessary to add it again. Open TileZed and then WorldEd and load your world, dbl click on the cell you want to add foraging to. Click the "create object" button at the top of the window. At the bottom of the window you will see 2 selection boxes ("Level: 0" and "Obj Grp: <none>") Click on "Obj Grp <none>" and you will see the list of foraging zones you can add to the world. Select the type you want, you can then draw a rectangle on the game world by clicking and holding left mouse button. You can add multiple rectangles of any type and size to each cell, allowing you to be as specific or general as you want. Once done, save the cell, close it and move on to the next. These zones are used for respawning loot and new zombies, the nav zone is used for zombie horde migration, basically marking the path of least resistance through a town/area. More specifically, only buildings that are within "TownZone", "TrailerPark" or "Farm" zones will be allowed to respawn loot. B - Vehicle Zones Adding vehicle zones is very similar to adding the forging zones. Simply add the following code to your map mods' PZW file the same way as you did for the foraging zones above. Again, if your pzw file already contains this code then there is no need to add it again. <objecttype name="ParkingStall"/> <objectgroup name="ParkingStall" color="#85929e" defaulttype="ParkingStall"/> List of vehicle zone names to use in WorldEd: bad good medium sport farm junkyard trafficjams trafficjamn trafficjame trafficjamw rtrafficjams rtrafficjamn rtrafficjame rtrafficjamw police ranger fire mccoy fossoil postal spiffo radio ambulance burnt The first group is the most common type of vehicle zones used. The second group are for traffic jams pointing in specific directions to immitate the flow of traffic. The ones prefixed with r will spawn less than the regular trafficjam zones. The third group are specific zones for the type of vehicles listed, they are still also spawn random cars but will also spawn the vehicle listed. The final one will add random burn out vehicles. Vehicle zones should be placed as a multiple of 4x3 tiles (4x3, 8x6, 28x3 etc) with 4x3 being a single vehicle, 4 being its side and 3 being its front/back. Once done, load your map mod up in WorldEd, open a cell and add your new vehicle zones as you would foraging zones. Whenever you add a zone you need to use the objects panel on the left of the WorldEd window to give the zone a name (use the names listed above) that will be visible in WorldEd as a tag over the zone, making it easier to keep track of what you have placed where, if these are left blank then the game will default back to grabbing random vehicles from the ParkingStall zone. Example: After you have added vehicle zones to all of your cells, save your map. If you are having trouble with your vehicle zones, you can always take a look at the vanilla objects.lua within the muldraugh folder of your zomboid install, once opened just search for "ParkingStall" to see examples of vehicle zones used in the vanilla vehicle branch. C - Water Zones As above, the first thing you want to do is add the needed code to your map mods' .pzw file, if already present there is no need to add the code snippets again. Look at the beginning of your pzw file and find where the "propertydef"' lines are and add the first chunk of code to the end of that block, same for the "template" and "objecttype" chunks, find their respective blocks and add to the end. Spoiler <propertydef name="WaterDirection" default="0.0"/> <propertydef name="WaterSpeed" default="0.0"/> <propertydef name="WaterGround" default="false"/> <propertydef name="WaterShore" default="true"/> <template name="WaterFlowN"> <property name="WaterDirection" value="0"/> <property name="WaterSpeed" value="1.0"/> </template> <template name="WaterFlowS"> <property name="WaterDirection" value="180"/> <property name="WaterSpeed" value="1.0"/> </template> <template name="WaterFlowE"> <property name="WaterDirection" value="90"/> <property name="WaterSpeed" value="1.0"/> </template> <template name="WaterFlowW"> <property name="WaterDirection" value="270"/> <property name="WaterSpeed" value="1.0"/> </template> <template name="WaterZone"> <property name="WaterGround" value="false"/> <property name="WaterShore" value="true"/> </template> <objecttype name="WaterFlow"/> <objecttype name="WaterZone"/> Now you will see 2 new zones in WorldEd in the same place your other zones reside, WaterFlow and WaterZone. WaterFlow zones are single tile-sized objects that you can place down on any body of water to make it flow in a given direction and at a given speed, any water tile connected to the tile you placed the zone on in a given cell is affected. You can then follow the flow downstream adding more WaterFlow zones to change its direction/speed to match the landscape/route the river/stream takes. Here's an example from the vanilla map: WaterDirection is in degrees with 0 being North and 90 being East etc. WaterSpeed goes from 0.0 to 1.6. The second new water zone is.... WaterZone. WaterZones allow you to play/remove with the blends that you will normally see where water meets land. This allows you to do things like have pools without the water in the pool creating a shore-like blend with the tiles next to it, which obviously for a pool, wouldn't make sense, here is an example from the vanilla world where a WaterZone has been used is this exact way, notice how the WaterGround and WaterShore properties are both set to false: It might be a little hard to tell from the picture but the WaterZone completely covers the pool and all tiles bordering it, allowing it to remove the shoreline blend from said tiles. You can play with the settings and placement of WaterZones to get different effects/looks depending on your needs. D - Zombie Zones Zombie Zones allow you to specify specific costumes for zombies that spawn within certain areas on your map (such as in and around buildings). As you did for the water zones etc first you need to add the following code to your map mods' .pzw file. Add the objecttype line at the end of the existing ones, same for the objectgroup line: Spoiler <objecttype name="ZombiesType"/> <objectgroup name="ZombiesType" color="#555500" defaulttype="ZombiesType"/> As before you will now have a new zone in WorldEd called ZombieType, you can select it and place zones as usual, the larger your zones the better chance of zombies spawning within them. These zones do not add "extra" zombies, they just affect zombies that spawn within them. Each ZombieType zone must be named, similarly to vehicle zones, the list of current ZombieType zone names is: Spoiler School Prison VariousFoodMarket Wedding Fossoil Offices Seahorse Dinner Restaurant Doctor Pharmacist FarmingStore Police ConstructionSite Gigamart Bank FancyHotel Spiffo CarRepair Factory Gas2Go ThunderGas McCoys TrailerPark CountryClub Athletic Spa PizzaWhirled Pony Jays Survivalist Boxing CoffeeShop Butcher Baseball StreetSports FireDept NursingHome Church Football Rocker PileOCrepe Bar Nightclub Army Above you can see an example of 2 Factory ZombieType zones and 1 TrailerPark ZombieType zone. The factory zones have been made to mainly only affect the zombies that spawn inside the buildings where as the trailer park zone has been made to cover the enitire park. E - Story Zones Story zones allow you to add small "scenes" to your map, such as a camping trip "gone wrong" as well as some others. As with the previous zones we first need to start off by adding the code snippets for these new zones to our maps .pzw file, once again add the objecttype line to the end of that section of code and the same with the objectgroup line, and if they already exist, they do not need to be added again: Spoiler <objecttype name="ZoneStory"/> <objectgroup name="ZoneStory" color="#ffffff" defaulttype="ZoneStory"/> You can now use the regular object tool to add Story Zones to your map. Best practice is to make the zone at least 10x10 tiles but you can also make them much larger to add a bit more randomization as to where they spawn in your zone. The zones themselves, like other zones do not guarantee a spawn of a story, only a chance. There are currently 3 different Story Zones used in vanilla, just like with vehicle zones and zombie type zones you will want to name each zone one of the following: Spoiler Lake Forest Beach As you can imagine, each one spawns vehicles/items/zombies you might expect to find in a "scene" from a zone of that type (eg. a bunch of tents, a campfire and a zombie eating some hiker/camper corpses). Above you can see an example of a Forest story zone and a Lake story zone. F - Loot Zones The new loot zones work alongside the new loot distribution system to allow us to take loot customization to a whole new level, 2 identical houses, but one with a loot zone over the top can produce wildly different loot spawns if you want it to. You do not need to add any loot zones to your map but they will offer wider loot variety and easier control of it. As with the previous sections, you will first need to add the code for these new zones to your map mods .pzw file: Spoiler <objecttype name="LootZone"/> <objectgroup name="LootZone" color="#ff00ff" defaulttype="LootZone"/> You can now add loot zones to the map the same way as any other zones. There are currently only a few zones used in the vanilla game (Rich, Poor, TrailerPark and Army), with more on the way, but you can easily create and use your own loot zones too. Here is a seperate guide about customizing loot for your map mod: Once all cells have had their zones added close any cells left open so you are back to the main world overview in WorldEd. Click on File and the Generate Lots>All Cells. If they aren't already then make sure your path to your lots directory and zombie spawn image are complete. Then for your tiles definitions folder you want to point that to the media folder inside your Project Zomboid installation folder (steam>common>... etc). Once done, click ok. Click File and then "Write spawn points to lua", then click on File and click "Write objects to lua". G - Map Zones Build 41.6 introduced the new in-game mapping system which allows your map to be procedurally drawn from a top down and an isometric view in game. All it requires is to tag your buildings in buildingEd with a type (commercial, industrial etc) and to add some simple zones over your roads/trails. There is a simple standalone guide on how to add these and get your map mod working with the new in game system here: Step 7) Uploading to steam workshop Spoiler Create a folder (anywhere for now, desktop is handy) with the name of your mod (e.g MyMapMod), place your mods preview picture (named preview.png) and a .txt file called "Workshop" which includes the following code: Spoiler version=1 title=Your Mod Name Here description=Your mod description here description=Second line of your mod description here (you can add more description= lines if you like) tags= visibility=public then save the file. Within the same folder as these 2 files create a new folder called "Contents", and inside the Contents folder add another folder called "mods". Inside this folder is where you want to copy and paste your mods main folder (the one you have been placing into c:\Users\Yourusernamehere\Zomboid\Mods when you test your mod in game). Once this is done cut/copy/paste the entire folder structure into your C":\Users\YourUserName\Zomboid\Workshop" folder and load up PZ. Click the "Workshop" button towards the bottom left and the click "create and update items", then select your mod (if it doesn't show dbl check you added it to the correct folder which will be shown at the top of the screen). Make sure the items details are correct and then press next, your mod will then be uploaded to steam workshop (wait for the upload confirmation)and should be viewable within the hour. You now have a map mod on steam workshop! Anytime you update your mod, simply copy/paste the updated files over the existing ones in your "C:\Users\YourUserName\Zomboid\Workshop" folder and follow the above step again from loading up Project Zomboid, anyone subscribers will have the update pop up in their downloads automatically. Tips Spoiler Map Image Creation: If you are using paint.net, I recommend the Selective Palette plugin. You can choose a palette of colors and all pixels in your image will be assigned to the closest color. Find it here: http://forums.getpaint.net/index.php?/topic/8043-curtis-plugin-pack-update-for-354/ - Ciber Ninja More Coming Soon FAQ's Spoiler Coming Soon Other Helpful Guides Spoiler Building Making - Current Room Definitions How To Add Custom Texture Packs And Tile Definitions Blackbeard06's Video Mapping Tutorial - How to create lootable maps for your map mod How to customize Loot Spawns Big thanks to Capt_Paradox, Blackbeard06, Suomiboi, Thuztor and the whole modding community ❤️
-
This is very similar to adding foraging zones to your map, (step 6 of this tutorial: https://theindiestone.com/forums/index.php?/topic/21951-the-one-stop-tilezed-mapping-shop/ ) Simply add the following code to your map mods' PZW file the same way as in step 6 of the above guide: <objecttype name="ParkingStall"/> <objectgroup name="ParkingStall" color="#85929e" defaulttype="ParkingStall"/> List of vehicle zone names to use in WorldEd: bad good medium sport farm junkyard trafficjams trafficjamn trafficjame trafficjamw rtrafficjams rtrafficjamn rtrafficjame rtrafficjamw police ranger fire mccoy fossoil postal spiffo radio ambulance burnt The first group is the most common type of vehicle zones used. The second group are for traffic jams pointing in specific directions to immitate the flow of traffic. The ones prefixed with r will spawn less than the regular trafficjam zones. The third group are specific zones for the type of vehicles listed, they are still also spawn random cars but will also spawn the vehicle listed. The final one will add random burn out vehicles. Vehicle zones should be placed as a multiple of 4x3 tiles (4x3, 8x6, 28x3 etc) with 4x3 being a single vehicle, 4 being its side and 3 being its front/back. You can choose any color values you want for the different zones, just make sure they are hex color codes. Once done, load your map mod up in WorldEd, open a cell and add your new vehicle zones as you would foraging zones. Whenever you add a zone you need to use the objects panel on the left of the WorldEd window to give the zone a name (use the names listed above) that will be visible in WorldEd as a tag over the zone, making it easier to keep track of what you have placed where, if these are left blank then the game will default back to grabbing random vehicles from the ParkingStall zone. Example: After you have added vehicle zones to all of your cells, save your map. Once saved, generate your lots and then write objects to lua. You now have vehicle spawns in your map. If you are having trouble with your vehicle zones, you can always take a look at the vanilla objects.lua within the muldraugh folder of your zomboid install, once opened just search for "ParkingStall" to see examples of vehicle zones used in the vanilla vehicle branch. For aligning vehicles in parking stalls: Select a ParkingStall object. In the Properties panel, click the "add" button under Templates. Choose one of the 4 ParkingStallX templates. You should see "Direction=X" where the object name is displayed. The direction controls where the front (or back) edge of each vehicle is aligned. In the picture you can see a Direction=E ParkingStall facing a Direction=W ParkingStall. This is used to ensure the vehicles don't overlap each other, and leaves space for the player (and zombies) to walk between them. For single parking stalls, there is usually no need to choose a direction. The FaceDirection property can be added to ParkingStall objects to align the front of a vehicle to the edge specified by the Direction property. When this property is "false" or isn't assigned to a ParkingStall object, the vehicle will face in a random direction as before. This can be used for parallel-parked vehicles for example.
-
Right now we Project Zomboid players can only spawn in Rosewood, Riverside, West Point and Muldraugh which is just 4 towns. But what if we could also spawn in Fallas Lake, March Ridge, Doe Valley, etc. which could even include the infamous Louisville? I think it'd be nice to have more of a variety on where your survivor could start out. I mean we has players would still have to fight for our lives against the undead and travel far if we wanted to go anywhere else. We'd just start off in more places which we may find even better than the spawn towns for whatever reasons.
-
Coords: 13578x2040x0 The screenshot is from the "Project Zomboid Map Project" website, but I originally found it while playing. You can't see it in the screencap, but it blocks an oven and a couple of containers.
-
Marre de l'entraide ? Marre du PVE ? Rejoinds notre serveur FULL PVP ou les RAIDS sont autoriser !!! fraichement wipe ce serveur n'attend plus que toi pour vivre une aventure jamais vu dans project zomboid !!!! n'hésites pas à rejoindre notre discord pour plus d'infos !!!!! Serveur encadré , nombreux EVENT , MOD , CARTES etc !!! venez check c'est par ici : https://discord.gg/F68EzAda7z
- 1 reply
-
- projectzombiod
- pvpve
- (and 6 more)
-
---Raven Creek--- This adds the city of Raven Creek to the vanilla game world. The map has the following parameters - size 8*8 (64 cells) - more than 1400+ buildings (WorldEd), and most of them are multi-storey - more than 23000+ rooms (WorldEd) _____________________________________________________ There are three zones of different difficulty on the map. Each zone has its own characteristics, number of infected and amount of loot. Also affects how long you survive (standart +50%), there will be more zombies every day (unless you changed this in the sandbox settings). На карте три зоны разной сложности. У каждой свои особенности, и количество зараженных. Также влияет и то, как долго вы выживаете, с каждым днем зомби будет больше (если вы не изменили это в настройках песочницы). _________________________________________________________________________________________________________________________________________________________ Urban zone (red) Городская зона (красная) - A lot of loot (max) / Кол-во лута (макс) - a lot of zombies (max) / Кол-во зомби (макс) - a lot of weapons and ammo (max) / Кол-во огнестрела и амуниции (макс) - little space, alleyway tight (especially in buildings) / Узкие переулки и коридоры, особенно в зданиях - better not to shoot, no matter how much ammo u have / Лучше подумать, прежде чем стрелять - stealth can help a lot here/ Скрытность может хорошо помочь здесь - a lot of traffic jams(car will useless here) / Много пробок и аварий, передвижение на транспорте осложнено - high difficulty/ Высокая сложность Residential zone (green) Частный сектор (зеленая) - medium loot / Кол-во лута (среднее) - medium zombies / Немного зомби (только вначале) - medium weapons and ammo / Огнестрела меньше чем в других зонах - almost empty roads (you can use the car) / Пустые дороги и много пространства - medium difficulty / Средняя сложность Port zone (yellow) Портовая зона (желтая) (for PVP) (для ПВП) - A lot of loot (high) / Много лута - low-medium zombies / Мало зомби - a lot of weapons and ammo (high-max) / Много оружия - difficult to get here / Сложно добраться сюда - on this side of the coast there are several secret places with awards / Есть секретные места с наградой - low difficulty (the main threat in this zone is other players) / Без мультиплеера - низкая сложность - most loot in containers (you need a sledgehammer and luck) / Большинство лута находиться в контейнерах, нужна кувалда FAQ / Часто задаваемые вопросы Why do I have to start over after updating the map? For new content to appear, you need to start the game again, except if you have NOT BEEN in the city (RC), and started, for example, in Rosewood, and the update came out. Then when you come to RC there will be new content, even if you started playing on the old version. In general, as long as you have not appeared in the place where the city is, and updated in the process, you can safely continue to play. Почему мне нужно начинать заново после обновления карты? Чтобы появился новый контент, вам необходимо начать игру заново, исключение только если вы ЕЩЕ НЕ БЫЛИ в городе (RC), а начали например в Роузвуде, и вышло обновление. Тогда когда вы прибудете в RC там будет новый контент, даже если вы начали играть на старой версии. В общем пока вы не появлялись в месте где находится город, и обновились в процессе, вы спокойно можете продолжать играть. Why do I need to turn off the *Randomized house* chance option in sandbox? This feature causes bugs, and makes the overall appearance of the map worse. If you see a bug when one half of the garage door is open, the other half is closed, it is from this option. Also burned, or completely covered with curtains skyscrapers (which this option can do) look unpleasant. Почему мне нужно отключить опцию *Шанс найти убежище* в песочнице? Эта функция вызывает баги, и делает хуже общий вид карты. Если вы видите баг, когда одна половина гаражных ворот открыта, другая закрыта, это именно от этой опции. Также сгоревшие, или полностью покрытые шторами небоскребы (что также может делать эта опция) выглядят неприятно. Why do I need to enable the double-sized textures option in the game settings? Without this, ANY custom texture added to the map, will cause bugs, this applies not only to my mod, but in general any map except vanilla. Почему мне нужно включить двойной размер текстур в настройках игры? Без этого ЛЮБАЯ пользовательская текстура, добавленная на карту , будет вызывать баги, это касается не только моего мода, а вообще любой карты кроме ванильной. After a while, my fps drops and the game begins to glitch. Try restarting the computer. Через какое то время, фпс начинает падать, игра тормозить. Попробуйте перезагрузить компьютер. Is there an lootable in-game map for this mod? Not yet. Есть ли какая-нибудь внутриигровая карта, для этого мода? Пока еще нет. Why is there so much traffic jam on the map? This was done not only for immersion in the game, but also for balance, so that players would have difficulty destroying hordes with vehicles. Почему так много пробок на карте? Это было сделано не только для большего погружения, но и для баланса, чтобы игрокам было трудно уничтожать орды с помощью транспортных средств. FOR THOSE WHO DO NOT APPEAR RESPAWN ON MOD MAPS, OR MISSING TRANSPORT ON THESE MAPS, REINSTALL THE STEAM TO THE MAIN DISK (C: STANDARD) OR MOVE THE FOLDER WITH MAPS IN THE DIRECTORY OF THE GAME MANUALLY У ТЕХ У КОГО НЕ ПОЯВЛЯЮТСЯ РЕСПАВН НА МОДОВСКИХ КАРТАХ, ИЛИ ОТСУТСТВУЕТ ТРАНСПОРТ НА ЭТИХ КАРТАХ, ПЕРЕУСТАНОВИТЕ СТИМ НА ОСНОВНОЙ ДИСК (С ПО СТАНДАРТУ) ИЛИ ПЕРЕКИНЬТЕ ПАПКУ С КАРТОИ В КАТАЛОГ ИГРЫ ВРУЧНУЮ The main point of creating the city was to gain a different experience. Vanilla PZ is more based on survival where it's hard to find weapons, food, etc., but I tried to add more action - there is a lot of loot in Raven Сreek, a lot of weapons, but the difficulty is in the number of infected. There are a lot of narrow lanes where you will be eaten no matter how much loot you have, if you get too much attention. This requires a different approach. Therefore, the original idea of the city was in a huge number of everything, from weapons to the infected. Another reason why there is so much loot on the map. I don’t know about you, but I didn’t like empty towns in multiplayer, when after a short time of creating a server there was nothing left on the map, I hope that Raven Creek will improve this situation. In any case, the city was created specifically for multiplayer, where the city will have a lot of loot, a lot of zombies, and a lot of players (not always friendly). Don't forget to move things around in the game. Sometimes it can help. Although I reduced the total number of loot, it's still a lot, the map is not designed for one player, keep this in mind. You can show up at any of the 57 spawn points, some can be tough, especially on rooftops. Use balconies, fire exits to get down safely or if the exit from the roof is blocked. Основной идеей создания города было получение другого типа опыта. Ванильный PZ - это в основном сложности с поиском всего необходимого, создание базы и накопление ресурсов. Но мне хотелось добавить сюда больше активности. В Raven Сreek очень много лута и оружия, но сложность тут как в кол-ве зараженных, так и в неизвестном кол-ве их в зданиях, в сражениях в узких и тесных пространствах. Нужен другой подход - включать скрытность, качать огнестрел, использовать окружающую обстановку. Город планировался для быстрых рейдов, поэтому безопасных зон для базы нет и не будет (кроме одной). Крайне советую играть с бегунами. Вторая причина почему в городе так много лута - карта создана специально для мультиплеера. Думаю все помнят как быстро опустошали от лута ванильные города в мультиплеере. Надеюсь Raven Сreek улучшит эту ситуацию. Не забывайте двигать вещи в игре. Иногда это может помочь. Хоть я и уменьшил общее кол-во лута, его все равно много, карта не рассчитана на одного игрока, помните об этом. Вы можете появиться в любом из 57 точек спавна, некоторые могут быть жесткими, особенно на крышах. Используйте балконы, пожарные выходы, чтобы безопасно спуститься или если выход с крыши заблокирован. _________________________________________________ This map project uses some buildings from the Forum so I have got to give credit to the amazing people who upload their buildings. Эта карта использует многие здания с форума PZ, хочу выразить огромную благодарность людям чьи работы я использовал. Atoxwarrior BeastlyBean Blackbeard06 cmseter dko112 DoctahWong Doublebrain EUDOXIO EnvyDemon fluffe9911 GothicGhost grivcin Jela331 kaizokuroof Kennethdio LegoLand Leolvanov Maklane mads232 Mainulainen Neutz Neutralnz1 Project Zomboid (for example some buildings) rsdworker Sieben srandiny The googlator Traya Aclus Valindil Veged VikiDikRUS Way2sp00ky IndigoRebel zoeyflower 956Texas Especially thanks: -Z3759xy -Union city team -Jela331 (including for inspiration) For all your hard work and dedication! Hope I not forgotten someone I also want to thank policeBoi for his tutorial from Youtube _______________________________________________________ Download full map in 22K (OLD VERSION) Скачать карту в 22К (СТАРАЯ ВЕРСИЯ) https://ibb.co/TtkPX86 NEW VERSION (IN PROCESS) НОВАЯ ВЕРСИЯ (В ПРОЦЕССЕ) 2D Map (Карта) __________________________________________________ ДЛЯ ТОГО ЧТОБЫ НОРМАЛЬНО РАБОТАЛИ СТАРЫЕ СОХРАНЕНИЯ, ВАМ НУЖНО СКАЧАТЬ СТАРУЮ ВЕРСИЮ Чтобы поиграть в старую версию, нужно удалить папку по этому пути (из стима) C:\Program Files (x86)\Steam\steamapps\workshop\content\108600\2196102849 (у вас может отличаться, тогда используйте поиск) Далее скачиваете и кидаете туда же папку ниже (ссылка) https://www.dropbox.com/s/nthc13vis35ctql/RavenCreek.zip?dl=0 FOR THE OLD SAVINGS TO WORK CORRECTLY, YOU NEED TO DOWNLOAD THE OLD VERSION To play the old version, you need to delete the folder along this path (from Steam) C:\Program Files (x86)\Steam\steamapps\workshop\content\108600\2196102849 (it may differ for you, then use search) Then download and drop the folder below (link) https://www.dropbox.com/s/nthc13vis35ctql/RavenCreek.zip?dl=0 __________________________________________________ Disclaimer: If you are interested in playing this map give it a download and give me some feedback. Its still a working project so there might be a some bugs here. Thanks and enjoy the map. P.S. Bad english...
-
Infinite trees engulf half of the map. The bug manifests with a straight line of trees near Riverside that never ends. It could be a corruption of the map due to some mod, but it could also be just a vanilla malfunction. Images below (link) 1. https://drive.google.com/file/d/11_6aQlyZEAJHl-1trz1Lcmf72nWFCYkv/view?usp=sharing 2. https://drive.google.com/file/d/1s8PgDtb5BJDCEvFuVvle9S01EfB52NWi/view?usp=sharing
- 4 replies
-
- multiplayer
- 41.78.16
-
(and 1 more)
Tagged with:
-
I tried using debug mode because the loot didn't respawn for some time. I noticed that the map's "zone" type was changed to DeepForest. (Only some modmaps seem to have changed. These mode maps are originally set to town.) I don't know the exact cause, but I think that the problem may be that I often used this program. maybe.. not sure https://lordikol.github.io/PZ_MapCleaner/ Is there any way to reset this?
-
A wall from the roof is displayed inside, blocking player's view: (can't even see my character...) Here: https://map.projectzomboid.com/#12106x2007x5852 Same problem here: https://map.projectzomboid.com/#12106x2007x5852 can't see anything behind those huge tanks
-
ok so from my understanding there are "rooms " that determine the loot that spawns in the containers if this is the case does anyone know where to find a list of all the different names to call the rooms for different loot if this is not the case can someone please explain the way this works and many thanks for any help
-
CURRENT STATUS: ACTIVE Hi everyone. I started to develop the map of my village where I born. I hope I will finish it as soon as possible. Stay tune It will be a unique map, where every yard, every building will be unique. The map will be as realistic as possible copied from the real world. The first map that is not square. You will get lost among the corn and potato fields and hayfields, which will be very numerous. Yes, you can easily upgrade the farmer's skill, but the grown vegetables will still need to be found among the rotten and dried ones. You will feel the beauty of the village. There will be a lot of narrow streets with lots of fences and you won't be able to easily crush the zombies with your car. Each outing will be horror and pain for you. You know why ? Because, no police station here, no weapons. A lot of pain, ha-ha-ha. It will be a new experience in the world of Project Zomboid. ---------------------------------------------------------------------------------------------------------------------------------------------------------------------------------------------------------------------------- Population - 3358 persons ( + 2 big cemetaries ) Game area - 10 x 10 cells ( aproximately ) Private courtyards and houses - 1000 items ( aproximately quantity) Another buildings - church , liceum complex , ambulatory ( little hospital ) , music school, cement factory , big stadium , small stadium with artificial turf , farm , trainstation , different shops , post etc. ---------------------------------------------------------------------------------------------------------------------------------------------------------------------------------------------------------------------------- WHEN MAP WILL BE PUBLISH ? First playable beta will be when I finished 15 cells. The map will be developed when will be developed. PLANS ~ symbol means what this area for concrete beta could be change CURRENT MAP STATUS MARCH 1, 2023 ( 11:11 , Kiev time ) Buildings: 129 ( +15 ) Rooms: 785 ( +38 ) Room rects: 1023 ( +46 ) Room objects: 1152 ( +80 ) >>>> PREVIOUS VERSION <<<< Topic will be updated time to time. Stay tune
-
Hello! I would like to create a replica map of my hometown from real life into Project Zomboid. I would like to know what 1 pixel in the game map would be equal to in real life. How many feet/meters is 1 pixel equal to?
-
Just stumbled over a small zone error while recreating a road within cell 41,23 The street polygon increases, with the same street width
-
Hi there, I have a map mod with multiple map directories. However, I would like to define my own collection of spawn points as several spawn regions, so I've added three more Map Directories which each represent one of such spawn regions. The spawn regions are displayed and basically works, but neither the description text nor the thumbnail are displayed in multiplayer. But it works fine in single player. I was at least able to translate the titles with a custom solution. But I guess, this should be possible by the core logic itself. This is my folder structure: map.info title=Green Zone lots=Muldraugh, KY description=Initial Description Green Zone fixed2x=true description.txt Übersetzte Beschreibung für grüne Zonen title.txt (1) Starte in einer grünen Zone objects.lua (shortened for better readability) objects = { { name = "", type = "SpawnPoint", x = 10916, y = 10133, z = 0, width = 1, height = 1, properties = { Professions = "all" } }, { name = "", type = "SpawnPoint", x = 10803, y = 10073, z = 0, width = 1, height = 1, properties = { Professions = "all" } }, { name = "", type = "SpawnPoint", x = 10919, y = 10132, z = 0, width = 1, height = 1, properties = { Professions = "all" } }, -- ... } spawnpoints.lua function SpawnPoints() return { unemployed = { { worldX = 36, worldY = 33, posX = 116, posY = 233, posZ = 0 }, { worldX = 36, worldY = 33, posX = 3, posY = 173, posZ = 0 }, { worldX = 36, worldY = 33, posX = 119, posY = 232, posZ = 0 }, } } end DebugServer_spawnregions.lua function SpawnRegions() return { { name = '(1) Green Zone', file = 'media/maps/GartenEdenSpawnsGreenZone/spawnpoints.lua' }, { name = '(2) Yellow Zone', file = 'media/maps/GartenEdenSpawnsYellowZone/spawnpoints.lua' }, { name = '(3) Red Zone', file = 'media/maps/GartenEdenSpawnsRedZone/spawnpoints.lua' } } end Rendered Result: ____________ My workaround to get at least the names translated I've added an file spawnregions.txt to my map mods Translate dir as follows: return { ['EN'] = { GreenZone = '(1) Start in a green zone', YellowZone = '(2) Start in a yellow zone', RedZone = '(3) Start in a red zone', }, ['DE'] = { GreenZone = '(1) Starte in einer gr\195\188nen Zone', YellowZone = '(2) Starte in einer gelben Zone', RedZone = '(3) Starte in einer roten Zone', } } And modified my DebugServer_spawnregions.lua as follows: function SpawnRegions() local activeLang = getCore():getOptionLanguageName() local sGreenZone = '(1) Start in a green zone' local sYellowZone = '(2) Start in a yellow zone' local sRedZone = '(3) Start in a red zone' local translationTable = {} if getActivatedMods():contains('GartenEdenMaps') then local file = getModFileReader('GartenEdenMaps', 'media/lua/shared/Translate/spawnregions.txt', false) if file then local scanline = file:readLine() local content = scanline and '' or 'return {}' while scanline do content = content .. scanline .. '\n' scanline = file:readLine() end file:close() translationTable = loadstring(content)() if translationTable[activeLang] ~= nil then sGreenZone = translationTable[activeLang].GreenZone or sGreenZone sYellowZone = translationTable[activeLang].YellowZone or sYellowZone sRedZone = translationTable[activeLang].RedZone or sRedZone end end end return { { name = 'Muldraugh, KY', file = 'media/maps/Muldraugh, KY/spawnpoints.lua' }, -- just as reference { name = sGreenZone, file = 'media/maps/GartenEdenSpawnsGreenZone/spawnpoints.lua' }, { name = sYellowZone, file = 'media/maps/GartenEdenSpawnsYellowZone/spawnpoints.lua' }, { name = sRedZone, file = 'media/maps/GartenEdenSpawnsRedZone/spawnpoints.lua' } } end So I was able to get this result: In singleplayer it looks like follows: (just borrowed image of bedford to ensure the image file isn't the problem) So what the heck do I wrong? Thanks in advance, stuck1a
-
Version : 41.78.16 (Steam) Player Mode : Singleplayer and MP. Host Or Dedicated : N/A Mods : More map icons (in the screenshots taken.) (Replicated w/o mods.) Reproduction Steps : Location(s) : Multiple areas in Louisville. Problem : Several roads in the Louisville area are not indicated on the map in partiality or entirety. *The roads I indicated are somewhat aggressive in some cases as some start as alleyways but turn into parking lots.
-
First, create the following file structure (if you are adding the lootable map to your own map mod then create all folders within the media folder below in your map mods media folder instead): Spoiler MyLootableMapsMod >media >>lua >>>server >>>>Items >>>client >>>>ISUI >>>>>Maps >scripts >textures >>worldMap Next up create a .txt file in the scripts folder called something like "mylootablemap" (except make it more unique to avoid any possible compatability issues with other mods that might use the same names), it should include this code: Spoiler module Base { item MyLootableMap { DisplayCategory = Cartography, Type = Map, DisplayName = Your map name here, Icon = Map, Weight = 0.1, Map = MyLootableMap, WorldStaticModel = Map, } } The above code is adding a new item with the internal name "MyLootableMap" (so again make sure yours is something unique) into the vanilla pool of items, the above settings work for maps. The next file you need you will want to create in the "media\lua\server\Items" folder, call it something like MyLootableMapDistribution.lua but again make it's a unique name to avoid any possible mod imcompatability with other mods. It should contain the following code: Spoiler local function preDistributionMerge() table.insert(ProceduralDistributions.list.MagazineRackMaps.items, "MyLootableMap"); table.insert(ProceduralDistributions.list.MagazineRackMaps.items, 50); end Events.OnPreDistributionMerge.Add(preDistributionMerge); In the above code you can see that we are adding our new Item "MyLootableMap" into the "MagazineRackMaps" loot table inside of ProceduralDistributions.lua, this will affect any roomDef of any building that pulls from the MagazineRackMaps loot table. We are doing it this way as the definition we want to add to has the "procedural" tag in Distributions.lua and is therefore using the procedural loot tables. The number 50 is the "weight" of the item you are adding, higher number = more chance. To find the current room and container definitions, navigate to your "steamapps\common\ProjectZomboid\media\lua\server\Items" folder and open the Distributions.lua file. If the definition you want to add your item to is not procedural (does not have the "procedural = true" line) then you want to add this code instead of the above code: Spoiler local myMapdistributionTable = { all = { shelves = { rolls = 5, items = { "Magazine", 20, "Newspaper", 20, "Book", 20, "SheetPaper2", 20, "Notebook", 20, "BookTailoring1", 2, "BookTailoring2", 1, "BookTailoring3", 0.7, "BookTailoring4", 0.5, "BookTailoring5", 0.3, "BookCarpentry1", 2, "BookCarpentry2", 1, "BookCarpentry3", 0.7, "BookCarpentry4", 0.5, "BookCarpentry5", 0.3, "BookCooking1", 2, "BookCooking2", 1, "BookCooking3", 0.5, "BookCooking4", 0.3, "BookForaging1", 2, "BookForaging2", 1, "BookForaging3", 0.7, "BookForaging4", 0.5, "BookForaging5", 0.3, "BookFarming1", 2, "BookFarming2", 1, "BookFarming3", 0.7, "BookFarming4", 0.5, "BookFarming5", 0.3, "BookFishing1", 2, "BookFishing2", 1, "BookFishing3", 0.7, "BookFishing4", 0.5, "BookFishing5", 0.3, "BookTrapping1", 2, "BookTrapping2", 1, "BookTrapping3", 0.7, "BookTrapping4", 0.5, "BookTrapping5", 0.3, "BookFirstAid1", 2, "BookFirstAid2", 1, "BookFirstAid3", 0.7, "BookFirstAid4", 0.5, "BookFirstAid5", 0.3, "BookMetalWelding1", 2, "BookMetalWelding2", 1, "BookMetalWelding3", 0.7, "BookMetalWelding4", 0.5, "BookMetalWelding5", 0.3, "BookElectrician1", 2, "BookElectrician2", 1, "BookElectrician3", 0.7, "BookElectrician4", 0.5, "BookElectrician5", 0.3, "BookMechanic1", 2, "BookMechanic2", 1, "BookMechanic3", 0.7, "BookMechanic4", 0.5, "BookMechanic5", 0.3, "FishingMag1", 1, "FishingMag2", 1, "HuntingMag1", 1, "HuntingMag2", 1, "HuntingMag3", 1, "HerbalistMag", 1, "FarmingMag1", 1, "CookingMag1", 1, "CookingMag2", 1, "ElectronicsMag1", 1, "ElectronicsMag2", 1, "ElectronicsMag3", 1, "ElectronicsMag4", 1, "ElectronicsMag5", 1, "MechanicMag1", 1, "MechanicMag2", 1, "MechanicMag3", 1, "EngineerMagazine1", 1, "EngineerMagazine2", 1, "MetalworkMag1", 1, "MetalworkMag2", 1, "MetalworkMag3", 1, "MetalworkMag4", 1, "Journal", 2, "Radio.RadioBlack",2, "Radio.RadioRed",1, "MyLootableMap", 50, } }, } } table.insert(Distributions, 2, myMapdistributionTable); This would add your map to the existing "all>shelves" definitions, which would be every shelves container in the game world not inside a roomdef defined inside Distributions.lua, so for example your map would not spawn on shelves that are placed inside a "bookstore" room def as that room def already exists in Distributions.lua with a rule for shelves. You can also check this thread: for a more in-depth guide to working with the loot tables. Lastly, inside of your "media\lua\client\ISUI\Maps" folder create a new file called something like MyLootableMapDefinition.lua (make it unique to your mod instead of a generic name) and include the following code: Spoiler require "ISMapDefinitions" MapUtils = {} function MapUtils.initDirectoryMapData(mapUI, directory) local mapAPI = mapUI.javaObject:getAPIv1() local file = directory..'/worldmap-forest.xml' if fileExists(file) then mapAPI:addData(file) end file = directory..'/worldmap.xml' if fileExists(file) then mapAPI:addData(file) end -- This call indicates the end of XML data files for the directory. -- If map features exist for a particular cell in this directory, -- then no data added afterwards will be used for that same cell. mapAPI:endDirectoryData() mapAPI:addImages(directory) end function MapUtils.initDefaultMapData(mapUI) local mapAPI = mapUI.javaObject:getAPIv1() mapAPI:clearData() -- Add data from highest priority (mods) to lowest priority (vanilla) local dirs = getLotDirectories() for i=1,dirs:size() do MapUtils.initDirectoryMapData(mapUI, 'media/maps/'..dirs:get(i-1)) end end local MINZ = 0 local MAXZ = 24 local WATER_TEXTURE = false function MapUtils.initDefaultStyleV1(mapUI) local mapAPI = mapUI.javaObject:getAPIv1() local styleAPI = mapAPI:getStyleAPI() local r,g,b = 219/255, 215/255, 192/255 mapAPI:setBackgroundRGBA(r, g, b, 1.0) mapAPI:setUnvisitedRGBA(r * 0.915, g * 0.915, b * 0.915, 1.0) mapAPI:setUnvisitedGridRGBA(r * 0.777, g * 0.777, b * 0.777, 1.0) styleAPI:clear() local layer = styleAPI:newPolygonLayer("forest") layer:setMinZoom(13.5) layer:setFilter("natural", "forest") if true then layer:addFill(MINZ, 189, 197, 163, 0) layer:addFill(13.5, 189, 197, 163, 0) layer:addFill(14, 189, 197, 163, 255) layer:addFill(MAXZ, 189, 197, 163, 255) else layer:addFill(MINZ, 255, 255, 255, 255) layer:addFill(MAXZ, 255, 255, 255, 255) layer:addTexture(MINZ, "media/textures/worldMap/Grass.png") layer:addTexture(MAXZ, "media/textures/worldMap/Grass.png") layer:addScale(13.5, 4.0) layer:addScale(MAXZ, 4.0) end layer = styleAPI:newPolygonLayer("water") layer:setMinZoom(MINZ) layer:setFilter("water", "river") if not WATER_TEXTURE then layer:addFill(MINZ, 59, 141, 149, 255) layer:addFill(MAXZ, 59, 141, 149, 255) else layer:addFill(MINZ, 59, 141, 149, 255) layer:addFill(14.5, 59, 141, 149, 255) layer:addFill(14.5, 255, 255, 255, 255) layer:addTexture(MINZ, nil) layer:addTexture(14.5, nil) layer:addTexture(14.5, "media/textures/worldMap/Water.png") layer:addTexture(MAXZ, "media/textures/worldMap/Water.png") -- layer:addScale(MINZ, 4.0) -- layer:addScale(MAX, 4.0) end layer = styleAPI:newPolygonLayer("road-trail") layer:setMinZoom(12.0) layer:setFilter("highway", "trail") layer:addFill(12.25, 185, 122, 87, 0) layer:addFill(13, 185, 122, 87, 255) layer:addFill(MAXZ, 185, 122, 87, 255) layer = styleAPI:newPolygonLayer("road-tertiary") layer:setMinZoom(11.0) layer:setFilter("highway", "tertiary") layer:addFill(11.5, 171, 158, 143, 0) layer:addFill(13, 171, 158, 143, 255) layer:addFill(MAXZ, 171, 158, 143, 255) layer = styleAPI:newPolygonLayer("road-secondary") layer:setMinZoom(11.0) layer:setFilter("highway", "secondary") layer:addFill(MINZ, 134, 125, 113, 255) layer:addFill(MAXZ, 134, 125, 113, 255) layer = styleAPI:newPolygonLayer("road-primary") layer:setMinZoom(11.0) layer:setFilter("highway", "primary") layer:addFill(MINZ, 134, 125, 113, 255) layer:addFill(MAXZ, 134, 125, 113, 255) layer = styleAPI:newPolygonLayer("railway") layer:setMinZoom(14.0) layer:setFilter("railway", "*") layer:addFill(MINZ, 200, 191, 231, 255) layer:addFill(MAXZ, 200, 191, 231, 255) -- Default, same as building-Residential layer = styleAPI:newPolygonLayer("building") layer:setMinZoom(13.0) layer:setFilter("building", "yes") layer:addFill(13.0f, 210, 158, 105, 0) layer:addFill(13.5f, 210, 158, 105, 255) layer:addFill(MAXZ, 210, 158, 105, 255) layer = styleAPI:newPolygonLayer("building-Residential") layer:setMinZoom(13.0) layer:setFilter("building", "Residential") layer:addFill(13.0f, 210, 158, 105, 0) layer:addFill(13.5f, 210, 158, 105, 255) layer:addFill(MAXZ, 210, 158, 105, 255) layer = styleAPI:newPolygonLayer("building-CommunityServices") layer:setMinZoom(13.0) layer:setFilter("building", "CommunityServices") layer:addFill(13.0f, 139, 117, 235, 0) layer:addFill(13.5f, 139, 117, 235, 255) layer:addFill(MAXZ, 139, 117, 235, 255) layer = styleAPI:newPolygonLayer("building-Hospitality") layer:setMinZoom(13.0) layer:setFilter("building", "Hospitality") layer:addFill(13.0f, 127, 206, 225, 0) layer:addFill(13.5f, 127, 206, 225, 255) layer:addFill(MAXZ, 127, 206, 225, 255) layer = styleAPI:newPolygonLayer("building-Industrial") layer:setMinZoom(13.0) layer:setFilter("building", "Industrial") layer:addFill(13.0f, 56, 54, 53, 0) layer:addFill(13.5f, 56, 54, 53, 255) layer:addFill(MAXZ, 56, 54, 53, 255) layer = styleAPI:newPolygonLayer("building-Medical") layer:setMinZoom(13.0) layer:setFilter("building", "Medical") layer:addFill(13.0f, 229, 128, 151, 0) layer:addFill(13.5f, 229, 128, 151, 255) layer:addFill(MAXZ, 229, 128, 151, 255) layer = styleAPI:newPolygonLayer("building-RestaurantsAndEntertainment") layer:setMinZoom(13.0) layer:setFilter("building", "RestaurantsAndEntertainment") layer:addFill(13.0f, 245, 225, 60, 0) layer:addFill(13.5f, 245, 225, 60, 255) layer:addFill(MAXZ, 245, 225, 60, 255) layer = styleAPI:newPolygonLayer("building-RetailAndCommercial") layer:setMinZoom(13.0) layer:setFilter("building", "RetailAndCommercial") layer:addFill(13.0f, 184, 205, 84, 0) layer:addFill(13.5f, 184, 205, 84, 255) layer:addFill(MAXZ, 184, 205, 84, 255) end function MapUtils.overlayPaper(mapUI) local mapAPI = mapUI.javaObject:getAPIv1() local styleAPI = mapAPI:getStyleAPI() local layer = styleAPI:newTextureLayer("paper") layer:setMinZoom(0.00) local x1 = mapAPI:getMinXInSquares() local y1 = mapAPI:getMinYInSquares() local x2 = mapAPI:getMaxXInSquares() + 1 local y2 = mapAPI:getMaxYInSquares() + 1 layer:setBoundsInSquares(x1, y1, x2, y2) layer:setTile(true) layer:setUseWorldBounds(true) layer:addFill(14.00, 128, 128, 128, 0) layer:addFill(15.00, 128, 128, 128, 32) layer:addFill(15.00, 255, 255, 255, 32) layer:addTexture(0.00, "media/white.png") layer:addTexture(15.00, "media/white.png") layer:addTexture(15.00, "media/textures/worldMap/Paper.png") end function MapUtils.revealKnownArea(mapUI) local mapAPI = mapUI.javaObject:getAPIv1() local x1 = mapAPI:getMinXInSquares() local y1 = mapAPI:getMinYInSquares() local x2 = mapAPI:getMaxXInSquares() local y2 = mapAPI:getMaxYInSquares() WorldMapVisited.getInstance():setKnownInSquares(x1, y1, x2, y2) end ----- local function replaceWaterStyle(mapUI) if not WATER_TEXTURE then return end local mapAPI = mapUI.javaObject:getAPIv1() local styleAPI = mapAPI:getStyleAPI() local layer = styleAPI:getLayerByName("water") if not layer then return end layer:setMinZoom(MINZ) layer:setFilter("water", "river") layer:removeAllFill() layer:removeAllTexture() layer:addFill(MINZ, 59, 141, 149, 255) layer:addFill(MAXZ, 59, 141, 149, 255) end local function overlayPNG(mapUI, x, y, scale, layerName, tex, alpha) local texture = getTexture(tex) if not texture then return end local mapAPI = mapUI.javaObject:getAPIv1() local styleAPI = mapAPI:getStyleAPI() local layer = styleAPI:newTextureLayer(layerName) layer:setMinZoom(MINZ) layer:addFill(MINZ, 255, 255, 255, (alpha or 1.0) * 255) layer:addTexture(MINZ, tex) layer:setBoundsInSquares(x, y, x + texture:getWidth() * scale, y + texture:getHeight() * scale) end local function overlayPNG2(mapUI, x, y, scaleX, scaleY, tex) local mapAPI = mapUI.javaObject:getAPIv1() local styleAPI = mapAPI:getStyleAPI() local layer = styleAPI:newTextureLayer("lootMapPNG") layer:setMinZoom(MINZ) local texture = getTexture(tex) layer:addFill(MINZ, 255, 255, 255, 128) layer:addTexture(MINZ, tex) layer:setBoundsInSquares(x, y, x + texture:getWidth() * scaleX, y + texture:getHeight() * scaleY) end -- -- -- -- -- Now, after the last set of dashed lines you can add your lootable map definitions with the following code: Spoiler LootMaps.Init.MyLootableMap = function(mapUI) local mapAPI = mapUI.javaObject:getAPIv1() MapUtils.initDirectoryMapData(mapUI, 'media/maps/MyMapMod') -- 'media/maps/MyMapMod' - this should be where your maps worldmap.xml file is MapUtils.initDefaultStyleV1(mapUI) -- Specify the appearance of the map. replaceWaterStyle(mapUI) -- Use solid color for water instead of a texture. mapAPI:setBoundsInSquares(12900, 9900, 14399, 11399) -- (starting x, starting y, ending x, ending y) of the area you want to display and uncover, in World Co-ordinates. overlayPNG(mapUI, 14299, 9900, 0.666, "badge", "media/textures/worldMap/MyLootableMapBadge.png") -- Add your lootable maps banner PNG. overlayPNG(mapUI, 13000, 10000, 0.666, "legend", "media/textures/worldMap/Legend.png") -- Add the legend PNG. MapUtils.overlayPaper(mapUI) -- Draw a paper-like texture overtop the map. end Make sure that your "LootMaps.Init.MyLootableMap" on line 1 matches the name you specified on the "Maps = " line in your map item script you made earlier in this tutorial. The rest of the code is commented to describe what they do. The "textures\worldMap" folder that you created at the start should be used to store your maps name banner png if you have one and is referenced in the above code to make your lootable map look more official. As you can see, no external PNG's need to be created as the map is drawn from the data stored in the maps worldmap.xml file, which is what the "mapAPI:setBoundsInSquares" is using to draw a certain section of the overall world map. And that's it, copy your entire folder structure into your "C:\Users\YourUserNameHere\Zomboid\Mods" folder, load up the game, enable the mod (Your map mod if you made your lootable maps as part of a map mod) and start a new game, you now have your lootable map in game and waiting for you to find, and when you do it will uncover that area automatically on the main in game map. If you need a working example you can always subscribe to Bedford Falls on Steam and check it's workshop folder "steamapps\workshop\content\108600\522891356" . It's handy to verify your folder/file structure etc if you're having problems.
-
Hello. Sugestion to put information to "how update interactive map" as a creator it would be nice to have it with other maps in browser. There are many maps rn that are not official but are very detailed and lack proper maping. If there is infromation how to do that i didint found it. https://map.projectzomboid.com/?#9702x5663x10
-
There's no vehicle icon for the mapping function. PLEASE add one! Pretty please with zeds on top.
-
Hey y'all! I decided to try to make a small map for the first time using the project zomboid map editor. I watched a tutorial and have all my files set up properly (I used paint.net to make a png file, a _veg.png file, and a _zombiespawnmap.bmp file) however, it seems to have blended the colors when I saved it so the map won't render properly as it cant read the RGB colors even though when I painted the map I triple checked that I used the correct corresponding RGB codes. Does anyone know what I'm doing wrong/how to fix this? Thanks!


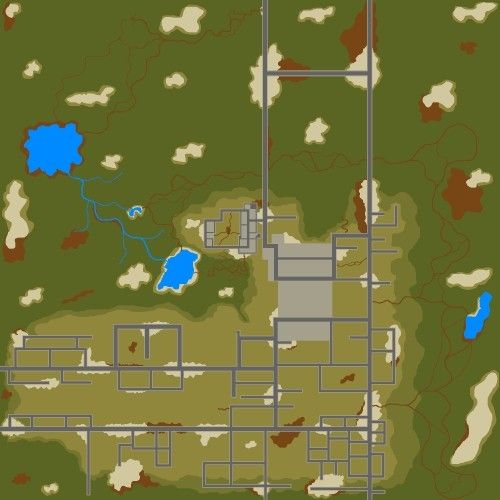
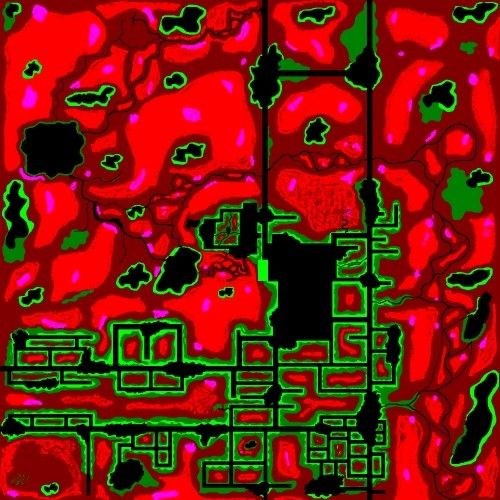


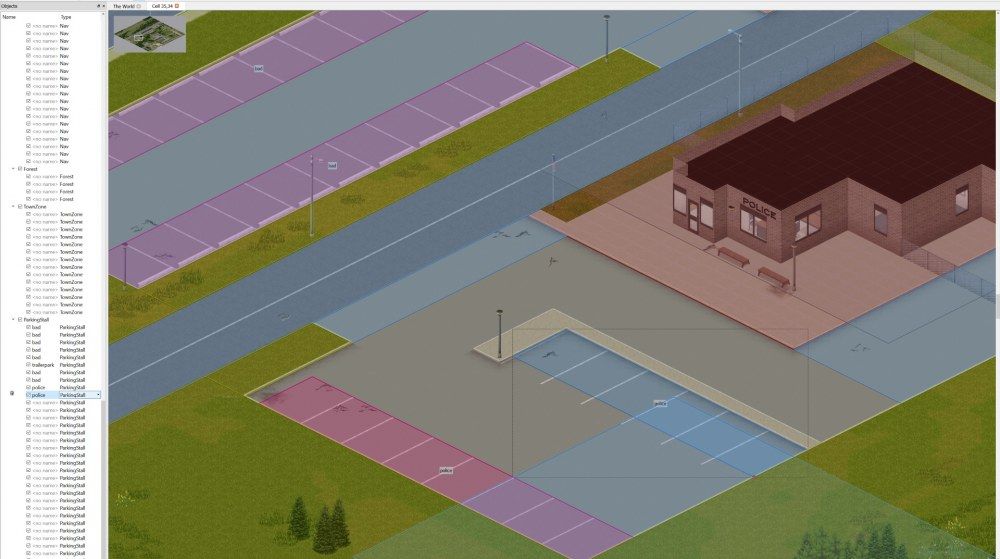


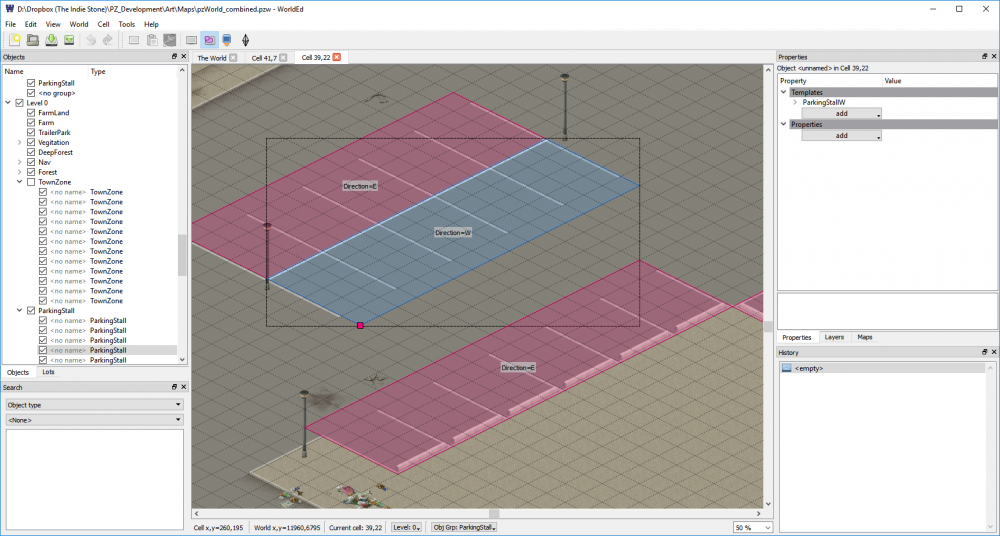
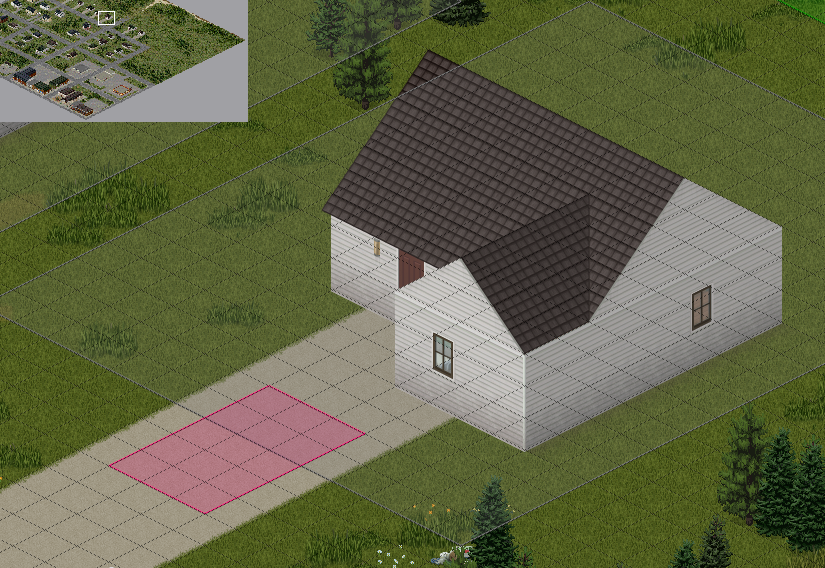
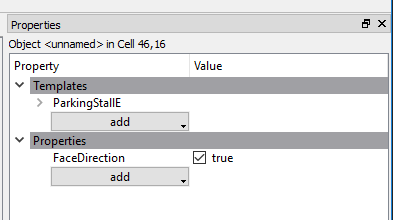





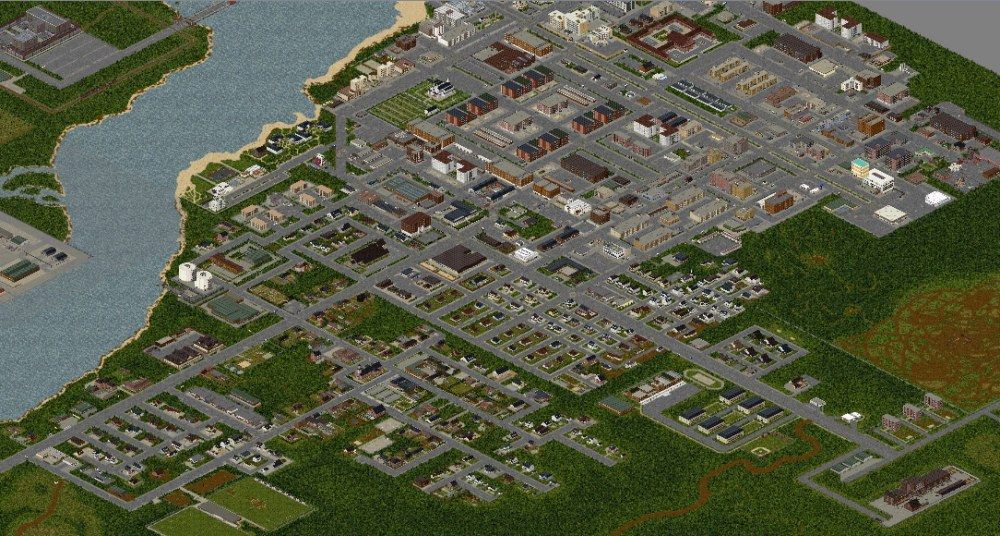
.thumb.jpg.c3d5ec3a5d3d87b116362ec27a513a98.jpg)
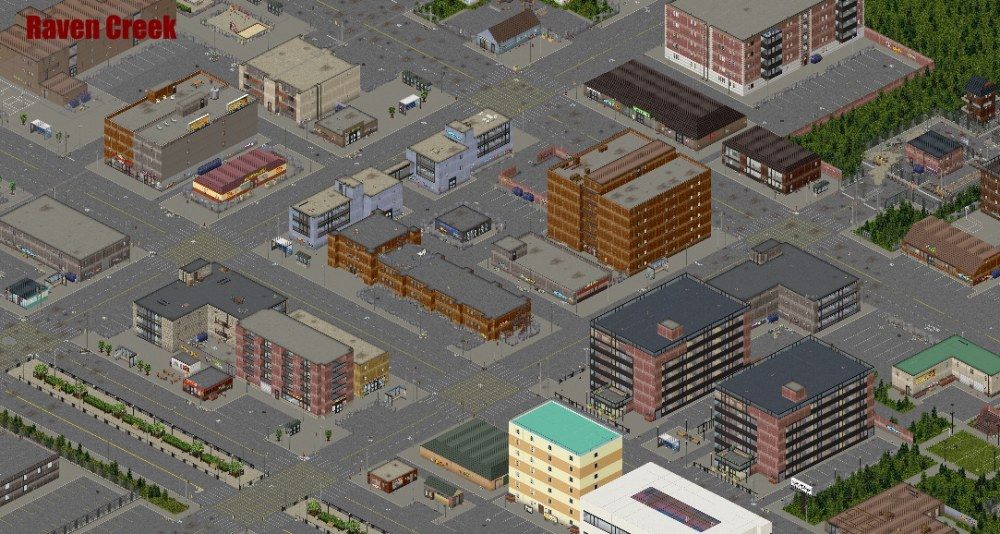


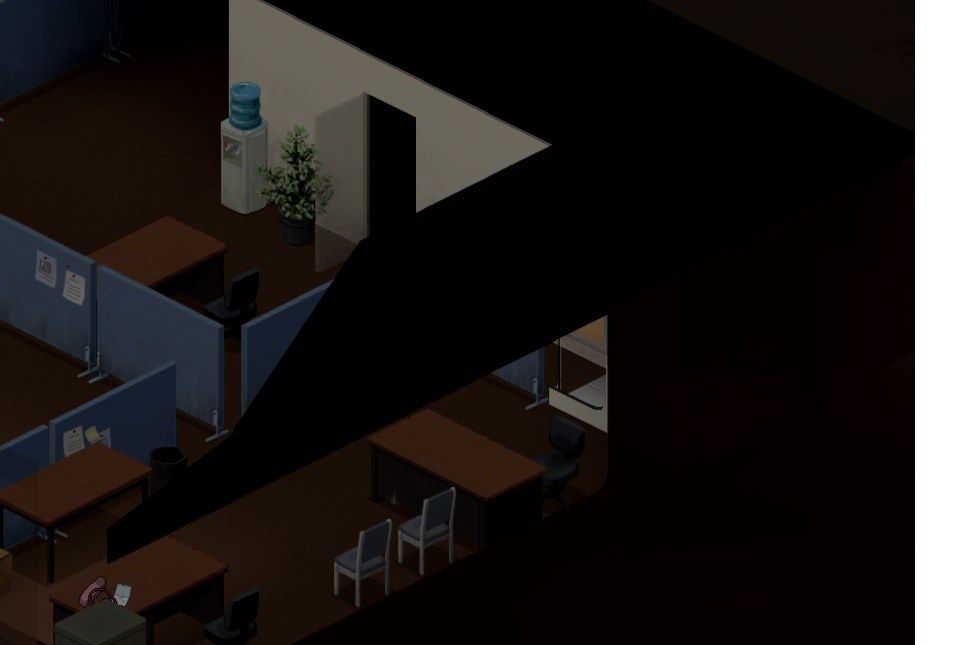





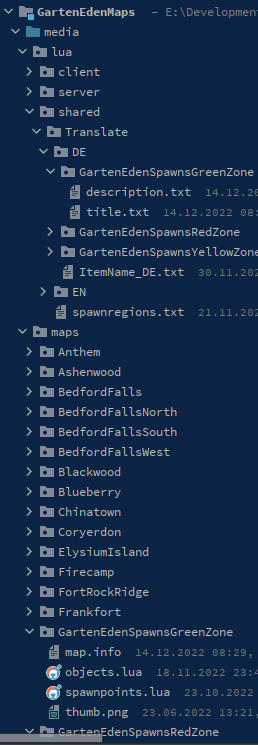


.thumb.png.b779756751d0e5518869ffef9e596265.png)
.thumb.png.9d5a4a8d0a1fb92cde229068fa9068de.png)
.thumb.png.ee7bbf3767444dc106742ecce2269dd1.png)
.thumb.png.5a2fb7a3e7171a71434a1a8d6e7bb263.png)

