Search the Community
Showing results for tags 'mods'.
-
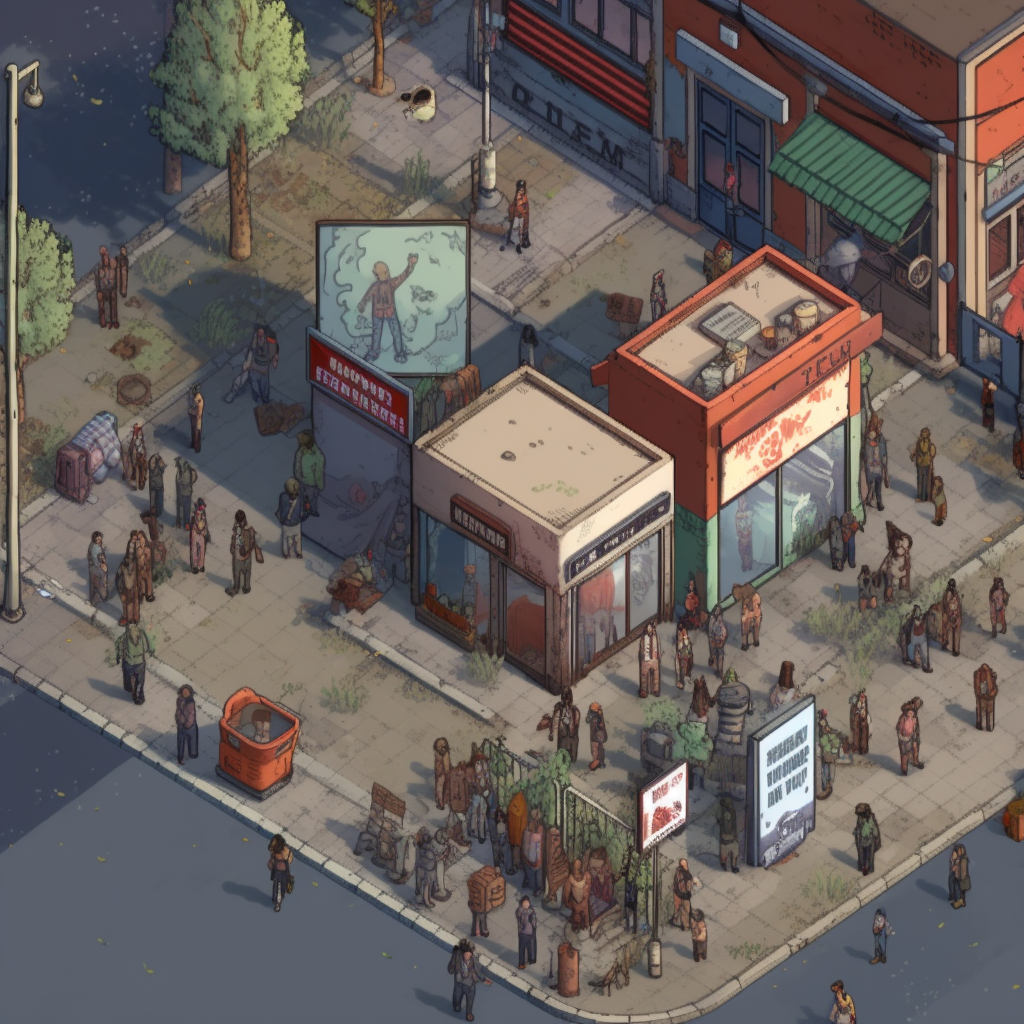
 FRESH WIPE World Boss |Solo Boss |Zombie Lair |Genetic Mutation |Special Ability Awakening |Achievements |Dead Zone Dedicated server 24/7 Discord: discord.gg/zT8N5pTbXJ 📷 SPECIAL FEATURES 📷 Unique features only available on Vietland server World Boss: Boss appears outside the regular Map and protects rich loot areas Solo Boss: Boss for 1 player to fight. Boss will have many special skills. Solo End Boss is the biggest challenge for players to overcome alone Mini Boss + Elite: appears in certain areas, much stronger than regular zombies Zombie Lair Archipelago System: go to the island and purge all zombies on the island. The number of islands to complete is unlimited. Difficulty gradually increases Genetic Mutation System: Survive 7 days ingame so the character can mutate genetically Special Ability Awakening System: Survive 14 days ingame to awaken a special ability. Cast fireball, lightning strike, poison ball, ... Achievement System: There are nearly 200 achievements for players to complete Upgrade Equipment System: Upgrade weapons and equipment Assurance System: Use insurance to avoid losing rare items when you die PZ Token System: Change rare items from the previous season into Tokens, then use Tokens to exchange for gift packages in the next season Zombie Zones: The map is divided into 5 areas: Easy, Normal, Hard, Hell, Dead. Depending on each area, zombies have different difficulty levels There is a currency system and NPC Shop You can see details of all the above features in the server's discord Full PVE on main server PVP will be held on a separate server and get character data from the main server. When participating in an event on the event server, if the character dies, it will not have any effect on the main server VIDEO about BOSS of VIETLAND SERVER https://youtu.be/d53gUV6yly0 https://youtu.be/Hf2HtruH96Q https://youtu.be/4-V2F4sJNM8 https://youtu.be/DUB0-OBDZL0 https://youtu.be/lKKRM2oeXQU https://youtu.be/jTduSCz8XE0 https://youtu.be/evHQiZEuLus https://youtu.be/5sIc6giVrhM https://youtu.be/zarNW28KmtI VIDEO about Zombie Lair Archipelago https://youtu.be/7hcstq5565s
 -
please explain the difference between the server and client folders?
-
Is there a mod to either select which buttons show on the upper left toolbar? Or perhaps resize and move it? I can't seem to find anything other than Immersive HUD which sounds good in theory but is fairly broken. Cheers!
-
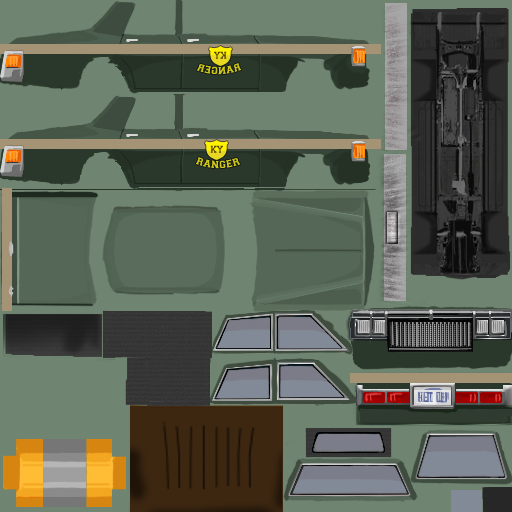
1) The first thing you want to do, as with most mods is to create your mods folder structure, use the image below as a reference, replacing MOD_NAME with the name of your mod: Don't worry about the files shown above, you will be creating them as you follow this guide, just make sure to remember, anytime you see "MOD_NAME" in this guide, replace that with the name you chose for your mod. 2) In your "..mods/MOD_NAME" folder, create your "mod.info" text file which contains the following code: Remember to replace all "MOD_NAME"'s with the actual name of your mod. 3) In the same folder, create/place your MOD_NAME.png , this will be the thumbnail used in game as the poster/picture for your mod. 4) Next up, in your "mods/MOD_NAME/media/lua/client" folder, create your MOD_NAME.lua file with the following code inside: This is the script that will load your model and scripts into the game, it also controls the spawn rate for the car in each type of zone as well as providing the vehicle mechanic overlay. Remember to replace all instances of "MOD_NAME" with the actual name you chose for your mod. 5) Next, in your "mods/MOD_NAME/media/scripts/vehicles" folder, create your MOD_NAME.txt file containing the following code: This script example contains all of the parameters to control the simulation of the vehicle, such as engine power, gear ratios, collision cube and much more. You will (hopefully) find it well commented to give you an idea of what each parameter does. You can look in the games "media\scripts\vehicles" folder for a vanilla vehicle script that more closely reflects the vehicle you are adding rather than starting with the example above, have a good look through them all to get a sense of the different templates you can use and the various changes that can be made to different components. 6) Now you need to (if you have not already) make the 3d model for your vehicle. We suggest using Blender, but as long as you're experienced in 3d modelling, any program that can export .ply files should work, just make sure your faces are triangulated, in Blender you can do this by selecting your model in Edit mode then pressing Ctrl + T. Then drag and drop the exported ply file onto the converter supplied below (unzip the below file, drag your .ply directly onto the .exe, do not double click the exe), it will output a new txt file with the same name as the .ply in the same directory. Copy the new .txt file into your "mods/MOD_NAME/media/models" folder as "Vehicles_MOD_NAME.txt This is the .ply to PZ convertor: PZ_PLYtoPZconverter.zip 7) Now it's time to create your vehicles texture files, these should all go into the "mods/MOD_NAME/media/textures/Vehicles" folder. First up is your "Vehicles_MOD_NAME_Shell.png" , this is the main texture image for your vehicle and needs to be 512x512 pixels, as do all of your textures, below is an example: Next there are 6 different overlay/detail png's to create, the first is for the vehicle lights ("Vehicles_MOD_NAME_Lights.png"): Then the vehicle rust ("Vehicles_MOD_NAME_Rust.png"): The next 2 image examples ("Vehicles_MOD_NAME_Shell_Damaged01.png" and "Vehicles_MOD_NAME_Shell_Damaged02.png") are to show light and heavy damage, respectively, on the vehicle's shell. They are used to represent dents in the bodywork: The next 2 image examples ("Vehicles_MOD_NAME_Overlays_Damaged01.png" and "Vehicles_MOD_NAME_Overlays_Damaged02.png") are very similar to the previous 2 except they are for showing damage on windows and lights as well as scratched on the body work: The last file we need is the vehicle colour mask ("Vehicles_MOD_NAME_Mask.png"), which should also be placed in your "mods/MOD_NAME/media/textures/Vehicles" folder. This tells the game which parts of your vehicle texture correspond to which part of your vehicle model and is needed to display damage, lowered windows and removed elements etc: Here the colour values to be used: Copy your complete mod folder structure into your C:\Users\YourUsernameHere\Zomboid\Mods folder, load the game, turn the mod on in the mod menu and start a new game, your new vehicle is now ready to be found and taken for a spin. Finally, here: ZAZ968M.zip - you can find an example vehicle mod using the above instructions. Notice the included example mod uses a slightly different process with its textures/overlays. The main texture is transparent while the detail has been shifted onto the vehicle_lights .png. This allows the game to automatically and procedurally generate different colours of your car when they are spawned in. Happy Modding!

-
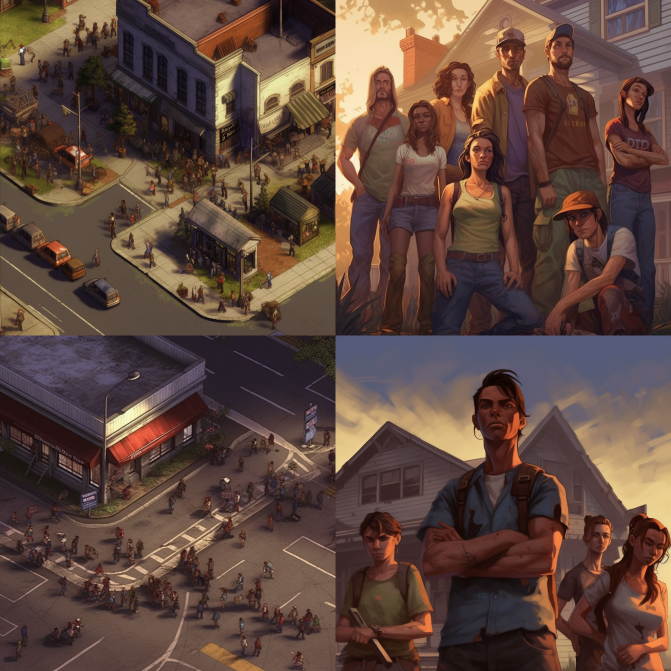
We have basements, we have RV Interiors, we have all the traits you would ever need, and they are dynamic! We have lots of maps!\n 100% Journal Recovery!\nRealistic systems, crouch, prone, excrementum, medicine etc. Whitelist on discord: https://discord.gg/sCmSPUxWr Check server stats on Battlemetrics: https://www.battlemetrics.com/servers/zomboid/25108368
-
Server IP : 45.26.230.245 Port : Default Come Join the Veracious Community! Are you looking to join a project zomboid community but dont know where to start? Well look no further than Veracious Network's Zomboid Survival Server! From our custom mods (made specifically for our server, by us, but also released on the workshop) such as Veracious Network's Garage Pack, Veracious Network's Weed, to our kind hearted and helpful community! Being a member of veracious network is a great opportunity for anyone looking for a server to call home! The server is set at mostly default settings with a few things turned down such as zombie speed etc, but other than that the difficulty is as close as vanilla as we would like it. But now onto the important stuff, Mods. At the time of writing Veracious Has over 100 mods in the server, Most of which are just quality of life improvements, there isnt anything that drastically changes the way the game is played etc. Come participate in Daily Group Raids! Gear up with us on a cold night while we raid a town or base somewhere! Making sure to grab all of the good stuff! Or are you a lone wolf who would rather go questing? Dont worry we got you there too! One of our team members at Veracious Studios is working on writing custom quests for our server using the SSR Quest system (these will probably be released on the workshop at a later date)! Discord: https://discord.gg/nx79Jr3BSy
-
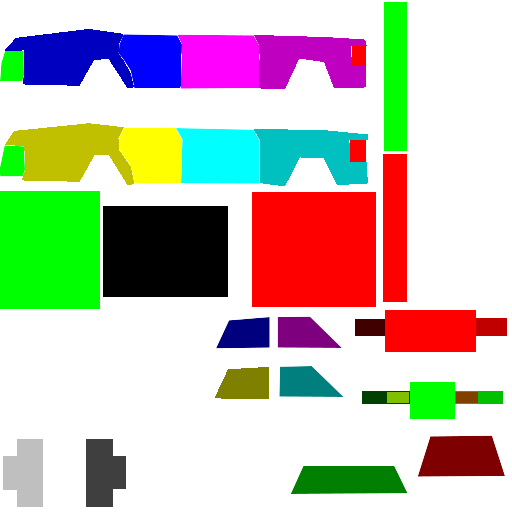
Hello and welcome to my tutorial. It covers full workflow of vehicle creation for PZ. If you are a complete beginner in 3D modelling, you'll have to watch/read additional tutorials, I won't cover every aspect of model creation and 'where this button is located'. I divide vehicle creation in these stages: 1) Modelling 2) Wheels texture and modelling 3) Texturing 4) Packing files in folders 5) Editing scripts and .lua 6) In-game editing and tests 7) Workshop publish STAGE 1 - MODELLING Today I am creating a 1960 Ford Falcon I prefer using blender as it is my everyday 3d modelling software. Now, find references for your vehicle and ideally it will be a blueprint/outline scheme, like this one: There are some tips in modelling for PZ: 1) Do not care too much about topology and good shading. There is no actual shading in game, only windows have reflections. 2) Avoid n-gons or triangulate them before export 3) DO NOT make edges to outline body panels/parts. All dividing of parts will be done with texture mask. You can do it in UVs if there will be a point for that. 4) Place spindiel imitations in wheel wells to hide rear part of wheel models 5) In the UVs parts of body have to be straight-oriented without any non-90 degrees rotation, so pixels in texture will lay parallel with polygon flow. 6) To avoid physics artifacts in game import model of one of vanilla game cars models to your scene and model in consistent scale. Or import mine, that is available in the end of topic. This is what I consider a well done model There is nothing special in UV unwrapping process, just remember to place the least amount of seams possible and keep island aligned. Here are the UVs of my model: I've unwrapped the model without applied mirror modifier, so now we will have to texture just one half of the car. I'll fix mirroring later. STAGE 2 - WHEELS There are many ways to make a wheel and texture it, but I'll show the most efficient one. Make the wheel's face with simple materials, but unwrap the 'road touching part' to flat surface, like this: Then place an orthographic camera facing the wheel, scale it to fit the whole wheel-dish. Place a ring with emission material to light the wheel. Switch your renderer to Cycles and go to camera view, now use a rendered shading mode to adjust materials and lights to your taste. Set rendering resolution to something like 120x120-175-175 for best results Check the 'transparent' box in film settings to have alpha backround in texture: Now increase the sample count to something like 512-1024 and hit render. You will end up with a result of a ready-to-go wheel texture: The example file with scene for rendering and the model of this wheel you can download here: *google drive .blend file* Now make a lowpoly model of the wheel to use this texture on. I prefer using 18-24 edge circles for wheels. The unwrapping will be later, but eventually you'll end up with this: This method takes 10-15 minutes when you get used to it and gives a stunning and clear result. STAGE 3 - TEXTURING NOTE: I use a pretty complicated way of texturing and adding light to model. All rules of using textures the default way are covered in "HOW TO CREATE NEW VEHICLE MODS" topic by RingoD123, one of PZ devs. You can access it here: *boop* I'll show you my way, using Substance Painter to apply lighting and fake chrome parts to model. But first comes the base color and details of the car, so let's dive into it. Create a texture with 0 alpha and resolution 256x256. You can go for 512x512, but personally I like pixelated look of lo-res texture. Here are the settings for initial image: To preview the texture you are painting with different car colors, use this node setup. But switch filtering mode from "Linear" to "Closest", I forgot to do it on screenshot. There are two types of texture details: somewhat transparent and absolutely opaque. Half-transparent parts will be affected by car color, so they are mostly shadow/highlight details. Headlights, fixtures and things like that have to be opaque and painted with 100% brush hardness. It is easier to keep 3d view just to see what are you doing and paint texture in image editing mode, right there: First, paint the outlines of doors and other opening parts. Here are some brush hardness values: 0.2 - Outline shadow 0.5 - Outline 1.0 - Fake chrome and rubber window sealing Some work in progress screenshots Now when you have windows frames, save the image you just painted and go to photoshop and mask out glass sections like that Well, time for Substance Painter. You can use photoshop gradients for windows and blender lighting for lighting of the body, but I'll use SP "Baked lighting" filter for that, and for chrome especially. I will briefly describe what I've done in SP: 1) Mask out windows, give them mirror metal material and add a filter to them 2) Mask out chrome parts, made them mirror metal and added the same filter with slightly different settings. 3) Apply the same filter to all body parts left. 4) Add a position gradient to the windows Now I have this result, it is not shaded model, just basecolor: Also export the AO map you baked in SP. You can download file with this scene to look through and get ideas using this link: *boop* Now paint additional details you want on the car and open Photoshop. This is your layers layout: Now save it as .psd for future color editing and as .png to see what the you've done. Plug .png direcly as BaseColor in shader settings. Set your shading setting like this: And check if everything looks ok. This is my result: And this is the vehicle's look with wheels that we made before Sweet, isn't it? Now, it is time to get rid of mirroring. You can make new UV, bake it and... get A LOT of offset artifacts resulting in jagged pixel edges. There is a lazy but effective method: 1) In the UV editor place cursor in the 0,0 coordinates. 2) Set Pivot to 2D cursor: 3) Scale all UV islands to 0.5 EXACTLY 4) Apply mirror modifier to your model. Now select FACES of any half of the model and move it in UVs on Y by value 0.5 EXACTLY or you'll eventually mess everything up. 5) In Photoshop expand canvas of your PSD file we made before 6) Duplicate everything and move to the upper left corner, like in UVs. You can merge color layer(s) to operate color on export more easily. Now you have half of the texture empty... You do not want to waste it, right? Then drop in the wheel texture here without scaling, and you won't need additional texture file for it! 7) Create a layer beneath all others and paint it black or grey to cover alpha-holes in the textures. 8 ) Now unwrap the wheel to this new texture and let it shine! We painted the car and fixed mirroring. DOWNLOAD THE .PSD FILE: *bloop* There are 3 more types of textures to make: 1) Rust 2) Damage (1 or 2 levels, I'm lazy, I prefer using single one) 3) ID Color Mask or just Mask It wasn't possible to make them right with mirroring. Everything about these textures are explained clearly in Ringo's guide, again: *boop* I'll just show results I ended up with. Now you have to use 512x512 clear images for these textures, do not forget it. RUST Painted it with jitter brush and 0.2 hardness. To see what I am doing used the same node setup, as for base texture. DAMAGE Painted gradients with black and white with 0.1 hardess with repetitive strokes. MASK Mask texture tells game where are separate parts of car: doors, windows, lights and others. Every part has it's own color in palette, you can find color table in Ringo's guide. Copy and paste color HEX to use it in blender brush or fill tools. I've missed some of the parts because they do not really matter. AEUGH Texturing is finished. Go to photoshop and make all color variations you want and save them as .png, name them Vehicles_[vehicle name]_ Vehicle name mustn't containt spaces These are color palettes of my car: Now you have to export your vehicle body and wheel models. Copy them to an empty scene and save as separate file. If you used blender default orientations (front, back, right, left, top), then rotate the car on Z axis by 180 degrees. Game rotates it for some reason, so you'll have to do it. Now position everything in scene like this and continue to export settings. Export body and wheel separately with these settings: STAGE 5 - Packing files in folders The folder hierarchy and naming the files you can find in Ringo's guide. The mod file and all of my project files you will be able to download in the end of this topic. make up an Id name for your car. It has to be short, but unique and do not contain spaces. For this car I use '60falcon'. _____________________________________________ workshop.txt properties of the mod for Steam Workshop _____________________________________________ mod.info properties of the mod for in-game mod menu _____________________________________________ models_X folder -> vehicles this folder contains 3d meshes of the vehicle - body and wheel _____________________________________________ textures -> vehicles easy to guess, all vehicle textures are placed here null.png - completely transparent image, used as placeholder later on _____________________________________________ scripts -> vehicles there shoud be a .txt file named with you vehicle's ID name. Open it up and follow these instructions: change invertX to 'TRUE' if vehicle appears to be mirrored by left and right in game. Do not care about scale, offset and other geometric parameters. Insert all your color variation textures as shown below: All vehicle driving parameters are self-explanatory. Remember to set seats count, I'm creating a car with 4 seats. If you want to make less seats or add new, delete passenger[Seat code] records or add new. Also remember Seat[position] records down below. Add or delete the templates, loaded from Game default files: _____________________________________________ LUA SCRIPTS lua -> server -> vehicles -> [car id name]dis.lua Vehicle trunk type distribution file. There is a file with all vehicle distribution types in game files, I'll put it in project folder in the end if the article. This is game files distibution types, select one of them in respect to the vehicle type you are creating. I'll use CarNormal type for Ford Falcon. This is what distribution lua file has to be: _____________________________________________ lua -> shared -> [car id name]SpawnList.lua This file describes spawn zones of your car in game world with certain chance. I've typed in all default zones of spawn, you just have to change the chance and set [Base.60falcon] to [Base.(your car id name)] _____________________________________________ lua -> shared -> Translate -> EN -> IG_UI_EN.txt This is the name of the car in UI - keys name, mechanics window name and such. STAGE 6 - In-game editing and tests Launch PZ and disable all mod exept the one you will be debugging. Now close the game and go to Steam. In application setting set startup parameter to -debug It enables many debug options in-game. Now launch the Game again and, if menu doesn't appear, you've done something wrong in lua scripts. Check them for probles, and I hope, you'll figure out what is wrong. Now start a new game in world with no zombies and big amount of cars. Leave the house and find any car vibing in the street. Right click, -> Vehicle -> Set Script -> [your car ID name]. Car will switch to yours. This is what I've got on first time in-game spawning: YEET, it is all coming along. But wheel positions are a bit off, and we have to place the entering areas of doors. Go to Right click on car -> [DEBUG] Vehicle -> Vehicle Editor. Chassis Place extents and physics shape to outline the car Areas These are access areas to different parts of the car. There is nothing to describe, really, just place them where you can explain it and continue to next section Right click in mechanics tab to enable cheat options for the car. Now right click in mechanics panel. Here you can get key for that car or repair it. Final result in different variations Make a suitable preview image for your mod and crop it in Photoshop to 256x256. Place it in mod folder as preview.png In game menu go WORKSHOP -> create or update mod -> Go to your profile workshop items and find the new mod. Add the description, more screenshots and set visibility to 'Public' ALL PROJECT FILES: *YEET* ZE END Congratulations if you followed my guide to this point. Comment any issues or mistakes I've made.
-
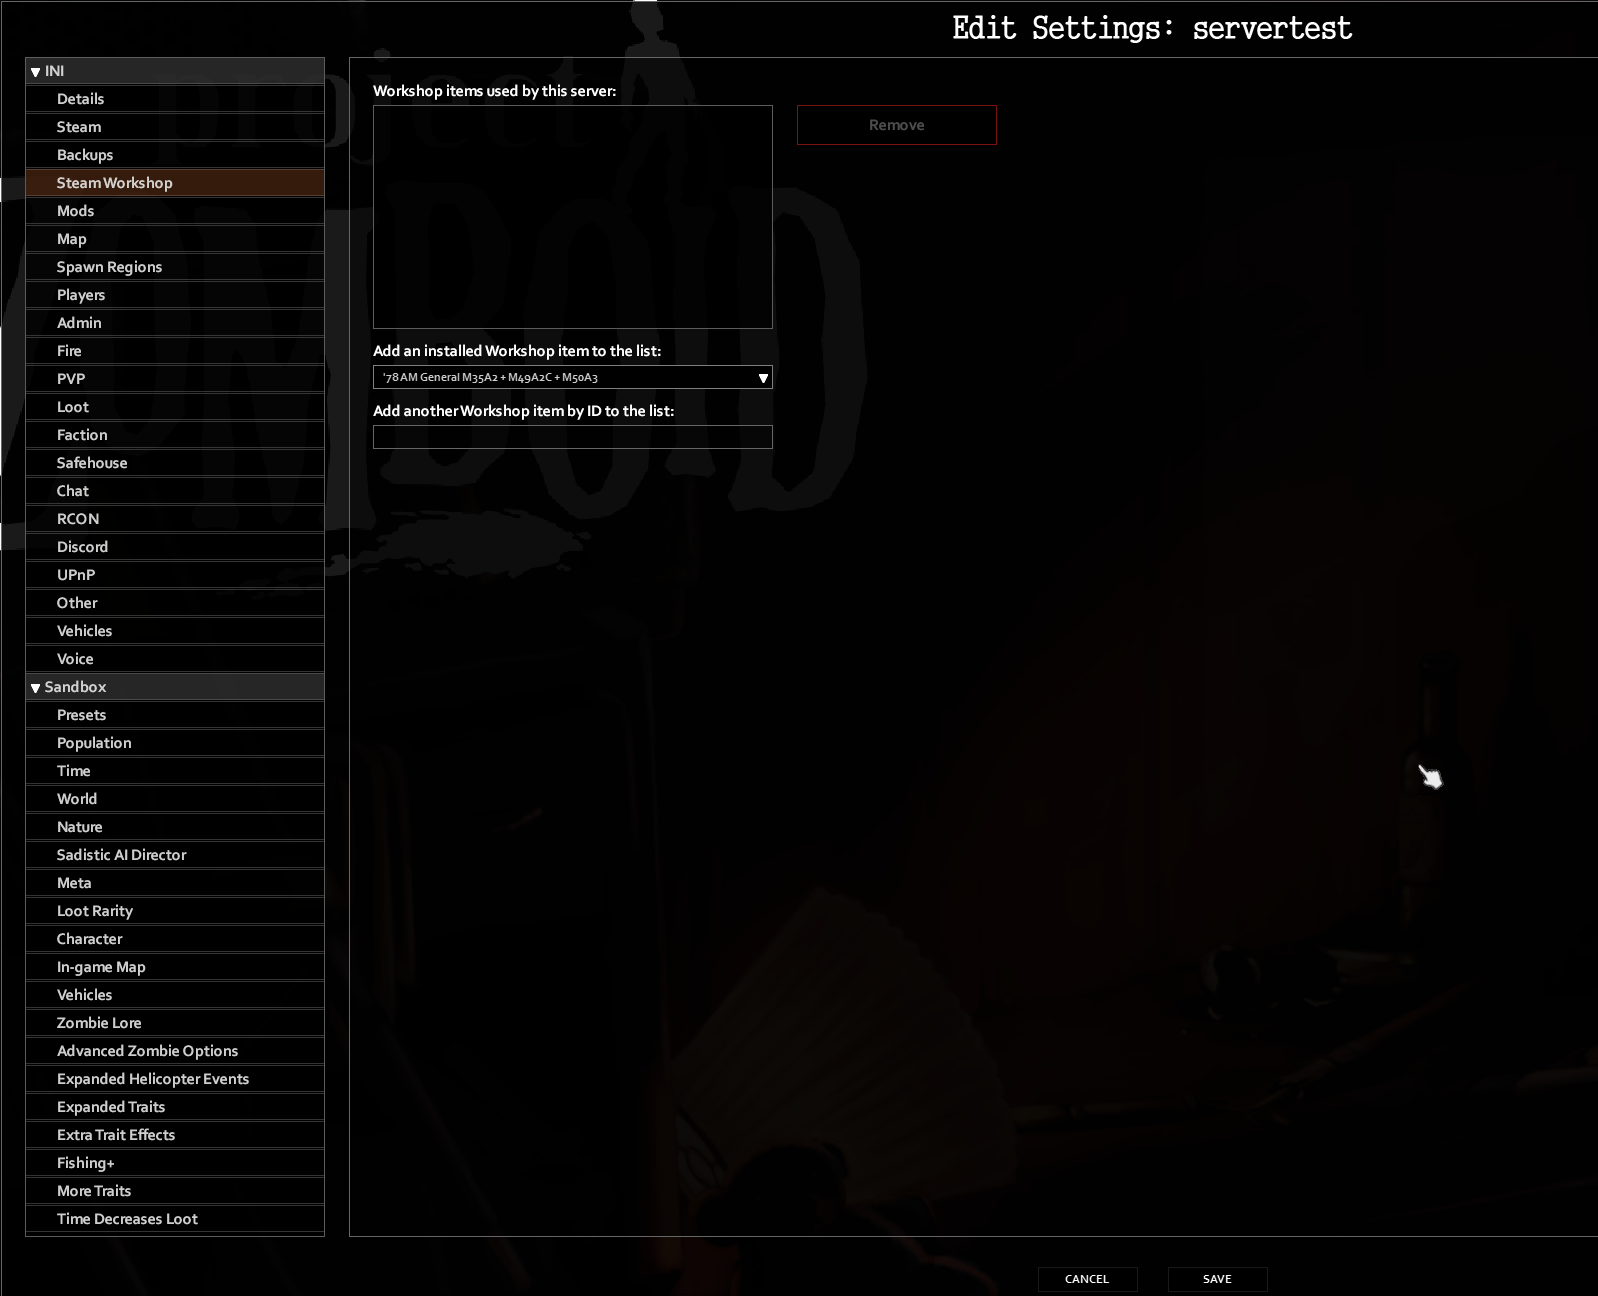
That is, the folders related to the server where all the progress is located simply remained untouched But I noticed this later, because after renaming, I clicked on "start the server" It was a fatal mistake, because the game just started creating new files from an already created server))) An attempt to roll back the changes also did not give anything, because even the game logs are updated WITH EACH CHANGE instead of creating another backup. Why am I doing this Developers either simply do not test their innovations, or they do not care about the work of their own game. Otherwise, I cannot explain the LACK of ANY EXPLANATIONS in each point of the server configuration. In the end, I managed to find and, in a sense, "revive" our save, but my character, which was re-generated, is lost forever, because the game, and in particular the server, does not provide for the possibility of transferring a character from one server to another, EVEN IF THERE IS A FOLDER WITH HIS PROFILE. Developers just need to remove half of the restrictions on reading character files so that in case of such breakdowns, they can restore the character and the server, making a backup copy of the entire server each time. All this nonsense related to the "anti-cheat" or the ban on the use of cheats is more than meaningless, since most people do NOT play on servers with 20+ people but play with friends. I do not know if the developers will see this post, but I have played their game for 1600 hours and am a fan of it, but the fact that the developers are NOT DOING ANYTHING for a stable game over the network just annoys me. Can I find out when you will expand the window for adding mods to the server?? This little window where you force to add mods piece by piece, is this a joke? What prevented you from making the same window as for a single game so that not 8 mods in the list are shown, but all 20??? I have 300+ mods on my server that I have added MANUALLY more than once, BY CLICKING ON EACH OF THEM, BECAUSE, AS ALWAYS, YOU DID NOT WANT TO ADD THE "ADD ALL" BUTTON. Thanks for attention.
-
Ich und ein paar Freunde und andere machen einen Server. Jeder der möchte kann drauf auf unserem Discord gibt es alle Infos. https://discord.gg/eDmjnF9C
-
I'm trying to host a modded server, but there are some mods that whilst they're properly installed and added to the server they don't seem to be actively working, I've tried SO MANY things and searched in many places for an answer but nothing seems to work, also I've even tried creating a world and using only one of those mods at the time and still they're not there during play(e.g 'More traits' is one of them and it is a mod functional in MP). If anyone can help me with this I'd be eternally grateful and feel free to ask for any information needed
-
I've been stuck at this screen for an indefinite amount of time after downloading mods in order to join a multiplayer server. No buttons work. I am playing on GeForce NOW with a GeForce RTX 4080 If you have any ideas on how to fix, please inform me, thank you!
-
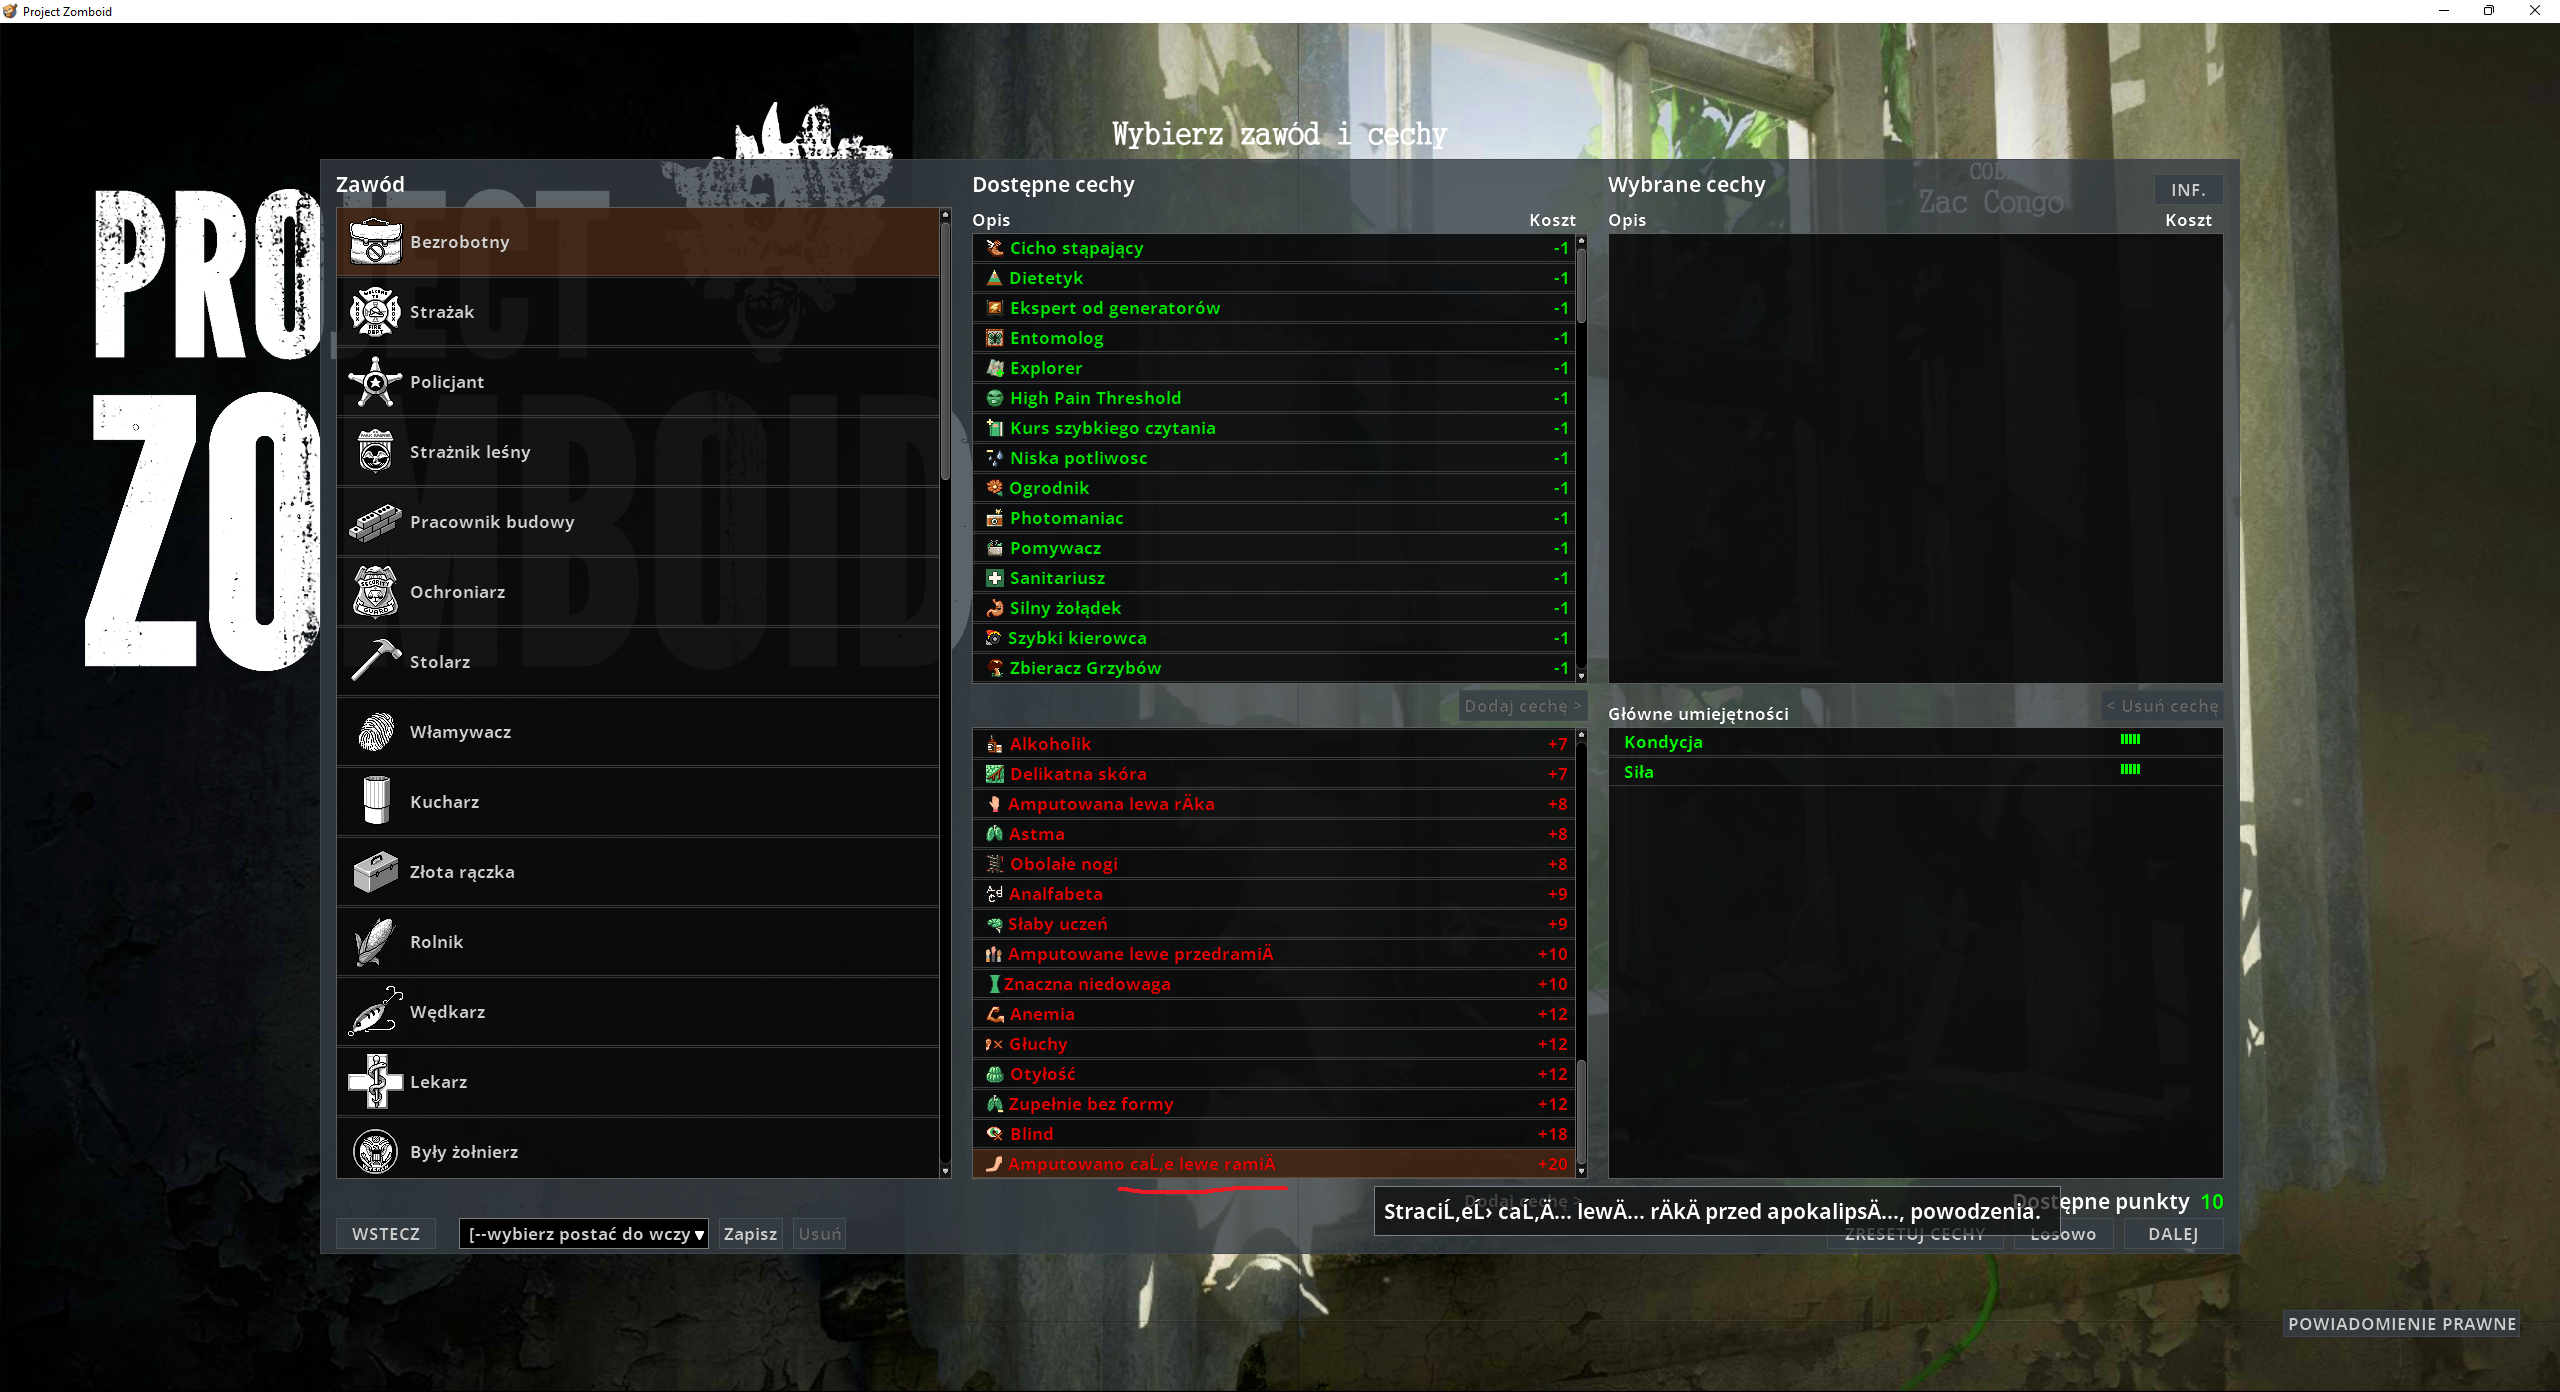
First of all, I would like to apologize in advance for my english. It's not my first language, but I promise that'll do my best. For the past days I've been trying to create a mod for a custom trait, but I haven't found much about it. I've been posting on forums, watching tutorials, and even downloading other mods to see and analyze their structure, hoping to being able to do some reverse engineering. So, here's the issue -- I know how to create a new trait and add some buffs for X skill, like: CustomTrait:addXPBoost(Perks.Strength, 4) or: CustomTrait:addXPBoost(Perks.Lightfoot, 1) which would add one (1) level on that skill, and a XP boost (75%). But I have no idea on how to make that CustomTrait to have the effects of another (vanilla) trait as well. I.e making my "CustomTrait" to have the effects of "Brave". I've tried testing with: TraitFactory.addTrait("Illiterate", getText("UI_trait_Illiterate"), -8, getText("UI_trait_IlliterateDesc"), false); but it doesn't work -- I guess this only work with professions. Also tried with: player:getTraits():add("MyTrait") Doesn't work either. I supposed that I should use: require('NPCs/MainCreationMethods'); to call the traits from the main folder, but still. Not working. I just wanted to make a simple trait, with minor buffs to skills and to contain the effects of Brave and Outdoorsman.
-
I have been trying to setup map mods on my Shockbyte server. I am trying to run Fort Rock Ridge, but everytime I create my character I just crash. I've read that you need to change the SpawnRegions file or something, but for some reason my server doesn't have that file. I would really appreciate some help. console.txt
-
Good Evening! Having an issue with Arsenal26/Britas in my server. Up until 5 days ago, I was hosting a server from my PC, non-dedicated, using a plethora of mods including arsenal26/britas. Had little to no issues running the game just fine. Last Friday, out of the blue I get a couple of crash to desktops where it says I've lost connection with the host server, and now when I try to host any game with the mod in the list, it gets past character creation then goes to black screen and eventually connection to server has been lost. The strangest thing is it only happens with britas/arsenal26 installed. I checked and there haven't been any updates to the mod or the game within the time period that I can see. Attached are the last part of my log files where the MP server is attempting to connect. I verified in regards to the mods loading, there are no issues that prevent it from firing up, its just when its time to actually connect to the server/host, I get this issue. Thank you for your time! Network Log.txt
-
Now with a dedicated Discord Server! Join here> https://discord.gg/f3pWYkAUVY Welcome to Willow Hill! IP: 194.140.197.193 PORT: 29900 PVE Casual Play 24/7 Random zombies. Slow time passaged (2 hours IRL to 1 day in game) Very slow respawn. Tons of cars and QOL mods. Open to suggestions on adding things as long as it's 1993 Lore Friendly. DEDICATED LONG TERM PUBLIC SERVER. 16GB dedicated server, North America 32 players max. No PvP. Casual CoOP. Not RPG. Safehouses are protected. Faction Safehouse mod installed. Vanilla map Zombie Lore: Zombification takes 1 - 2 weeks, only transferred by Bites. slow zombie respawn - enabling you to clear out and hold an area. Mostly wandering hordes/random zombies passing through after that. Randomized Zombies (rare sprinters, crawlers, rare smart and tough zombies), 2x Peak Zombies at 1 year. Zombies aggressive at night, but they chill during the day. periodic Helicopter Events Admin is on daily, submit ticket for issues/questions - or just DM me directly. Setting Many mods for more vehicle choices, RVs, motorbikes, ATVs, sports cars, military trucks, etc. Common sense mod Tons of music, dancing, musical instruments, boom boxes tons of video games and movies Trading cards in game - COLLECT THEM ALL! Lifestyle mod (music instruments! meditation!) Playable video games, arcade games, pinball machines Added Samurai, Crafted Knife/katana sheaths (player requests) QOL No Sleep Required. 10x faster books. Longer Days (3h/game day). Canned food/preservation possible. Map sharing and Map creation/annotation Proximity VOIP and walkie talkies active. Pantry Packing mod LY Skill books DISCORD SERVER - active admin - growing discord community - both experienced and new players - custom stickers and emojies active - multiple voice channels, custom voice channels - dedicated MidJourney channel for creation of fun art, emojies, and stickers (see some of our examples posted here) - custom soundboard
-
I'm creating a weapon mod, and I came across the fact that I don't have a weapon model, it's transparent. How do I fix this? Weapon script DEV6-Firearm.txt
-
hello everyone please help me with something , I have the pirated project zomboid or let s say it s not from steam and I m from Mac , and I would like to know how to download mods In my situation
-
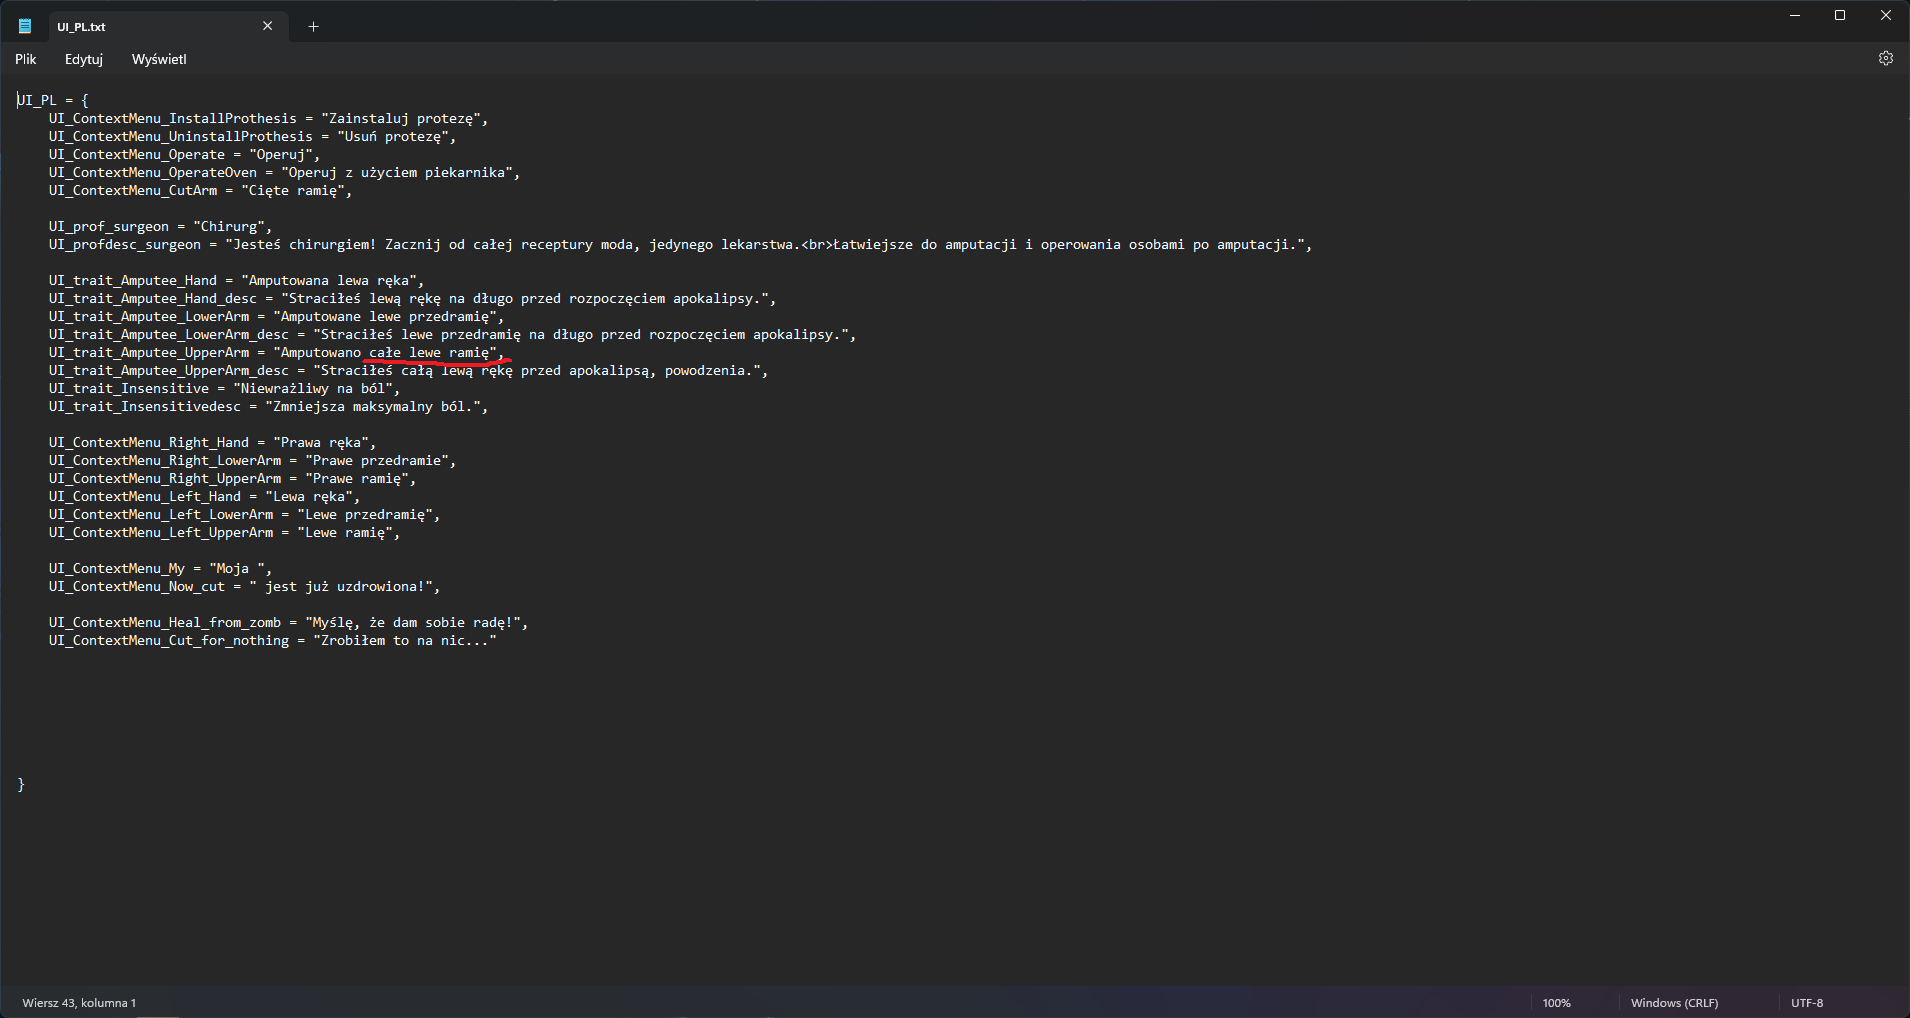
Hi, I have problem with translating mods into polish, the error occurs in special characters and i don't know how to fix it. Translation file looks like this: For example Simple Overhaul: Traits and Occupations (SOTO) have orginal polish translation and it work correct (my txt files with translation look the same)
-
Would be amazing to craft a shooting target, like using the scarecrows or also a simple target made with planks, nails and paint , sure wil not give the same exp of shoot to a zed but finally u can train ur aim's skill safely and have funny shooting and plus will be very realistic ....
-
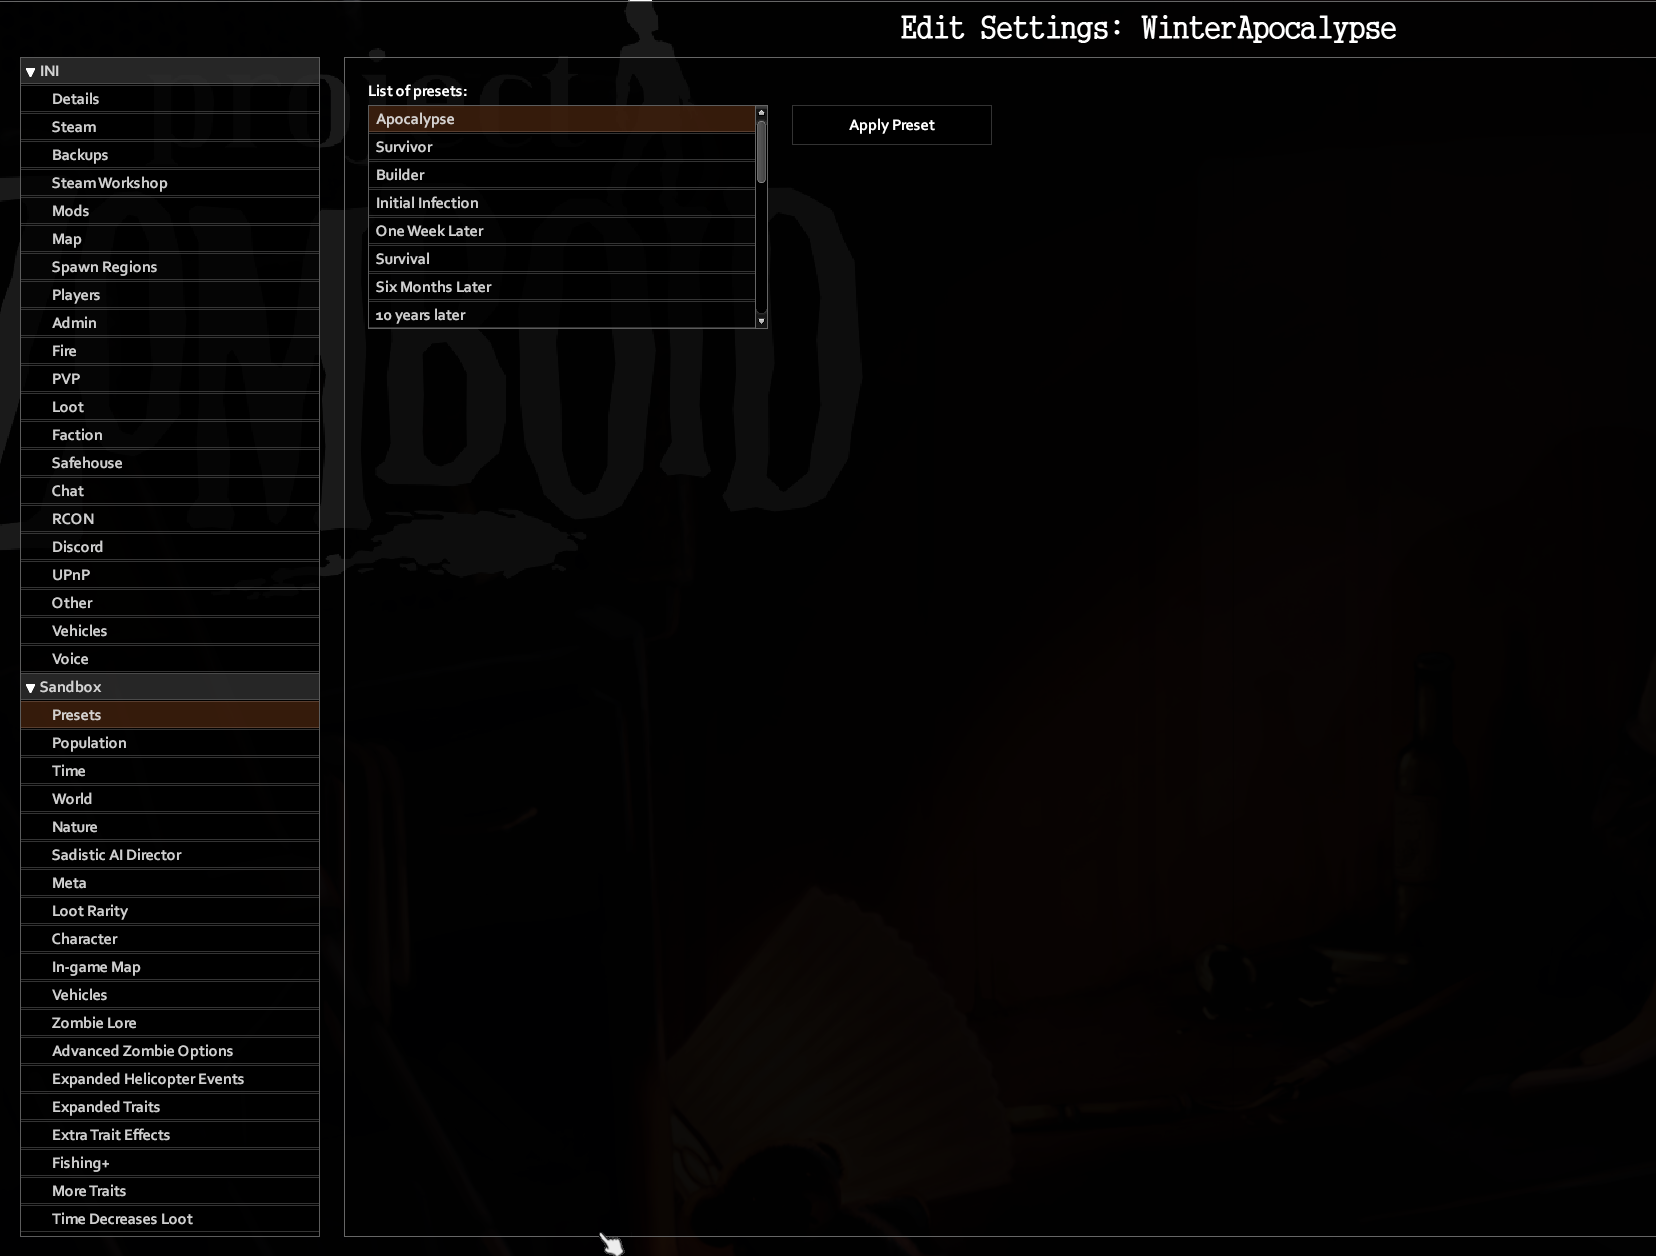
So I was creating a new Scenario for my friends and I, to try some challenge mods out. At some point the mod list glitched and refuses to update. In the two pictures you can see that the Sandbox options for the empty list are all modded and exactly the same as the other modded one. This is the same for all of the host scenarios and refuses to update or change. I've tried restarting my game, my pc, deleting the scenarios and starting from scratch, I've even uninstalled the game and all subsequent mods but it's still stuck like this.
-
Every time I look for a guide or try to figure out what may be wrong, its something different for everyone. This isn't the first time my server has done this but it resolved itself overnight. That hasn't happened this time and I'm worried my server may be gone. It wont launch but any new server will, including mods. I'm not sure what could be going wrong if someone could give me advice/ help that would be beautiful. My buddy and I have put about 80 hours into this server in just a couple weeks and I'd hate to see it go like this. coop-console.txt
-
First, create the following file structure (if you are adding the lootable map to your own map mod then create all folders within the media folder below in your map mods media folder instead): Spoiler MyLootableMapsMod >media >>lua >>>server >>>>Items >>>client >>>>ISUI >>>>>Maps >scripts >textures >>worldMap Next up create a .txt file in the scripts folder called something like "mylootablemap" (except make it more unique to avoid any possible compatability issues with other mods that might use the same names), it should include this code: Spoiler module Base { item MyLootableMap { DisplayCategory = Cartography, Type = Map, DisplayName = Your map name here, Icon = Map, Weight = 0.1, Map = MyLootableMap, WorldStaticModel = Map, } } The above code is adding a new item with the internal name "MyLootableMap" (so again make sure yours is something unique) into the vanilla pool of items, the above settings work for maps. The next file you need you will want to create in the "media\lua\server\Items" folder, call it something like MyLootableMapDistribution.lua but again make it's a unique name to avoid any possible mod imcompatability with other mods. It should contain the following code: Spoiler local function preDistributionMerge() table.insert(ProceduralDistributions.list.MagazineRackMaps.items, "MyLootableMap"); table.insert(ProceduralDistributions.list.MagazineRackMaps.items, 50); end Events.OnPreDistributionMerge.Add(preDistributionMerge); In the above code you can see that we are adding our new Item "MyLootableMap" into the "MagazineRackMaps" loot table inside of ProceduralDistributions.lua, this will affect any roomDef of any building that pulls from the MagazineRackMaps loot table. We are doing it this way as the definition we want to add to has the "procedural" tag in Distributions.lua and is therefore using the procedural loot tables. The number 50 is the "weight" of the item you are adding, higher number = more chance. To find the current room and container definitions, navigate to your "steamapps\common\ProjectZomboid\media\lua\server\Items" folder and open the Distributions.lua file. If the definition you want to add your item to is not procedural (does not have the "procedural = true" line) then you want to add this code instead of the above code: Spoiler local myMapdistributionTable = { all = { shelves = { rolls = 5, items = { "Magazine", 20, "Newspaper", 20, "Book", 20, "SheetPaper2", 20, "Notebook", 20, "BookTailoring1", 2, "BookTailoring2", 1, "BookTailoring3", 0.7, "BookTailoring4", 0.5, "BookTailoring5", 0.3, "BookCarpentry1", 2, "BookCarpentry2", 1, "BookCarpentry3", 0.7, "BookCarpentry4", 0.5, "BookCarpentry5", 0.3, "BookCooking1", 2, "BookCooking2", 1, "BookCooking3", 0.5, "BookCooking4", 0.3, "BookForaging1", 2, "BookForaging2", 1, "BookForaging3", 0.7, "BookForaging4", 0.5, "BookForaging5", 0.3, "BookFarming1", 2, "BookFarming2", 1, "BookFarming3", 0.7, "BookFarming4", 0.5, "BookFarming5", 0.3, "BookFishing1", 2, "BookFishing2", 1, "BookFishing3", 0.7, "BookFishing4", 0.5, "BookFishing5", 0.3, "BookTrapping1", 2, "BookTrapping2", 1, "BookTrapping3", 0.7, "BookTrapping4", 0.5, "BookTrapping5", 0.3, "BookFirstAid1", 2, "BookFirstAid2", 1, "BookFirstAid3", 0.7, "BookFirstAid4", 0.5, "BookFirstAid5", 0.3, "BookMetalWelding1", 2, "BookMetalWelding2", 1, "BookMetalWelding3", 0.7, "BookMetalWelding4", 0.5, "BookMetalWelding5", 0.3, "BookElectrician1", 2, "BookElectrician2", 1, "BookElectrician3", 0.7, "BookElectrician4", 0.5, "BookElectrician5", 0.3, "BookMechanic1", 2, "BookMechanic2", 1, "BookMechanic3", 0.7, "BookMechanic4", 0.5, "BookMechanic5", 0.3, "FishingMag1", 1, "FishingMag2", 1, "HuntingMag1", 1, "HuntingMag2", 1, "HuntingMag3", 1, "HerbalistMag", 1, "FarmingMag1", 1, "CookingMag1", 1, "CookingMag2", 1, "ElectronicsMag1", 1, "ElectronicsMag2", 1, "ElectronicsMag3", 1, "ElectronicsMag4", 1, "ElectronicsMag5", 1, "MechanicMag1", 1, "MechanicMag2", 1, "MechanicMag3", 1, "EngineerMagazine1", 1, "EngineerMagazine2", 1, "MetalworkMag1", 1, "MetalworkMag2", 1, "MetalworkMag3", 1, "MetalworkMag4", 1, "Journal", 2, "Radio.RadioBlack",2, "Radio.RadioRed",1, "MyLootableMap", 50, } }, } } table.insert(Distributions, 2, myMapdistributionTable); This would add your map to the existing "all>shelves" definitions, which would be every shelves container in the game world not inside a roomdef defined inside Distributions.lua, so for example your map would not spawn on shelves that are placed inside a "bookstore" room def as that room def already exists in Distributions.lua with a rule for shelves. You can also check this thread: for a more in-depth guide to working with the loot tables. Lastly, inside of your "media\lua\client\ISUI\Maps" folder create a new file called something like MyLootableMapDefinition.lua (make it unique to your mod instead of a generic name) and include the following code: Spoiler require "ISMapDefinitions" MapUtils = {} function MapUtils.initDirectoryMapData(mapUI, directory) local mapAPI = mapUI.javaObject:getAPIv1() local file = directory..'/worldmap-forest.xml' if fileExists(file) then mapAPI:addData(file) end file = directory..'/worldmap.xml' if fileExists(file) then mapAPI:addData(file) end -- This call indicates the end of XML data files for the directory. -- If map features exist for a particular cell in this directory, -- then no data added afterwards will be used for that same cell. mapAPI:endDirectoryData() mapAPI:addImages(directory) end function MapUtils.initDefaultMapData(mapUI) local mapAPI = mapUI.javaObject:getAPIv1() mapAPI:clearData() -- Add data from highest priority (mods) to lowest priority (vanilla) local dirs = getLotDirectories() for i=1,dirs:size() do MapUtils.initDirectoryMapData(mapUI, 'media/maps/'..dirs:get(i-1)) end end local MINZ = 0 local MAXZ = 24 local WATER_TEXTURE = false function MapUtils.initDefaultStyleV1(mapUI) local mapAPI = mapUI.javaObject:getAPIv1() local styleAPI = mapAPI:getStyleAPI() local r,g,b = 219/255, 215/255, 192/255 mapAPI:setBackgroundRGBA(r, g, b, 1.0) mapAPI:setUnvisitedRGBA(r * 0.915, g * 0.915, b * 0.915, 1.0) mapAPI:setUnvisitedGridRGBA(r * 0.777, g * 0.777, b * 0.777, 1.0) styleAPI:clear() local layer = styleAPI:newPolygonLayer("forest") layer:setMinZoom(13.5) layer:setFilter("natural", "forest") if true then layer:addFill(MINZ, 189, 197, 163, 0) layer:addFill(13.5, 189, 197, 163, 0) layer:addFill(14, 189, 197, 163, 255) layer:addFill(MAXZ, 189, 197, 163, 255) else layer:addFill(MINZ, 255, 255, 255, 255) layer:addFill(MAXZ, 255, 255, 255, 255) layer:addTexture(MINZ, "media/textures/worldMap/Grass.png") layer:addTexture(MAXZ, "media/textures/worldMap/Grass.png") layer:addScale(13.5, 4.0) layer:addScale(MAXZ, 4.0) end layer = styleAPI:newPolygonLayer("water") layer:setMinZoom(MINZ) layer:setFilter("water", "river") if not WATER_TEXTURE then layer:addFill(MINZ, 59, 141, 149, 255) layer:addFill(MAXZ, 59, 141, 149, 255) else layer:addFill(MINZ, 59, 141, 149, 255) layer:addFill(14.5, 59, 141, 149, 255) layer:addFill(14.5, 255, 255, 255, 255) layer:addTexture(MINZ, nil) layer:addTexture(14.5, nil) layer:addTexture(14.5, "media/textures/worldMap/Water.png") layer:addTexture(MAXZ, "media/textures/worldMap/Water.png") -- layer:addScale(MINZ, 4.0) -- layer:addScale(MAX, 4.0) end layer = styleAPI:newPolygonLayer("road-trail") layer:setMinZoom(12.0) layer:setFilter("highway", "trail") layer:addFill(12.25, 185, 122, 87, 0) layer:addFill(13, 185, 122, 87, 255) layer:addFill(MAXZ, 185, 122, 87, 255) layer = styleAPI:newPolygonLayer("road-tertiary") layer:setMinZoom(11.0) layer:setFilter("highway", "tertiary") layer:addFill(11.5, 171, 158, 143, 0) layer:addFill(13, 171, 158, 143, 255) layer:addFill(MAXZ, 171, 158, 143, 255) layer = styleAPI:newPolygonLayer("road-secondary") layer:setMinZoom(11.0) layer:setFilter("highway", "secondary") layer:addFill(MINZ, 134, 125, 113, 255) layer:addFill(MAXZ, 134, 125, 113, 255) layer = styleAPI:newPolygonLayer("road-primary") layer:setMinZoom(11.0) layer:setFilter("highway", "primary") layer:addFill(MINZ, 134, 125, 113, 255) layer:addFill(MAXZ, 134, 125, 113, 255) layer = styleAPI:newPolygonLayer("railway") layer:setMinZoom(14.0) layer:setFilter("railway", "*") layer:addFill(MINZ, 200, 191, 231, 255) layer:addFill(MAXZ, 200, 191, 231, 255) -- Default, same as building-Residential layer = styleAPI:newPolygonLayer("building") layer:setMinZoom(13.0) layer:setFilter("building", "yes") layer:addFill(13.0f, 210, 158, 105, 0) layer:addFill(13.5f, 210, 158, 105, 255) layer:addFill(MAXZ, 210, 158, 105, 255) layer = styleAPI:newPolygonLayer("building-Residential") layer:setMinZoom(13.0) layer:setFilter("building", "Residential") layer:addFill(13.0f, 210, 158, 105, 0) layer:addFill(13.5f, 210, 158, 105, 255) layer:addFill(MAXZ, 210, 158, 105, 255) layer = styleAPI:newPolygonLayer("building-CommunityServices") layer:setMinZoom(13.0) layer:setFilter("building", "CommunityServices") layer:addFill(13.0f, 139, 117, 235, 0) layer:addFill(13.5f, 139, 117, 235, 255) layer:addFill(MAXZ, 139, 117, 235, 255) layer = styleAPI:newPolygonLayer("building-Hospitality") layer:setMinZoom(13.0) layer:setFilter("building", "Hospitality") layer:addFill(13.0f, 127, 206, 225, 0) layer:addFill(13.5f, 127, 206, 225, 255) layer:addFill(MAXZ, 127, 206, 225, 255) layer = styleAPI:newPolygonLayer("building-Industrial") layer:setMinZoom(13.0) layer:setFilter("building", "Industrial") layer:addFill(13.0f, 56, 54, 53, 0) layer:addFill(13.5f, 56, 54, 53, 255) layer:addFill(MAXZ, 56, 54, 53, 255) layer = styleAPI:newPolygonLayer("building-Medical") layer:setMinZoom(13.0) layer:setFilter("building", "Medical") layer:addFill(13.0f, 229, 128, 151, 0) layer:addFill(13.5f, 229, 128, 151, 255) layer:addFill(MAXZ, 229, 128, 151, 255) layer = styleAPI:newPolygonLayer("building-RestaurantsAndEntertainment") layer:setMinZoom(13.0) layer:setFilter("building", "RestaurantsAndEntertainment") layer:addFill(13.0f, 245, 225, 60, 0) layer:addFill(13.5f, 245, 225, 60, 255) layer:addFill(MAXZ, 245, 225, 60, 255) layer = styleAPI:newPolygonLayer("building-RetailAndCommercial") layer:setMinZoom(13.0) layer:setFilter("building", "RetailAndCommercial") layer:addFill(13.0f, 184, 205, 84, 0) layer:addFill(13.5f, 184, 205, 84, 255) layer:addFill(MAXZ, 184, 205, 84, 255) end function MapUtils.overlayPaper(mapUI) local mapAPI = mapUI.javaObject:getAPIv1() local styleAPI = mapAPI:getStyleAPI() local layer = styleAPI:newTextureLayer("paper") layer:setMinZoom(0.00) local x1 = mapAPI:getMinXInSquares() local y1 = mapAPI:getMinYInSquares() local x2 = mapAPI:getMaxXInSquares() + 1 local y2 = mapAPI:getMaxYInSquares() + 1 layer:setBoundsInSquares(x1, y1, x2, y2) layer:setTile(true) layer:setUseWorldBounds(true) layer:addFill(14.00, 128, 128, 128, 0) layer:addFill(15.00, 128, 128, 128, 32) layer:addFill(15.00, 255, 255, 255, 32) layer:addTexture(0.00, "media/white.png") layer:addTexture(15.00, "media/white.png") layer:addTexture(15.00, "media/textures/worldMap/Paper.png") end function MapUtils.revealKnownArea(mapUI) local mapAPI = mapUI.javaObject:getAPIv1() local x1 = mapAPI:getMinXInSquares() local y1 = mapAPI:getMinYInSquares() local x2 = mapAPI:getMaxXInSquares() local y2 = mapAPI:getMaxYInSquares() WorldMapVisited.getInstance():setKnownInSquares(x1, y1, x2, y2) end ----- local function replaceWaterStyle(mapUI) if not WATER_TEXTURE then return end local mapAPI = mapUI.javaObject:getAPIv1() local styleAPI = mapAPI:getStyleAPI() local layer = styleAPI:getLayerByName("water") if not layer then return end layer:setMinZoom(MINZ) layer:setFilter("water", "river") layer:removeAllFill() layer:removeAllTexture() layer:addFill(MINZ, 59, 141, 149, 255) layer:addFill(MAXZ, 59, 141, 149, 255) end local function overlayPNG(mapUI, x, y, scale, layerName, tex, alpha) local texture = getTexture(tex) if not texture then return end local mapAPI = mapUI.javaObject:getAPIv1() local styleAPI = mapAPI:getStyleAPI() local layer = styleAPI:newTextureLayer(layerName) layer:setMinZoom(MINZ) layer:addFill(MINZ, 255, 255, 255, (alpha or 1.0) * 255) layer:addTexture(MINZ, tex) layer:setBoundsInSquares(x, y, x + texture:getWidth() * scale, y + texture:getHeight() * scale) end local function overlayPNG2(mapUI, x, y, scaleX, scaleY, tex) local mapAPI = mapUI.javaObject:getAPIv1() local styleAPI = mapAPI:getStyleAPI() local layer = styleAPI:newTextureLayer("lootMapPNG") layer:setMinZoom(MINZ) local texture = getTexture(tex) layer:addFill(MINZ, 255, 255, 255, 128) layer:addTexture(MINZ, tex) layer:setBoundsInSquares(x, y, x + texture:getWidth() * scaleX, y + texture:getHeight() * scaleY) end -- -- -- -- -- Now, after the last set of dashed lines you can add your lootable map definitions with the following code: Spoiler LootMaps.Init.MyLootableMap = function(mapUI) local mapAPI = mapUI.javaObject:getAPIv1() MapUtils.initDirectoryMapData(mapUI, 'media/maps/MyMapMod') -- 'media/maps/MyMapMod' - this should be where your maps worldmap.xml file is MapUtils.initDefaultStyleV1(mapUI) -- Specify the appearance of the map. replaceWaterStyle(mapUI) -- Use solid color for water instead of a texture. mapAPI:setBoundsInSquares(12900, 9900, 14399, 11399) -- (starting x, starting y, ending x, ending y) of the area you want to display and uncover, in World Co-ordinates. overlayPNG(mapUI, 14299, 9900, 0.666, "badge", "media/textures/worldMap/MyLootableMapBadge.png") -- Add your lootable maps banner PNG. overlayPNG(mapUI, 13000, 10000, 0.666, "legend", "media/textures/worldMap/Legend.png") -- Add the legend PNG. MapUtils.overlayPaper(mapUI) -- Draw a paper-like texture overtop the map. end Make sure that your "LootMaps.Init.MyLootableMap" on line 1 matches the name you specified on the "Maps = " line in your map item script you made earlier in this tutorial. The rest of the code is commented to describe what they do. The "textures\worldMap" folder that you created at the start should be used to store your maps name banner png if you have one and is referenced in the above code to make your lootable map look more official. As you can see, no external PNG's need to be created as the map is drawn from the data stored in the maps worldmap.xml file, which is what the "mapAPI:setBoundsInSquares" is using to draw a certain section of the overall world map. And that's it, copy your entire folder structure into your "C:\Users\YourUserNameHere\Zomboid\Mods" folder, load up the game, enable the mod (Your map mod if you made your lootable maps as part of a map mod) and start a new game, you now have your lootable map in game and waiting for you to find, and when you do it will uncover that area automatically on the main in game map. If you need a working example you can always subscribe to Bedford Falls on Steam and check it's workshop folder "steamapps\workshop\content\108600\522891356" . It's handy to verify your folder/file structure etc if you're having problems.
-
J.A.G (Just A Game) New Project Zomboid Steam PvE server with plenty of QoL mods and a fresh wipe as of 9/26. We are a friendly community just starting out and looking to grow. We have plenty of mods like add on maps, vehicle and trailer additions, armor, lockpicking, and many more! ⦁ Snakes Mod ⦁ 4 Hour Days(2 day and 2 night) ⦁ 3x XP ⦁ 5 free trait points ⦁ Increased reading speed ⦁ factions and safehouse day 1 ⦁ Truly safe safehouses: no looting or trespassing ⦁ spawn at safehouse ⦁ Fair and active admins ⦁ Low ping, high quality server ⦁ challenging, but not impossible zombie population ⦁ loot respawn every Week ⦁ SO MUCH MORE Mods https://steamcommunity.com/sharedfiles/filedetails/?id=2868277866 Please join us at our discord at https://discord.gg/9aqPPtRjuH for any questions and to be part of a growing and active community! We are always open to community suggestions. We also host several other games, so come check us out. IP: JAGgaming.us.to Port: 1626
-
I'm playing with the mod for britta weapons and armor, but i have problems and the game ends up crashing when i attack zombies with melee weapons. I asked a friend and he told me that the problem is caused by these mods when his objects are stained with blood, apparently the VRAM fills up over time and the game ends up crashing. I think he may be right, because it happens when I've been playing for a long time. Could someone tell me if it happens and if it can be solved?
-
Servidor de Project Zomboid | PVE/PVP | Abierto 24/7 | Refugios con protección offline | Próximo Wipe: Próxima estable | https://discord.gg/xKuVhGazAS