Search the Community
Showing results for tags 'mapping'.
-
I'm getting all my ducks in a row to work on a map + tiles mod, and here's some questions I haven't been able to figure out. I'm a fan of not having to redo a bunch of stuff late in a project, so any help is much appreciated! Are the road tiles behavior hardcoded? I'd like to make a couple more, but I don't see any properties or relevant scripts that make a road tile give a smooth ride (compared to driving on grass). I just want to make some tire marked roads so they aren't so uniformly clean; I could do this with an overlay, but if I'm going to do that, then why not save a little and make them a full opaque tile? In my test map, I can't get zombies to NOT spawn. I have a sandbox preset that works just fine with the vanilla map, no zeds spawning. The same preset on my map has a small amount of zombies everywhere, including where I spawn, and inappropriate places like water or in kitchen counters for example. In this case, I was using an all-black spawnmap. I thought maybe some slight noise was getting saved or something, but that wasn't the case. I also tried other combinations of spawn settings with some painted white spots in my spawnmap, but still seeing the loose zombies peppered across the cells. The map with the painted spots is increasing population density there, so that works as expected. But having them spawn on top of the player spawn or anywhere else they shouldn't is a problem. What am I missing here? (afterthought to point out that I am using the correct pixel size for the spawnmap) I've gathered that most of the named zone areas (TownZone, Forest, etc) relate to trapping and scavenging through a couple thread and looking at scripts. Since I can't open the vanilla map in the editors to see exactly how things are laid out, just a few questions here. Nav zone: What is this used for and where? I assume I would lay these zones out on roads, but what about say, a sidewalk system on a school campus? And should a Nav zone overlap a Town Zone, or does the game expect them to be broken down so they don't overlap? Also, is it possible to use custom zone definitions? I've got a half-baked idea for adding random barricade type things similar to the car wrecks.
-
Hey yall, I've been tinkering with the rules sheet the last few days to add more colors to the bitmap to make farms a bit more easily, as Im a big fan of just creating things randomly. Then I decided big flower fields and other sorts of trees and all sorts of miscellaneous items would be nice to see to differentiate areas. The problem I'm coming across is that trees that arent some sort of Pine variant have the trunk as one layer and the leaves on a higher layer. This would work fine in the builded tool but for use on a veg bitmap theres nothing higher than the vegetation layer. Now if I add a layer and call it "vegetation 2" and have the leaves appear on layer "vegetation 2" it works out fine. The problem is that I can only make that layer in tilezed and only one cell at a time. Now my question is how can I do this where someone would not have to add a layer to each of their cells?
-
 Hello everyone! I've been working on making a (will be) large standalone map (not connected to Muldraugh). I was wondering how I could effectively add more spawn regions to it (ones for each 'town'), currently it just bugs out and adds another world which isn't what I want. I was also curious how one might efficiently create multiple spawnpoints regions in Worlded as it currently seems I can create one and then would have to go and manually add the spawnpoints to all the other regions as it doesn't differentiate them. I imagine I could do this by creating multiple maps and merging them together, but I want to avoid splitting the .lots and such between multiple folders. Appreciate any and all help! Here are a couple map teasers for those curious, will be posting in WIP fairly soon.
- 1 reply
-
- 1
-

-
- mod
- spawn regions
- (and 5 more)
-
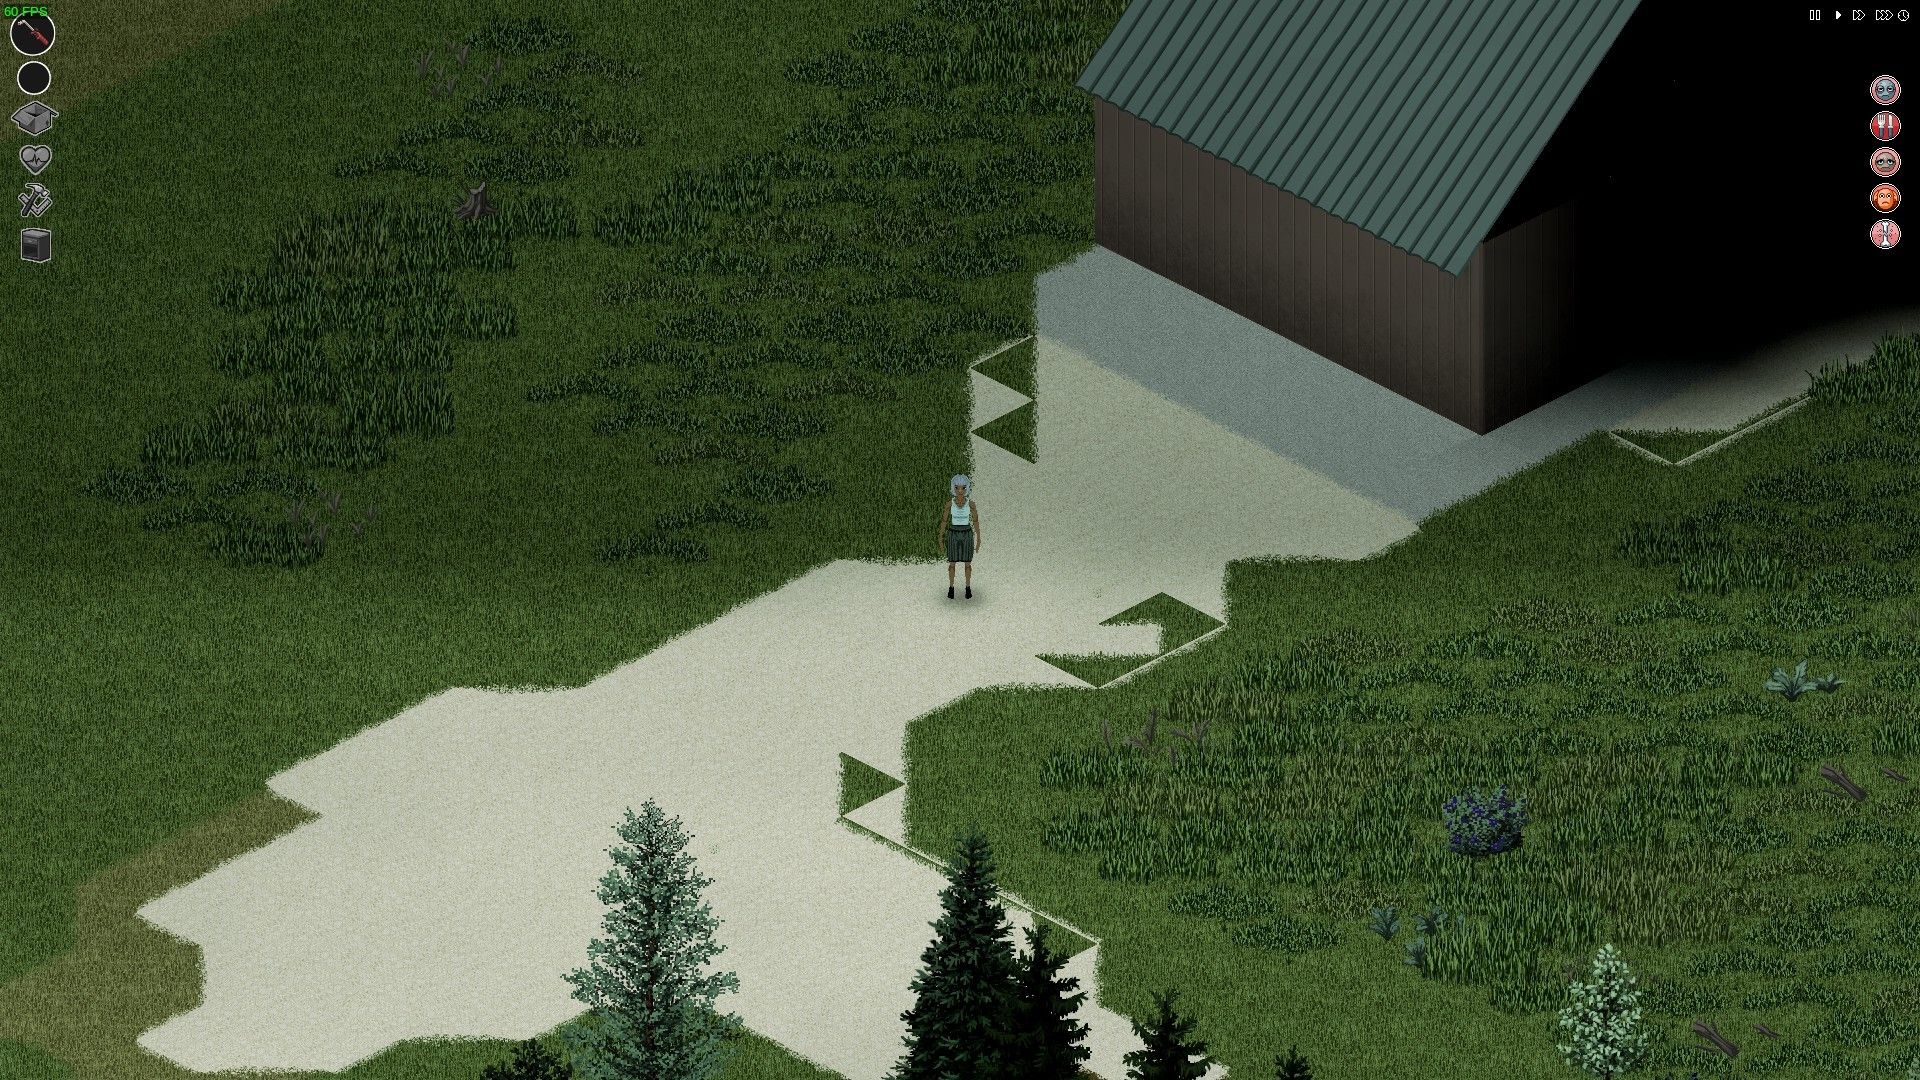
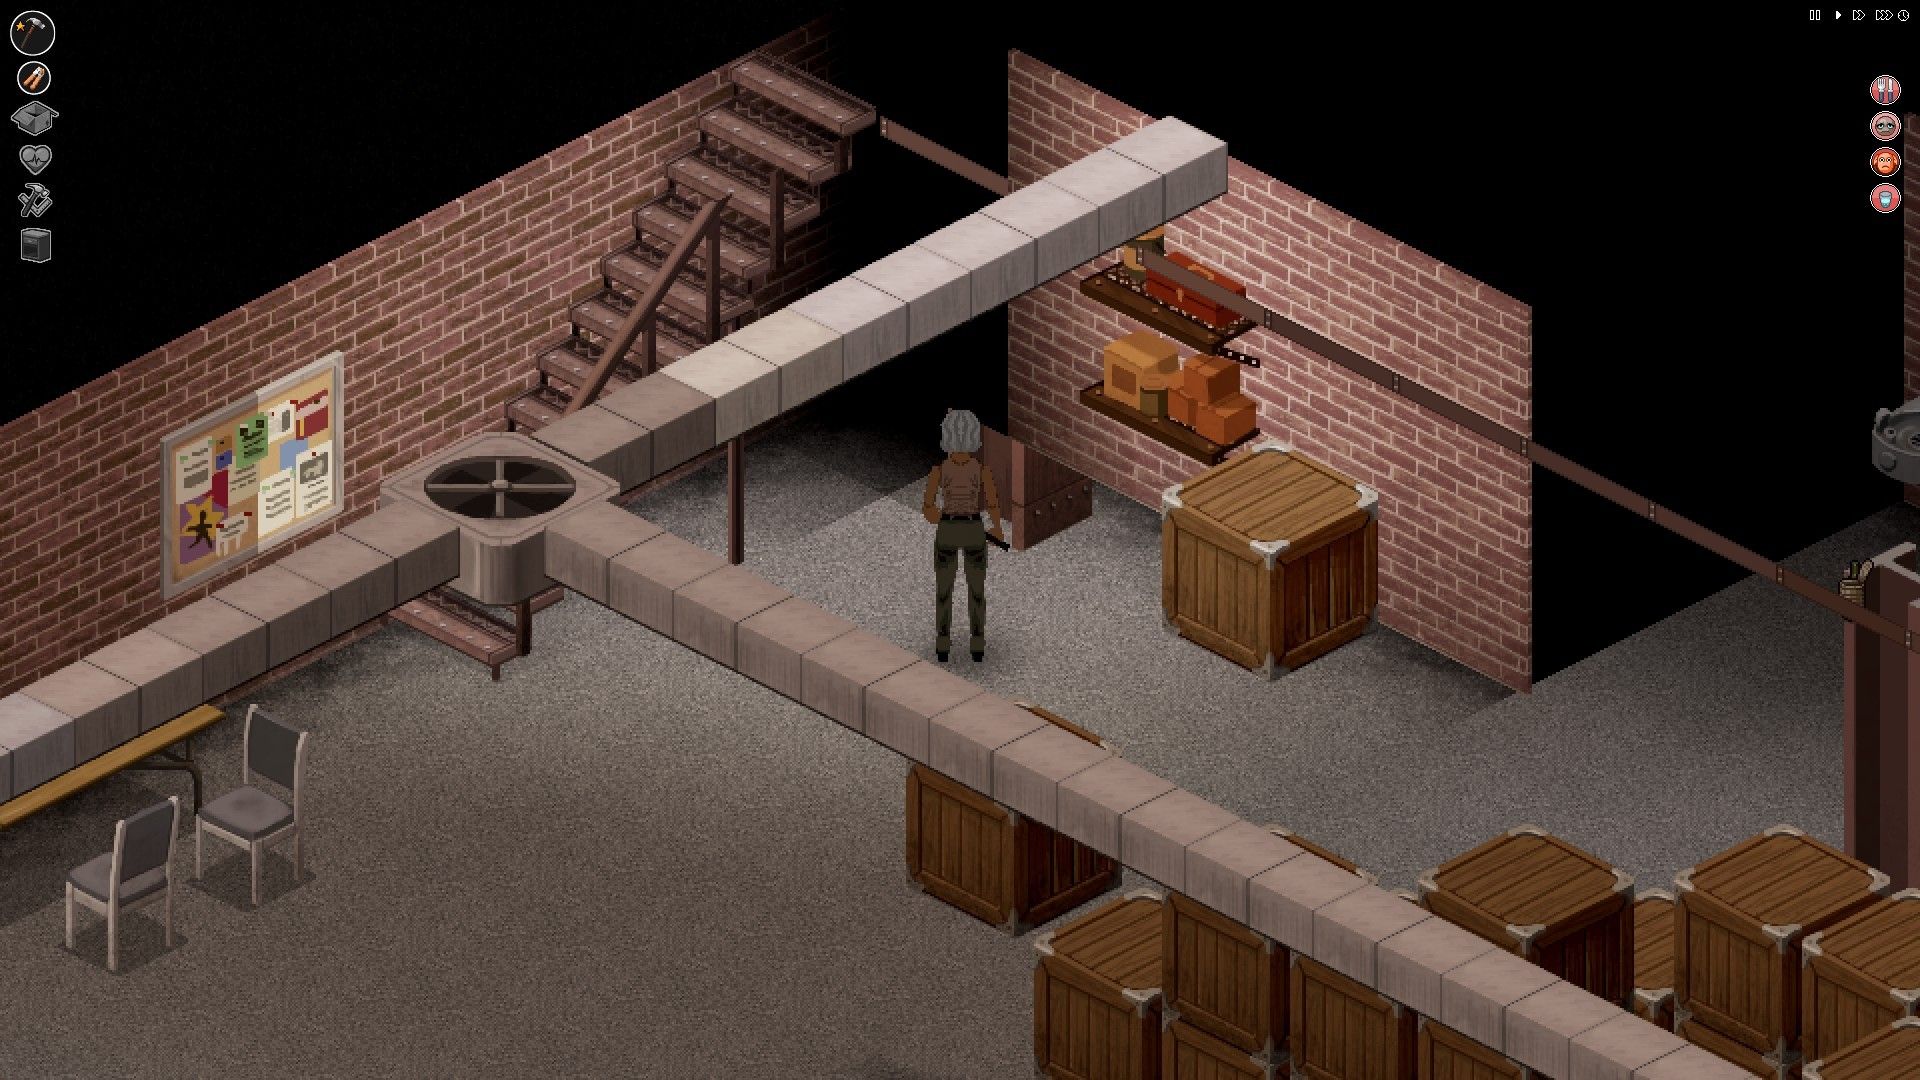
 It seems that some tiles got scrambled/rotated in between the builds. These tiles were looking correct the last time I played a year ago, but some map addition probably caused them to appear scrambled, which might be related to this bug where according to a post from @EasyPickins generating cells again helped or this bug which remained unfixed in 39.67.5 (I have yet to verify it on 39.68). I was certain I found another similar location with scrambled tiles around Muldraugh, but since I can't find it now in my screenshots, let me post about the one I know about: North from Muldraugh North Farm: current vs how it used to look like. I compared the current version with the Alexandria 2015-07-22 as the wrong tiles seems to be there also in build 38 map. There's also this issue I spotted in North Muldraugh Large Warehouse, but it's not visible in PZMap:
-
I have followed the steps of this excellent tutorial to create a custom map: https://steamcommunity.com/sharedfiles/filedetails/?id=853478035 and at the step of testing my map, I can't seem to launch it (how frustrating!) The game recognizes the mod, the spawn points, launches and then gives me an unexpected error type. I think I have all right files needed (I triple checked at this point), but still the same error. this is what the console says, can anyone help me please? console.txt
-
Hi everyone, I'm just learning Tilezed Worlded, and need a little push in the right direction here... So I've got my TEST.png, TEST_veg.png, TEST_ZombieSpawnMap.bmp - [Started] TileZed, went into WorldEd... - [Converted] to TMX with no errors - [Loaded] successfully into WorldED - [Clicked] cell 0,0 and everything loaded and looks as it did in TileZed - Added Building, and [Saved] as TEST.pzw - Went back to Tilezed, [Edit] - [Preferences] - [Zomboid], added the WorldEd Project file I just saved... - [Closed] TEST_0_0.tmz.... [RE-OPENED] TEST_0_0.tmz And I am not seeing my buildings in TileZed.... Am I missing something ? ====================== EDIT ========================= So under the [Edit] - [Preferences] - [Zomboid] tab where it states you must close/re-open to see changes... I thought this to mean merely the TMX file.... But it seems to me, that closing and opening via the [FILE] menu doesn't make the changes appear.... Instead, when I close it and restart TileZed completely, the changes (buildings in this case) are visible in TileZed, to allow further editing of the landscape with buildings in place for reference... Hope this saves someone else some aggravation!!!!
-
 Any full tile roof peice that is currently not over a room definition in your building needs a room definition. For any bits that are above an internal room, simply make sure that room has a room definition (all room in buildings should, even hallways etc). If the roof bit is over an outside area (such as a porch) then instead of giving it an internal room definition, which could possibly mess with loot tables etc, use the new room definition made for this situation - emptyoutside. In the example below you can see that this building has a porch roof outside the front door, all other bits of roof are already over a pre-existing room definition and so we don't need to worry about them. We do need to add an emptyoutside room definition on/under the porch roof however as there currently is no room definition outside the building. In this example, the porch roof is on the roof layer of floor 2. If we check Ortho view you can see that a room definition of emptyoutside yellow) has been applied to the corrosponding tiles on floor 2. Once applied, simply save the building and move on to the next. Once all buildings are done, close buildingEd and open your map in WorldEd, generate lots and you're done, your map should now support the new roof occlusion system! If you're having problems getting it to work properly, remember: every "full tile" roof peice (the little overhang peices you see in the example above do not need to adhere to this rule, just leave them as is if you have any) must be "over/on" a room definition, so make sure every room in your buildings has a room definition (including hallways etc). Add a room definition of "emptyoutside" (without " ") to any full tile roof peices that do not sit "over/on" an internal room definition. Make sure to generate lots in WorldEd once all of your relevant buildings have been updated.
 -
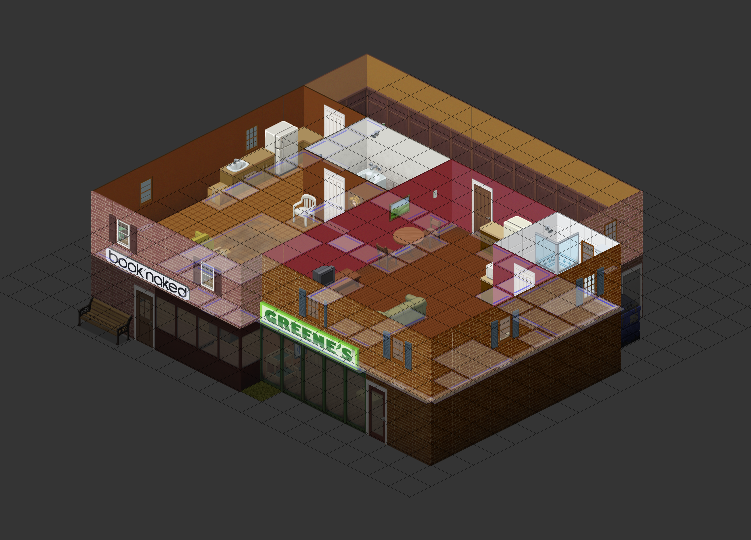
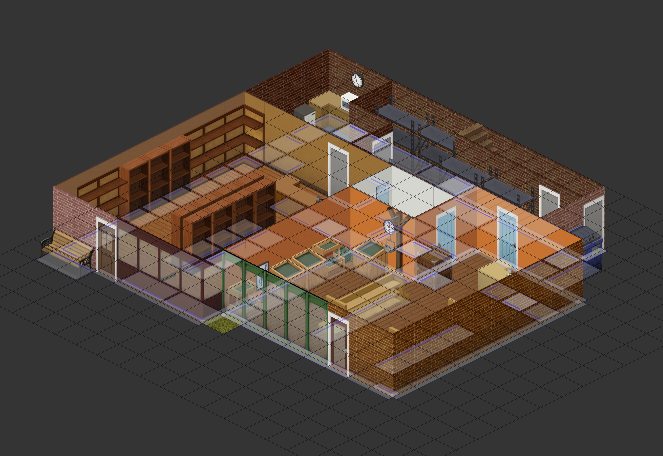
ALL BUILDINGS I MADE Since I intend to continue on creating buildings for the community, i took advice from Atoxwarrior and made a single post for all my creations! Feel free to go throgh them and pick the one you liked the most You can use'em freely on whatever project you might be doing, just mention me in the "credits". ====MADE BY TEREC====
-
BOOKSOTERE AND GREENE'S BUILDING SIZE: 20x20 DOWNLOAD:unfinih.tbx MADE BY TEREC
-
Hey guys I need some help with TileZed's BuildingEd. I just finished a cool building that I worked so hard on, saved it and everything, didn't click on anything out of the ordinary. When I went to WorldEd, I clicked on my building, didn't show a preview image. When I dragged it out onto my Cell, it didn't show a building, neither did it plop a building when I placed it on my map itself. Then I went to BuildingEd to see if I messed something up, and instead I got an error saying, "Error Reading Building - Invalid Object Coordinates (1, -3 Line 2209, Column 72". What does this mean and how can I fix it without having to remake my whole tower? THANK YOU! My building's png is still in one of the .pzeditor folders, so idky it won't show in WorldEd or let me edit it either in BuildingEd.
-
Like the title says, I want to start creating my own map and buildings. I've never done it before, but I've got the time and I've got a decent enough computer, as well as some ideas for a town or two that I've been wanting to bring to life. Unfortunately, I have no idea where to begin. Thuztor's supposedly tell-all mapping guide is no longer accessible for some reason, so I'm not quite sure how to go about doing ANYTHING in relation to mapping. Does anyone have another guide available, or perhaps a link to Thuztor's guide that actually works? Is mapping easy or hard? I'm an utter noob when it comes to mapping, so forgive me for being so confused.
-
 Ok when using the wall tool make sure for these sides you click on Exterior wall and select your texture. Click the multicolored square at the top toolbar and you get the room tool. then go to the plus and click add room When you open it up you see there are two names, the top one doesn't matter, the second one indicates what spawns there, so if im making a bedroom put bedroom for internal room name. https://theindiestone.com/forums/index.php?/topic/5461-full-list-of-current-room-definitions/ this is a good list to help you figure out the names for spawns (THANK YOU RingoD123 for the roomlist). Then go down and click interior walls none (if you used the wall tool) do the same for Tri Go to floors and pick your floor tiles you want, i choose carpet for this bedroom If you click on the little color box, it will let you choose a color so you don't confuse yourself when you have more than one room like 2+ bedrooms, one you can set to blue, another to red. if you want or you can keep using the same one if it's going to use the exact same floors. then you go to the exterior walls and select what you want the outside walls to be, if you want to use the wall tool, select none and it will look like this If you want it to match or use a different color for the hallways outside the bedroom go to exterior walls and select your wall (i decided to match mine). If you go to Ortho you get an overhead view and you'll notice that your rooms are visible based on the color you picked earlier you can do everything without using the room tool if you want, then when you want to spawn stuff(you will need to use the room tool for that) you just set everything in the room tool to none, and go to exterior walls and click it to NONE and it will look like this (this way you can continue using the wall tool). Wall tool version This is how you do floors in ISO mode rather easy. Just go to floors when you have your room selected red bedroom(or whichever you picked) and pick the floor tile you can switch back and forth once you have the rooms setup using the textures on the right, just change the Room drop down menu I have highlighted and it will automatically fill it in Red Bedroom right window click on tile, bam, blue bedroom click on tile, bam, etc etc Also dont be a NUB put lightswitches in your house or it will be pitch black Lighting - Indoor Also if you want to spawn items not found in a bedroom in a bedroom but not mess up dressers too here's how, make a new room with a new internal name - I picked gunstore for gun spawns, picks a gun locker for furniture and placed it. set everything to none, except the same color floor, then this is where ORTHO helps and the color coding click the draw room tool after selecting the new room from the drop down menu you'll notice I have 4 square selected (only need one for the gun locker) but the furniture is blocking the tile so I did 4 for you to see As you can tell it all looks the same in ISO mode, but anything that is storage will spawn gunstore stuff now on those 4 tiles So when you have stuff like offices, that you want office supplies, but also have something like a mini fridge, or cabinets, you can just do that and keep the same textures, but have different spawns! I hope I explained it well. Hopefully there will be more to come! I often get questions in Discord so since I go through the effort to walk people through it I figure I'd share it here! Again TY StarKitty for the motivation! Happy Mapping!
-
- 1
-

-
- mapping
- place wall tool
- (and 8 more)
-
So earlier today, it was brought to my attention there are some new tiles that "Starkittycat || Game Dev || YT" made me aware of. One of those new tiles is Sliding Glass Doors! So here's how to use them on your house to pretty em up all nice. Ok top left click on Building - Then tiles Left side the top menu click on Doors Then in the middle window pane, scroll till you get to fixtures_doors_01, then on the right side the doors will appear. Go down and click on the white sliding glass door(or the red ones). Then you see my mouse cursor in the bottom left is over the Plus symbol. click Add Tiles Click Ok when you see it added to fixtures_doors_01 on the bottom left menu. Ok then go to ISO mode and click on Door Icon at the top toolbar, then click on Door Frames in the right side menu, Select NONE otherwise it will act strange This is what happens if you don't click none, apparently the modified it for doors to act sideways. This is it with door frames at none. Now I'm going to do windows. Ok, so click on the windows, then select the white window one without a handle, Go to the bottom left and click the plus. (just like we did with doors Then in ISO mode click on the Window Tool in the top toolbar, then go to the windows, on the right side menu and select the white sliding door window under fixtures_doors_01 Now you don't have to go to Tiles ever again for those textures! it is a little silly, but it saves time later on. I hope this helps everyone add some awesome sliding glass doors to their houses! Happy Mapping and thanks to StarKitty for motivating me to do this!
-
Hey Indie Stoners, I'm playing PZ for about a month now and the 130+ hours i collected hopefully speak for themselves. Congratulations for the release of the newest build. Having such progress after a few weeks may make me a spoiled kid though. So I'm looking forward to build39 within the next weeks. I'm here to give a bit of a feedback but mainly to ask a catalogue of questions. I'm quite tempted to make a map for your game by my own. But I need to know what I'm getting into, as I am aware that this will be an effortful task. For TF2 I carried a map within 5 months to its first alpha stage but eventually dropped it for the time being. This was caused by the strict sets of options you get if you want the map to succeed gameplaywise. There's so much to balance for a teambased game like this, that I was demoralized (after a few mediocre tests) by all the compromises and their solutions one has to make. (Link to the unfinished TF2 map) With less "lod" but more freedom to build what I want to and focus on atmosphere, I hope to have a better experience building for another game I got passionate about. 1. The Editor I already downloaded it and checked it out, watched and read a few tutorials but quite a few questions remain: 1.1. I can't understand why the whole process is structured like it ís if my observations were correct: TL;DR Am I forced to follow the order of the process as I understood it in the tutorials and do I have to repeat most of the steps again every time I like to edit a part of it. 1.1.1. Why do you have to draw the fixed basic structures as the first thing? One has to know quiet exactly where the streets etc. (base map), the forests (veg map) and the zombies will have to be (zombie spawn map) before he even started! Also why isn't this part of the editor itself - why do you have to use another program to draw a png and a bitmap? Why can't I just start with empty tiles and draw rawly on that? 1.1.2. Why do you have to set the inner / exterior wall textures (f.e.) before you draw the wall in the building editor? Wouldn't it be more intuitive to just draw an empty wall and detail it later? 1.1.3. Is there really only one exterior wall texture you can choose for the whole building? Or: How can I make a stone building f.e. with glass-walls in between. When I change the wall type, it always changes it for the whole building. 1.1.4. Why do I have to set the function of the room (bathroom etc.) before I draw the room? Why can't I just build a house, then set rooms and do some detailing in between? 1.1.5. How do you edit a map? 1.1.5.1. If I feel a street is just a few tiles too long, do I have to draw the whole base/veg/zombie map again? ...each time I wanna test it out ingame? 1.1.5.2. When there is new content (like the cars that might come sooner or later) - will i have to edit and update the map again to let it spawn cars or implement some of them myself? 1.2. What's randomly generated, how does spawn work and what is possible to do? 1.2.1. "For sale"/lease-, barricaded houses "bleached" corpses keys on corpses / zombies.. How are these generated? If randomly: Does this mean that a house I built might be empty / barricaded..., because it was chosen by random? If not random: How to add corpses with bleach/pistol or even a written note to it? 1.2.2. Is it possible to have vegetation in buildings? - christmas tree! Or at different levels than 0? 1.2.3. Does the population number you choose for your town affect anything? (like zombie spawn) 1.2.4. How do zombies spawn in buildings on different floors? 1.2.5. Is there any other way than stairs to get to a different level(for building, no sheet ropes)? Roofs arent walkable. Any other way? Is or will there be a way to introduce different ground levels to make a hill f.e.? 1.2.6. Is there a list of things that can be spawned for each room assignment (bathroom f.e.)? 1.2.7. Are there any more ressources; more props f.e. to download? 2. General Impressions / Bugs / Ideas 2.1. Bugs In singleplayer a few bugs are persistent for me: Pouring out water out of containers (pots, buckets, bottles) won’t work and causes error messages (red, rightbottom screen) occasionally and permanent after it happened once. Only a restart of the game fixes this for some amount of time Can’t build something because some materials are missing which I actually have enough of in my inventory. Fix by restart or sometimes switching the item between different containers, then back to main inventory In Multiplayer sometimes items disappear while changing container. 2.2. Wishes 2.2.1. Improvements I like so many features. But quiet a few are implemented systems that aren't worked out: Metal working Electricity Lids / Jars, Shooting ; with low/no skill, seeing what I can craft with it on 1 ingredient (like crafthelper mod) Radio / TV system - what about cassetes and radiochannels after electricity is down? Or even the option for custom radio channels? 2.2.2. Additions Animations / Cars / NPCs? seeds to plant trees ; build natural barriers / own forrest, alley, etc. more craftable weapons (maybe worse in killing than others but with f.e. stun effect): slingshot, sock with billiard-ball... tbc Whoever made it to the end of these lines: Thanks for the patience and energy. Hopefully someone can answer a few of my question so I can find out how limited / unintuitive the editor is so I can decide if I want to make a map with it and noone takes offense at my critism towards at atm. Cya there, Bud
-
Spawn Map-Objects Utility - Enhance your maps ! Workshop link What is this mod ? While I was working with the map editor, I got frustrated some items could not be placed using it. For instance, barricades and campfires. So we decided with a friend to solve this problem... Once done we decided to make this mod and make it as generic as possible ! This should allow any mapper to use our object-spawning system to make better maps and any modder to upgrade it with ease. I'm a player, what do I need to know or do ? Nothing. This mod should be a dependency mod for any map that uses the Spawn Map-Objects Utility. One you have this mod installed, it should work without needing you to do anything. I'm a mapper, what is this mod doing precisely and how does it works ? Tell me more about it ! This mod will allow you to place items & events within the map editor like campfire, tents, wall frames, zombies... Those placeholders will be converted into their working version inside the map once loaded. This means you will be able to place pick-up-able tents, light-able campfires, thumpables wooden and metal structures, break windows, spawn zombies at precise places and even more ! Interesting... So how do I use it ? The installation is very simple, once you have subscribed and download this mod, locate it's installation folder : \Steam_Installation_Folder\steamapps\workshop\content\108600\974718243\mods\SpawnMapObjectsUtil Once inside the mod folder, you should see a Tiles folder. Open it, and then open the 2x folder. You should see all the placeholders images you will need. Copy all these .png files to the 2x folder of your Tilezed. Now, you should be able to use the placeholders via the tilset list. I usually place those on the Furniture layer but it should work on other layers too. If you want to test the features, check out the building we are using for internal testing : https://rbfi.io/dl.php?key=/0Sol/testmap.tbx Once your map is finished and you are ready to publish it to the workshop make sure to add this mod to the dependencies of your map. So that it will be prompted to the players to install it with your map. Great, but before I install it, can you showcase some features ? Of course, here is the list of what you can do with the current version of Spawn Map-Objects Utility. Place thumpable walls of all possible quality with adjusted durability (Logs, wood, metal). Place fences adjusted durability too (Sandbags, wood, metal plates or bars). Place thumpables and working-properly barricades on windows (1,2,3 or four planks, metal sheet, metal bars) Place upgradable by player walls frames. Place weapons, literature, trash and food items on the floor. Place properly-interactable camping materials (tents, campfires and compost) Zombies-spawner at specific places (Horde inside a tower away from the city or a lone zombie in a specific room...) Add water collecting barrels already full of water Place fishing-nets on your lake or generators in a specific room Break specific windows on the map (with them still barricadable and full of dangerous shards). Break and remove glass from windows and keep it barricadeable Place sheetropes on windows. We also plan to add more to this list with upcoming updates, things like traps, sound events and such. What are those red tiles on your placeholders images ? As said earlier, we are planning to add more tiles to the placeholders. You can use the blue ones, but if you try to place a red one, it won't work. The red tiles are the not-implemented-yet features. But we kept it so that it will be easier to update once done. Please do not use the red placeholder tiles. I'm a modder, you said I could expand your utility ? Even more ! We made functions for you to easily add your own placeholders or remove the "default placeholders" shipped with the mod. Let me explain. Create your custom placeholder Once you have created the png of your custom new placeholder, you will need to code the replacement function in lua. To do it, you can write your lua file using this template : require "WorldManager/SpawnFromPlaceholder"; MyPlaceholder = {}; MyPlaceholder.replace = function(square, tileObject) -- Your code goes here -- indicate that the method has worked properly -- and the placeholder tile can be removed return true; end -- register and identify the placeholder in the system SpawnFromPlaceholder.Add({ name = "MyPlaceholder" }); Here are the explanations : First, you need to implement the method MyPlaceholder.replace(square, tileObject) which will be called for each object found in each square loaded. This method need to return a Boolean (true or false) to indicate if the method has worked. If the method return true the program will automatically delete the tile placeholder else it does nothing. The second step is to register your placeholder in the system with the method SpawnFromPlaceholder.Add(placeholderInfoObj). The parameter expect two important properties : name : the name of your object which contains at least the method replace() Remove default placeholders This mod allow you to remove unused shipped placeholders to save resources and gain performance. To remove the placeholders, you can use this snippet : require "WorldManager/SpawnFromPlaceholder"; SpawnFromPlaceholder.Remove({ "WallsPlaceholder", "ZombiePlaceholder", "..." }); The method will remove the placeholders listed in the array when the event OnGameStart is fired. Shipped placeholders list BarricadePlaceholder CampingCompostPlaceholder (campfire, tent and compost) CarpentryAndConstructedPlaceholder (sandbag, barrel, rain collector, lamp) DroppedFoodItemsPlaceholder DroppedTrashItemsPlaceholder DroppedWeaponsItemsPlaceholder GeneratorPlaceholder TrapsPlaceholder WallsPlaceholder WindowStuffPlaceholder (smash & clean window, sheet rope) ZombiePlaceholder
-
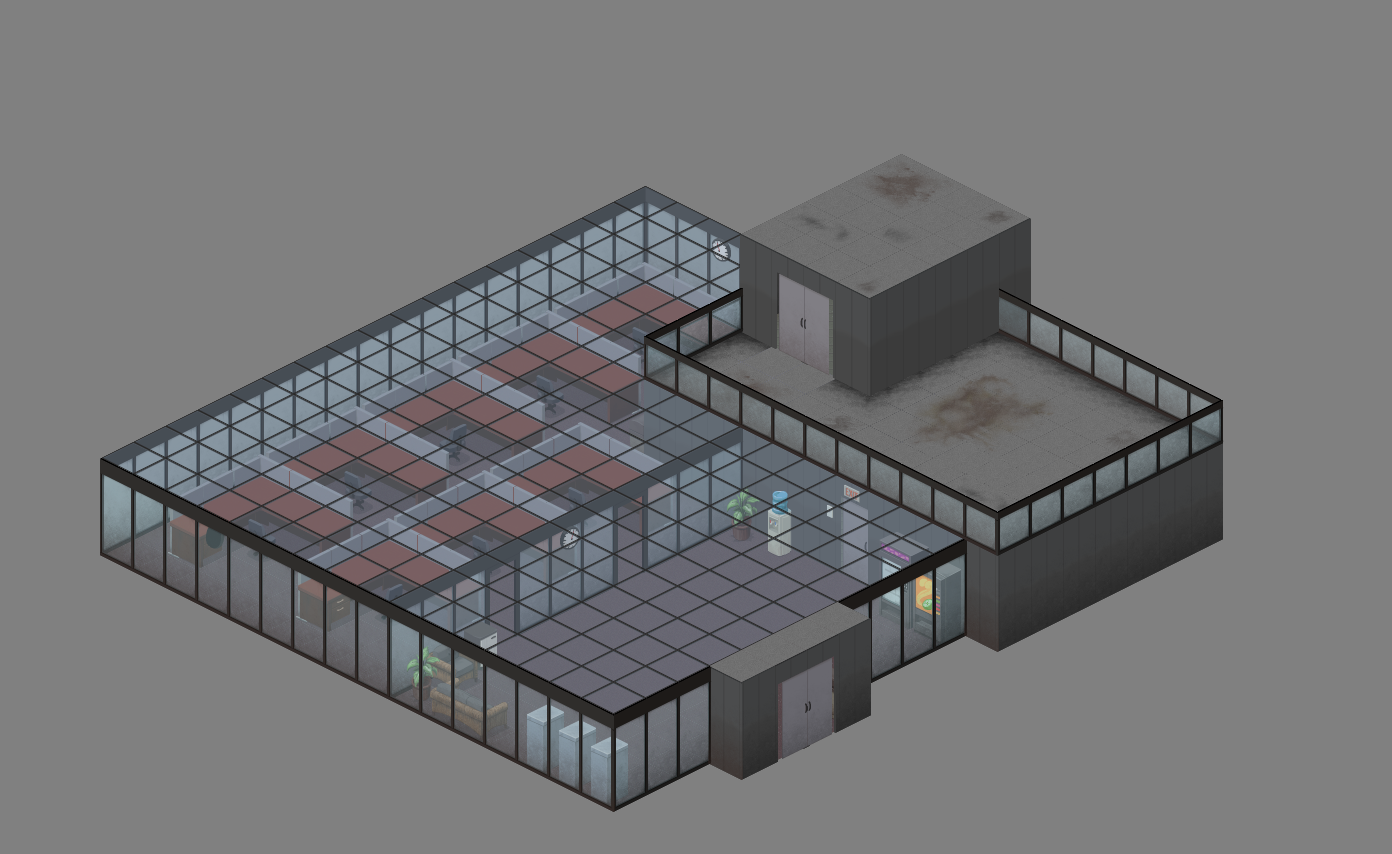
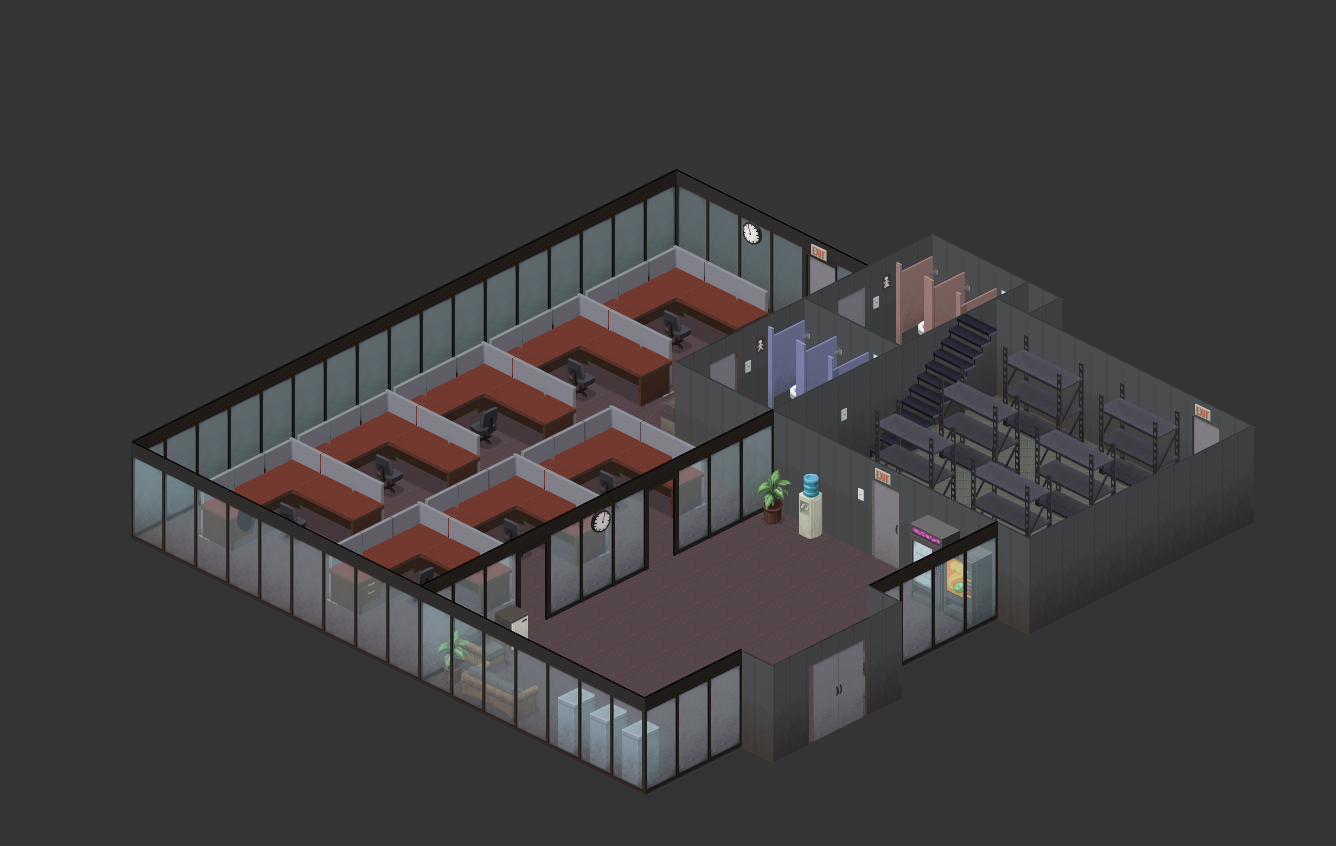
Hello fellow players and map editors. I'll be posting my custom buildings here as I make them. I'd like to hear what you guys think so that I could get a good feeling what this community wants. So far, I built a simple, one story office building that could be a car dealership. A parking lot will soon come separately. I might be able to expand the building... Loot will contain tools (Such as wrenches, hammers, etc.) and electronic parts.
- 10 replies
-
- 3
-
-
- custom building
- buildings
- (and 3 more)
-
Ok so I looked for every tutorial I could find. Most of which are dead links, outdated or incomplete. So I used http://projectzomboidatoxwar.blogspot.com/ By Atoxwarrior Sadly it wasn't in english so I had to replay it a few times to make sure I got everything (of course this is with the old tools as well too). But I managed to do it. I've added my tiles to tilzed. I've created a new tileset definitions I've created a .pack file I've modified my mod structure to include the new texturepack folders as well as modify my mod.info file No matter what I do I always get an error in WorldEd trying to generate lots "Some Tilesets missing in a map cell 0,0" The directory points to the same tiles directory read by TileZed so I double checked that. I've made it this far but now there are no more tutorials to cover this that I can find. So any info would be greatly appreciated. Thanks - Capt_Paradox Oh yeah, though i did play with my tiles folder earlier trying to switch directories between Tiles and 2X which caused my buildings to disappear in TileZed but still appear in WorldEd (after switching it back of course since that didn't help). So if anyone knows of a fix for that either let me know
-
So I have an image that I want to attach to the ground layer. It's pretty big so I know it isn't easy. I broke my image up to 4 different sections and tried lining it up so this way they'd all meet....... But they don't they all overlap each other and slightly offset. Any suggestions or methods to those would be greatly helpful, hell I'd even do individual tiles (60x124 is it?) but I'm not quite sure how to set up an isometric grid so that is proving a tad difficult. Thanks.
-
I managed to load my custom tiles into TileZed. I'm trying to add my custom tiles to the building editor. I can find them if I go under the "tiles" tab and browse that way. What I'd like to do is create a new Category and select my tiles from the "ISO" tab instead for building. I went to my .TileZed folder and tried to modify the buildingtiles.txt but it gave me an error after modifying. So I'm obviously missing something......... here's my text But like I said still tossing me an error........ any suggestions?
-
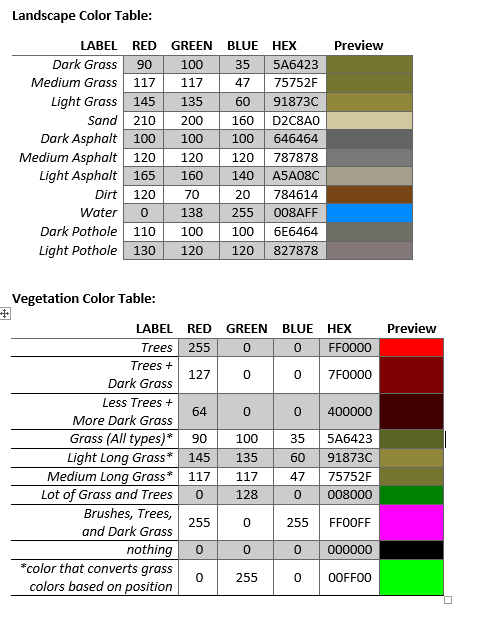
UPDATE:Tiles for 2015 didn't work for me or BlackBeard so I linked to 2014 tiles which still work. I have modified the tutorial to reflect this! If someone knows of a fix for 2015 tiles please let me know. https://dl.dropboxusercontent.com/u/237104401/Project Zomboid Mapping Instructions.txt (New Download link for Txt file Tutorial)^^^^^ This is a basic guide to get people from Veg Map to testing their Custom Map in PZ. I'm one of those people, who before I commit to something I want to understand the process to see limitations. I spent 3 days scouring the web for videos and tutorials to learn as much as I could. At which point I think I finally have a good grasp of everything up to the point of testing. I've included some links to tools and tutorials that helped me better understand this as well. Maybe later I'll pretty this up, but for now enjoy! I apologize for any typos! -------------------------------------------------------------------------------- Mapping for Project Zomboid Required: TileZed-May-25-2015-32bit.zip https://dl.dropboxusercontent.com/u/13095836/TileZed-May-25-2015-32bit.zip Tiles-May-25-2015.zip https://dl.dropboxusercontent.com/u/13095836/Tiles-May-25-2015.zip (2015 tiles that didn't work) ZomboidMapTools1_1.zip http://www.moddb.com/games/project-zomboid/downloads/zomboid-map-tools-64bit (2014 tiles that work) mapzoidv060exe.zip (Optional if you do not want to make your own maps for layout/vegetation). Paint Program First: Create a few folders for easy access: Main Folder= Zomboid Mapping SubFolders found in Zomboid Mapping Folder: -Buildings (this is where you will store building files for the Building Editor). -Output (This is where you will find your lot files(map you made) after clicking generate lots in WorldEd). -TmxWorld (This is where your saved map from the PNG/BMP Basemap/Vegetation Map will save too). -Tiles -Tools (This is where you have your Tile Definitions from the Tiles-May-25-2015.zip ZomboidMapTools1_1.zip that will be props/textures).(Extract the zip file into the Zomboid Mapping Folder,there will be a folder named Tools created, inside that folder will be another called Tiles. This Tiles folder is the one you will use for generating lot's when asked.) These instructions are going to assume you are creating a 1x1 Cell map. Step 1: Create your BaseMap(Roads,Basic Terrain). Step 2: Create your Vegetation Map (The types of Plants/Tree's and Ground Coverage your map will have) Step 3: Create your ZombieSpawnMap Your BaseMap and Veg map should be saved in PNG format. Size for a one cell map= 300x300 for both. Your ZombieSpawnMap should be saved in BMP format. Size for a one cell map= 30x30 Example File names: NewbCity.png(baselayout 300x300),NewbCity_veg.png(Vegetation map 300x300), NewbCity_ZombieSpawnMap.Bmp(Duh,Zombie Spawn map 30x30) I just used NewbCity as the example for my map project. These links will help explain the color codes to use in the paint editor to draw Base Layout map/Vegetation Map. https://theindiestone.com/forums/index.php?/topic/4823-how-to-draw-maps-for-the-pz-mapping-tools/ Thuztor's Pdf file for mapping contains good color code info as well pages 5 and 6. https://dl.dropboxusercontent.com/u/69737873/PZ/Sonstiges/mapping/Mapping%20Guide_v0.2.pdf If you want to try your hand using Mapzoid to get an idea of what it's like here's the link: https://theindiestone.com/forums/index.php?/topic/4684-random-mapzoid-random-bitmap-terrain-generator-python-win-exe/ Base layout colors Veg Map Colors(I would copy and paste these color palettes to your paint program and use them with the color picker tool to adjust your mapzoid file to your liking since it doesn't always work perfectly.:Thanks to Suomiboi again for his tutorial found here) Also make sure to disable anti-aliasing if you have any issues with incorrect colors (I didn't have too but some programs react differently). Wouldn't let me display the image here so if you want to copy them click on the links or scroll to the bottom of this page. Step 3:Now that you are done using mapzoid or a paint program to create those 3 files(which I would store in the main directory of ZomboidMapping folder) Load up TileZed. Go to the toolbar at the top and look for the tab TOOLS Then go down and select WorldEd. Now a new window popped open with WorldEd. Go to File in the Toolbar and select New and popup window asking the size of the map you want to create. Change it to 1 Cell Width, 1 Cell Height. Great now you have this empty grey square saying 0,0 You might notice in the upper right side of the screen it says Maps with a little window of folders. Navigate to your ZomboidMapping Folder you created earlier. If you saved your files to the ZomboidMapping folder earlier you will now see NewbCity.png. Drag this file from the window into the grey square that says 0,0. You should now see a basic view of the file you created in paint or mapzoid earlier. Great! Go to File tab in the toolbar at the top, Save as> Newbcity.pzw (or whatever your map name is you chose). Step 4: Go to the File Tab again in the toobar at the top, BMP>TMX then select All Cells. You should now have a new popup window asking you all kinds of fun stuff. The only one you should have to change is the top one for Export directory Select that and navigate to your Tmx_World folder you created in Zomboid Mapping earlier and select that. (if you click apply afterwards the window will exit saving your directory but will not complete the BMP>TMX so go through the file tab again doing the same process this time click OK). Next a window should popup saying Bmp to Tmx Sanity Check, click Ok. After a few seconds it should say Finished, Click OK. Step 5: go into TileZed and go to the File Toolbar tab in the upper left corner. Click Open, navigate to Tmx_World folder in the Zomboid Mapping folder you created earlier. Select NewbCity_0_0.tmx or whatever you saved your map as (make sure to keep the name the same across all files). Now you should be able to view your map in TileZed. Some notes: If you plan on changing your vegetation map I highly suggest you do it at this stage before you add props or details in TileZed Because when I tried editing mine afterwards I had to go back and do the BMP>TMX (close out of TileZed Reload the program and load up the file again) only to realize all of my street lines, fences and props were now gone. So make sure you are happy with your layout of roads/forests/vegetation before continuing to detail your map. This should roughly get your started mapping, maybe when I master HouseBuilding/Spawning ETC I will add that later. Step 6: Playing your map! So after all of this you have some really basic map you want to try out right? Ok, so go back to WorldED, Go to the File Tab on the toolbar in the top left. Select Generate Lots, then Select All Cells. Now a new pop window has started. Lots Directory: This is where your map files will save, select the folder we created earlier in Zomboid Mapping called Output. Zombie Spawn Map Image: This is the 30x30 NewbCity_ZombieSpawnMap.bmp you created earlier (or whatever your map is named) it should be in the Main Zomboid Mapping Folder. Tile Definitions: This is all those wonderful images/props for your map which should be located in the Tiles (tools/tiles is where they are now located)folder you extracted Tiles-May-25-2015.zip ZomboidMapTools1_1.zip to earlier in Zomboid Mapping earlier. (note:Depending upon how you extracted it there might be a Tools\Tiles folder inside of the tiles folder you created earlier).<<<<<< This might explain why even I was confused about the 2015 tiles and the 2014 tiles. So make sure you use the 2014 from http://www.moddb.com/games/project-zomboid/downloads/zomboid-map-tools-64bit World Origin: This tells the game what area of the Zomboid Map you are claiming for your cell. Note( Go to http://map.projectzomboid.com/ and on the left side click Map Coordinates. Now you will see it say Example: Cell 35x32 which is main st Muldraugh you obviously don't want to cover over a part of the map that has a town in it, so scroll around and find a nice spot where there isn't a a lot of stuff (clear land or forest)). Write down the cells you want and input them into the World Origin and click OK Now all the map files are compiled to the output folder in Zomboid Mapping. Step 7:Now you have to make it a mod. Go to the C:\Users\(your user name\Zomboid\Mods folder. In this folder you will notice another folder called examplemod, you can use this as a template to create your new map mod. So under the Mods folder create a new folder for your map named after your map. New Folder in Mods= NewbCity Inside the NewbCity Folder you will need to create another folder called media. Inside the Media Folder you will have to create another folder called maps. Inside the Maps folder you will have to create another folder called NewbCity (yes again!) Inside the 2nd Newbcity folder there should be the following: 0_0.Lotheader (0_0 is the World Origin you picked earlier so if you choose cell 35x32 it would say 35_32.Lotheader) Chunkdata_0_0.bin (again 0_0 is just an example for your world origin) World_0_0.lotpack (again again 0_0 is just an example) These 3 files are the files that were created in your output folder after you went through generating lots in WorldEd, you should copy them here. the other required files are: Description.Txt = NewbCity - Population ~750 <LINE> <LINE> (V1.1). U=BTL <Note>>:I figured this out but looking at New Denvers Files so I modified them to test my map, just change it to your map name.> Map.info file looks like this: title=Newb City lots=Muldraugh, KY description=Newb City - Add a short description of your map here Spawnpoints.lua : This file will designate where your player spawns in the game based on character occupation Updated because I was missing a closed bracket - Ty Blackbeard function SpawnPoints() return { constructionworker = { { worldX = 38, worldY = 26, posX = 180, posY = 180, posZ = 0 } }, fireofficer = { { worldX = 38, worldY = 26, posX = 180, posY = 180, posZ = 0 } }, parkranger = { { worldX = 38, worldY = 26, posX = 180, posY = 180, posZ = 0 } }, policeofficer = { { worldX = 38, worldY = 26, posX = 180, posY = 180, posZ = 0 } }, securityguard = { { worldX = 38, worldY = 26, posX = 180, posY = 180, posZ = 0 } }, unemployed = { { worldX = 38, worldY = 26, posX = 180, posY = 180, posZ = 0 } } } end You will notice that WorldX and World Y refers to which cell. You will also notice posx and posy refers to the tile in your cell/map. If you look at your map in TileZed you will see in the bottem left corner numbers like Example:180,172 These are your tile coordinates. So find a tile you want to spawn and write down the numbers. Now modify that file for which cell you picked earlier on the PZ map under worldx and worldy Now modify that file for which tile you picked on your map in TileZed under posx and posy Save the file and now you character will spawn in the spot you chose. The next file in the folder will be: Thumb.png This is just a screenshot for your map, you can steal the one out of New Denvers to use as a placeholder for now if you want till you have your own. So let's recap: Inside of the last NewbCity folder you need: 0_0.lotheader Chunkdata_0_0.bin World_0_0.lotpack Map.info Description.txt Spawnpoints.lua Thumb.png Make sure you have all 7 files. Ok now go back to the Mods\Newbcity folder (the first newbcity or your mapname folder with the media folder in it). There should be 2 files in here: Mod.info (this is another file to describe your map) Poster.png (Another screenshot photo) Mod.info contains this: name=NewbCity id=NewbCity description= This is NewbCity for newbs trying to map. poster=poster.png If you want to get rolling you can modify the files in the examplemod folder to make it easier. If you want a better understanding of these files I suggest you download NewDenvers map to take a look at this link: https://theindiestone.com/forums/index.php?/topic/12110-new-denver-bc-v21/ Step 8: Load up Project Zomboid Go to mods in the bottom left corner and go to NewbCity(or your map name and activate it) Create a single player game and you will see your Newbcity(or your map name) as a spawn location. Join the game and you will notice that you spawned at the location you designated earlier in the spawnpoints.lua file. Play your barren wasteland of a map and enjoy! Big thanks to EasyPickins, Blindcoder, Thuztor, Suomiboi, Mendonca for their tools and tutorials which helped me make it to testing my own custom map. Courtesy of BlackBeard! Great comprehensive tutorial!
-
I was looking at Thuztors Mapping Guide on this forum and noticed in the pdf provided that he included 2 tables for color reference. He mentioned using paint.net and I thought to make things easier I would make a nice color palette that would consist of TileZed appropriate colors. Table in Zip: The zip includes both a palette file and a word document with a table to be used for reference as well as explain what each color is for. You can also check out the mapping guide I linked to above which I strongly suggest as it includes a lot of good tips on how to make a custom map. To access the palette in Paint.net, open paint.net, than look at color window on the top of the palette there will be two icons the icon on the right is of a folder with a color wheel inside it. If you hover over the icon it will say "manage color palettes." Click on the down arrow beside the color palette manager icon and select the option that opens the palette folder. In the folder, drag and drop the "TileZed.txt" file into it. Close the open folder menu and click the down arrow beside the palette manager again, an option for a "TileZed" palette should available:) TileZed paint.net palette/Table Guide: color reference.zip
-
LOCATION OF CALIFORNIA, KY STEAM LINK http://steamcommunity.com/sharedfiles/filedetails/?id=747740095 UPDATE 8/19/16 The Map is now given to public in order for it's completion. In case of wanting to mod California in anyway. Dropbox Link Below Entire Cali v2 Map, and Buildings from All of PZ World. Here is the LOTPACK AND WORLD PACK FILES TO OVERRIDE THE WORLD FILES FOR CALIFORNIA TO SHOW ON MAP California, KY (Manual File Installation) https://www.dropbox.com/s/4b4sqkjucm1mmak/California%2C Ky.zip?dl=0 Directions on how to get to California the fastest way. Think of your points of the Compass as Such. Muldraugh= South WestPoint = North Bedford= East California= Head West From West Point down the River (Opposite from Going to the Mall) Accomplished. TCO So I have (Finished Louisiana, Ky for the most part, waiting on feedback to tweak what needs it) and I have an Idea for a 6 x 6 cell to fill the top of the map above West Point with the River. Image for Reference. Image above Edited on 8/15/16 I have tidied up the Veg map to allow me to finish the river north. srandiny is working on a bridge. I am hoping to get a Good Golden Gate to cross the river. Not sure If I want two bridges that cross the river yet. Sieben has a great building that I would love to use. Kinda inspired me for the city of California. I would like to have tall buildings for the most part in here. And for the outlaying cities of California I will make them more rural. Sieben Has All of the Military Bases and Whatnot that I am going to use, Plus this massive Hotel! Tell me what yall think. I will need help with some buildings as usual to populate the map. I have plans for field areas and outdoor tourist attractions. We will see how this goes. I plan on this map taking upwards of a couple months. @ Jela331 seems to think that I won't give Credit Where it's Due. So Please, If someone has built something that I might or might not use in my Map, Please Don't go Ham. I have no problem Giving Credit to anyone who Helps with this map, Has buildings that I would like to use, and or even attempts to play it. I will do everything In my power to find out where I have gotten the file and Give credit to that person for allowing someone (Myself included) to use it. Thanks EDIT: Mad Props to srandiny For Building the Goldengate bridge!! Also Way2sp00ky Has a Gorgeous Bank I might need to Use. Love its setting. Also has Supplied Coffehouse and Offices. mads232 Has a city house (His house actually that I think would look great for neighborhood houses in Cali! Neutralnz1 has a checkpoint that I am using as well + The Large Hotel of His. Need a golf course to go with that, Also the Med Center would Be Great for the Big City Pjuux Has some wicked buildings that could be fantastic around the city as well cmseter has a fantastic bathhouse that I would love to incorporate. BeastlyBean for the Lost Church Maklane for the Bloody Restuarant Marcelmarceau for the french church! BeastlyBean for the Lost Church Traya Aclus for the Confederate house and Industrial Plant Z3759xy for the Contribution of the Downtown buildings! TCO
-
Hi! I'm welcoming you to join the first unofficial real world map expansion for Project Zomboid! Community project: Radcliff Now in blindcoder's PZ Map project! http://pzmap.crash-override.net/?desc=Radcliff0dot2L0 Map description: ''''''''''''''''''''''''''''''''''' Radcliff Beta v0.2 Disclaimer: I can not and will not support any MP versions of the map and can not commit bug fixes in the forseeable nearTM future. The map is a beta version and does have bugs. If you're willing to live with this knowledge without complaint here's something for you: DOWNLOAD Installation directions: just extract the files in your %username%/zomboid/mods -folder and enable the mod from the pz mods options window (you might have to restart the game). ''''''''''''''''''''''''''''''''''''' As many of us know the developers have been hard at work with the mapping and Mash is pounding away in secrecy and deciding what will be the next big things added to the map. Also much hasn't been confirmed about how big the map will actually be and what it will eventually cover. We have had word that the map will be expanded, and some rumors that we'll likely see the impassable Fort Knox and the swarming city of Louisville implemented in the future. That is all we know. This project is here with that knowledge to be added south of the future Fort Knox and maybe even work as an encouragement for Mash and TIS on their great work. So, what is this about? I am creating (with hopefully some help ) a 10x10 cell map with accurate (as close to real life size and placing, as I have the fortitude) road mapping, forests, rivers, railways, paths and buildings of the town of Radcliff which is south of Fort Knox. Where do I fit in? Your job, if you wish to join and/or contribute to the project, is quite simple at the moment. I will need hundreds of buildings for this project and you as a budding Zob the Builder shall do my bidding , wait... no... can help <3 by making as real life accurate buildings as you can in the style of what is already existing in game (ie.no own tilesets, at least for now). More accurately, you can check google maps for the area covered and try to copy buildings as good as you possibly can. We are also trying to imitate the style that has already been established in the game by our wonderful MashPotato. If you wish to do more than that, have some mapping required (simple) skills and are ready to dedicate yourself, you can contact me by PM and we'll discuss your future role on the project. (Read on for more accurate info on the buildings...) Why are you doing this? Because, I love Project Zomboid and the community and wish to help make this the best zombie survival game it already is! Also I have been doing a fairly large project on my own which includes my home city, but I have decided to put it on the background for a while and do something where the whole community will benefit. As to the purpose of this map, it is to be as good as (or even better ) than the original, existing map, expanding the playable area enormously and maybe even be incorporated to the vanilla map when it is fully fledged out. Only TIS knows! When will this be out? I wan't to play! I'm sorry to say that this being such a huge and intricate project, you're going to have to wait quite a while until it will be in any fully playable state. As in the Indie Stone fashion: No ETAs! That being said the ones contributing most can of course always make test versions for themselves and with agreement, share some versions with friends and others for testing/streaming etc. purposes. Once we get there I will publish larger alpha/beta tests for the public, but I'll say that as I'm quite the perfectionist, the map should be very much near completion at that point. Mainly this is a slow and steady project and I'm in no rush of finishing it tomorrow or the day after. Questions, comments, ideas? Post them below or PM me personally, but as always keep it civil, constructive and lovely, above all! Ok! to the pics yayyyy!!!: Full map plus roads: Roads: A finished cell (1,3): The most typical buildings in the area: png map: _veg map: Plan: Finished areas, buildings etc: Finished/submitted buildings: (note not all of these are yet included in the map but approx. 98% are) 35 garages 147 tiny houses 205 small houses 118 medium houses 2 apartment blocks 3 medium blocks 1 small block 2 large houses 21 trailers 1 medium warehouse 14 construction sites 118 custom buildings (including schools, baseball fields and basketball courts, a town hall, library, a gazebo, chicken coop, a full golf course with apartments etc.etc) 638 buildings in total updated 6.4.2015 Completely finished cells (with buildings/tiles): Important for sending houses: Contributors, thanks and active members: Stay lovely <3
- 103 replies
-
- 12
-
-
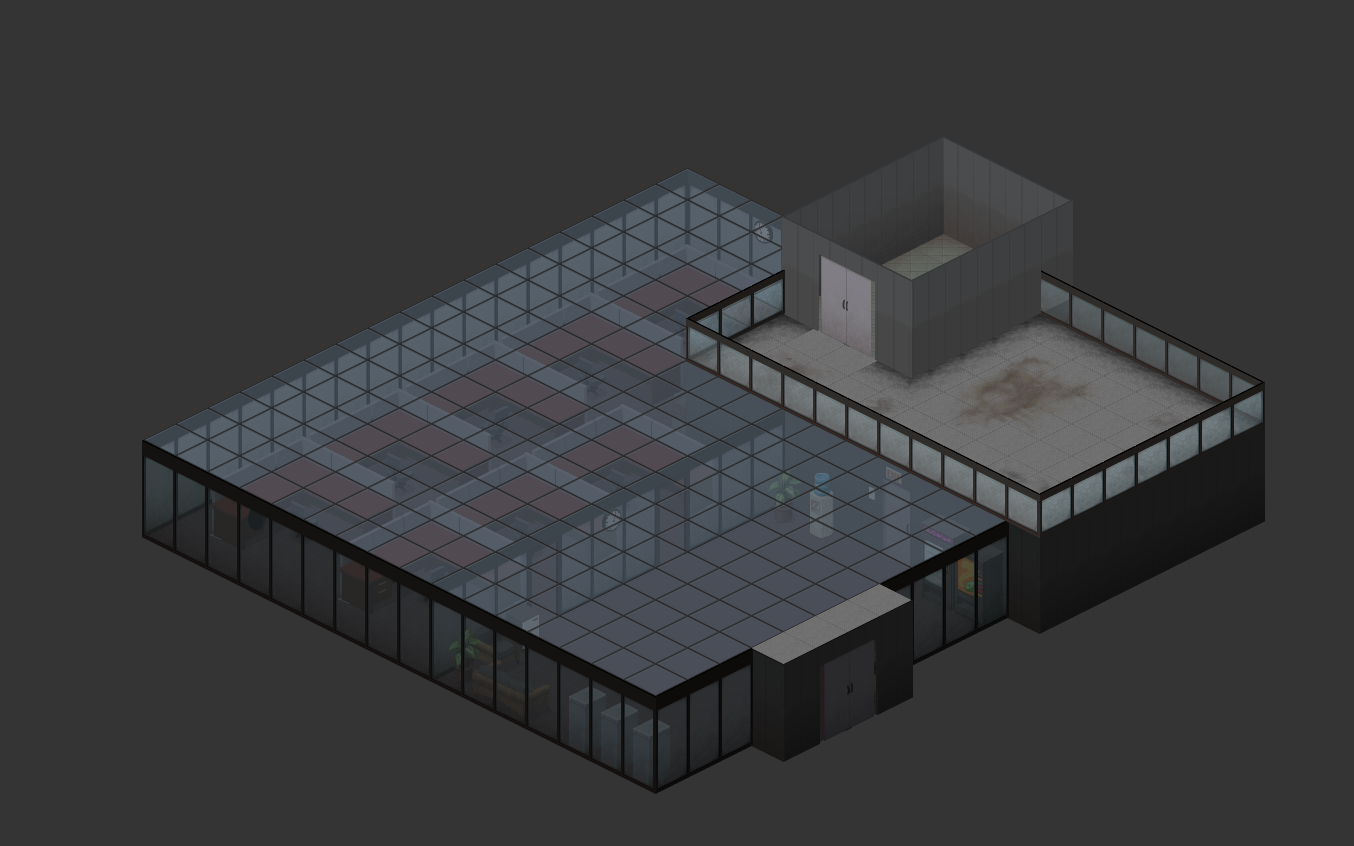
Hello people! I have been working on this map for several months and finally briefly finished a cell. So why not make a thread and gather some feedback Overview Screenshots Any questions, comments, suggestions are welcome.
-
Hey all, I was just wondering if theres any hope of a Mac compatible Map Editor? Im very interested in making new maps for the area where I live but the only issue im running across is that the PZ Map Editor is a windows only program. If PZ is a Mac compatible game, it should only make sense that the Editor should be Mac compatible as well.