cardenaglo
-
Posts
91 -
Joined
-
Last visited
Everything posted by cardenaglo
-
Card's Tutorial for Terrain Generation
cardenaglo replied to cardenaglo's topic in Tutorials & Resources
future tutorial -
Intro. I’d like to start off by saying that the updated tools by the dev team have allowed many people to join the ranks of mappers. I’m one of those that joined in on this new boon of mappers but I saw that the tutorials only went over the process of map making but not really a way to quickly create the base images. Thus, my process here is going to go in depth on the process and it’s a process that will give out many uniquely shaped maps. Tools: Paint.Net is the only program we’ll be needing and it’s entirely free for use. This tutorial is being developed with Paint.Net in mind but that does not mean that you couldn’t follow this process in Photoshop or other similar tools. Results Now you’re probably wondering what type of results you’ll be getting. Thus, here is the map of Southern Gaia, the map I’ve been working on. Step 1: Terrain Generation Let’s start by making a brand-new file and for now let’s stick to 300x300 pixels. If you feel like you’ll feel comfortable making a new map, then go ahead and make a larger file however make sure that its in intervals of 300px. Each cell is 300x300 pixels thus if you want a 3x3 cell map then you’re going to want to make it 900x900 pixels. We’ll want to set our colors to black and white if they’re not already before we continue. Now we’ll want to render clouds next. To do this you’ll go to Effects, then Render and finally Clouds. You’ll then get a popup for scale and roughness, just hit Ok for now. We’ve now got clouds that are black, gray and white. In this next step, we’re going to be treating black as water and white as land. We’ll want to go to Adjustments and then Levels. This will help you create landmasses or a single landmass with water. On the pop up screen that appears called levels adjustment you have two histograms. The left one, the input histogram, is the one we care about, the output histogram we can leave alone. The values will need to be the same. The higher the value the more white you’ll have and inversely the lower it is the more black you’ll have. Try to find a balance you like and if you cant find a perfect one just find a close enough match as you’ll be able to change it a little more manually. If you have black or white spots you don’t like just grab brush and clean them off. Step Two: Terrain We’ll be using the magic wand tool next. First select it and then at the top change the flood mode to global and tolerance to 0. The click on the black. Now all the black on your map should be selected. Change the flood mode back to contiguous and use the fill tool next and use the following color values for the correct blue: 0, 138, 255. Your black has now turned blue and you’ve got water done. You’ll want to choose your coast color next. By this I mean the color you want the land around your water to be. I’m going to choose the color for sand as I prefer that to be around my own water but dirt and light grass work well too. Let’s fill in the color values for sand which are 210 200 160. Lets get our magic wand tool again and make sure that our flood mode is changed to global and select the white. Now we’ll replace the white with the sand. At this point you should not have any white or black on your map. The only two colors should be the sand and water colors. Let’s now return to our default colors, black and white and create a new layer. This layer will be temporary so let’s head back to our land and water layer. This time select your sand, make sure that the flood mode is still global, and then go back to our temporary layer. We’ll want to head up to Effects -> Blurs -> Gaussian. The next popup window will ask what size radius you want. This will be how large you want your coast to be. For now let’s select 8. We should now have a slight blur going inland. Still using our magic wand tool select the portion of land that is not affected by the blurry rings. Now lets head back to previous water and sand layer and fill this new selection with a new color, 145 135 60 , which is used for light grass. We can now delete the temporary layer. Lets now select our new color and render clouds. This time we will not use levels, but rather posterize. A new screen will show up with three adjustments lines. Change the values to 3 and your image should have white, gray and black. No more than that. With that done select okay. Using our magic wand friend, let’s select our white and replace that with the light grass color. Lets select the grey next and fill that with the new values of 117 117 47 which represents medium grass. Let’s then select our black and use the dark grass values, 90 100 35, to fill it in. Congratulations, you now have the base image for your map. You can now follow RJ’s tutorial from here on out and place your dirt paths and roads to fit your wants and needs.
-
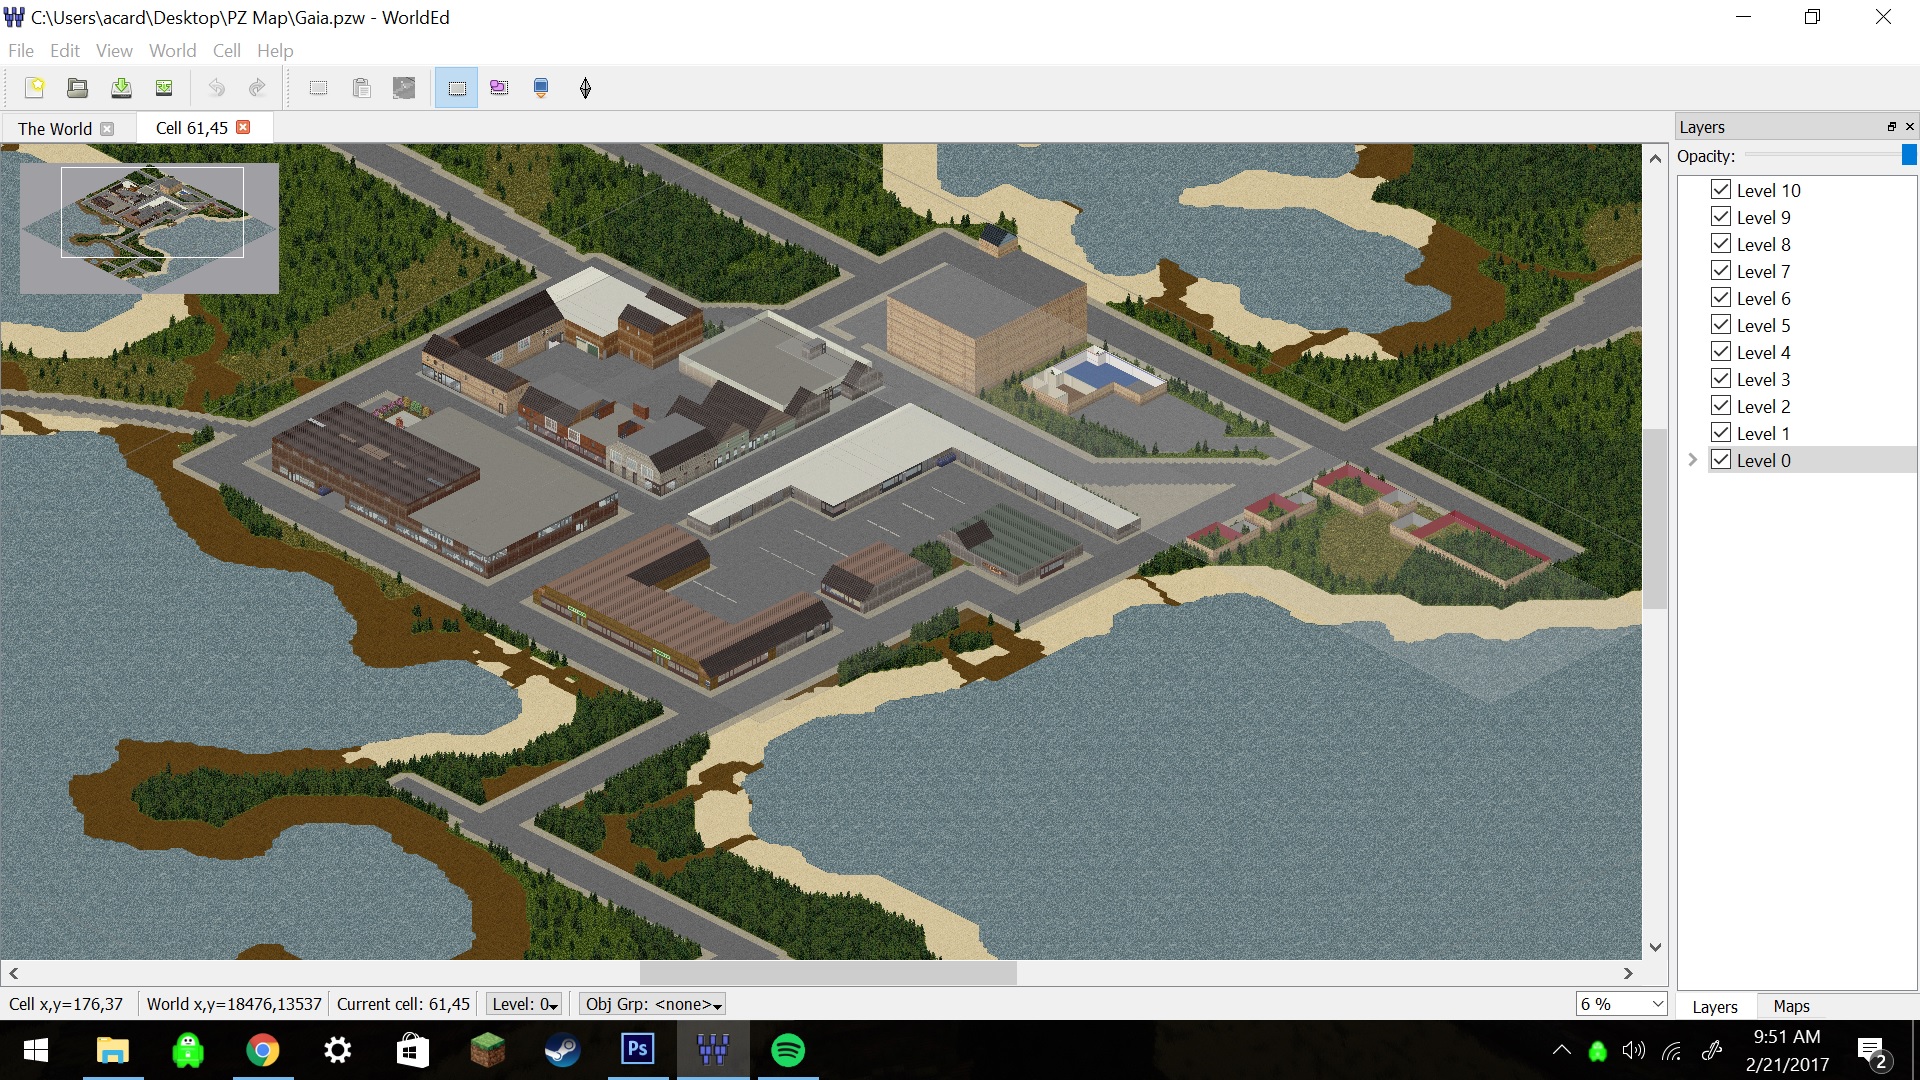
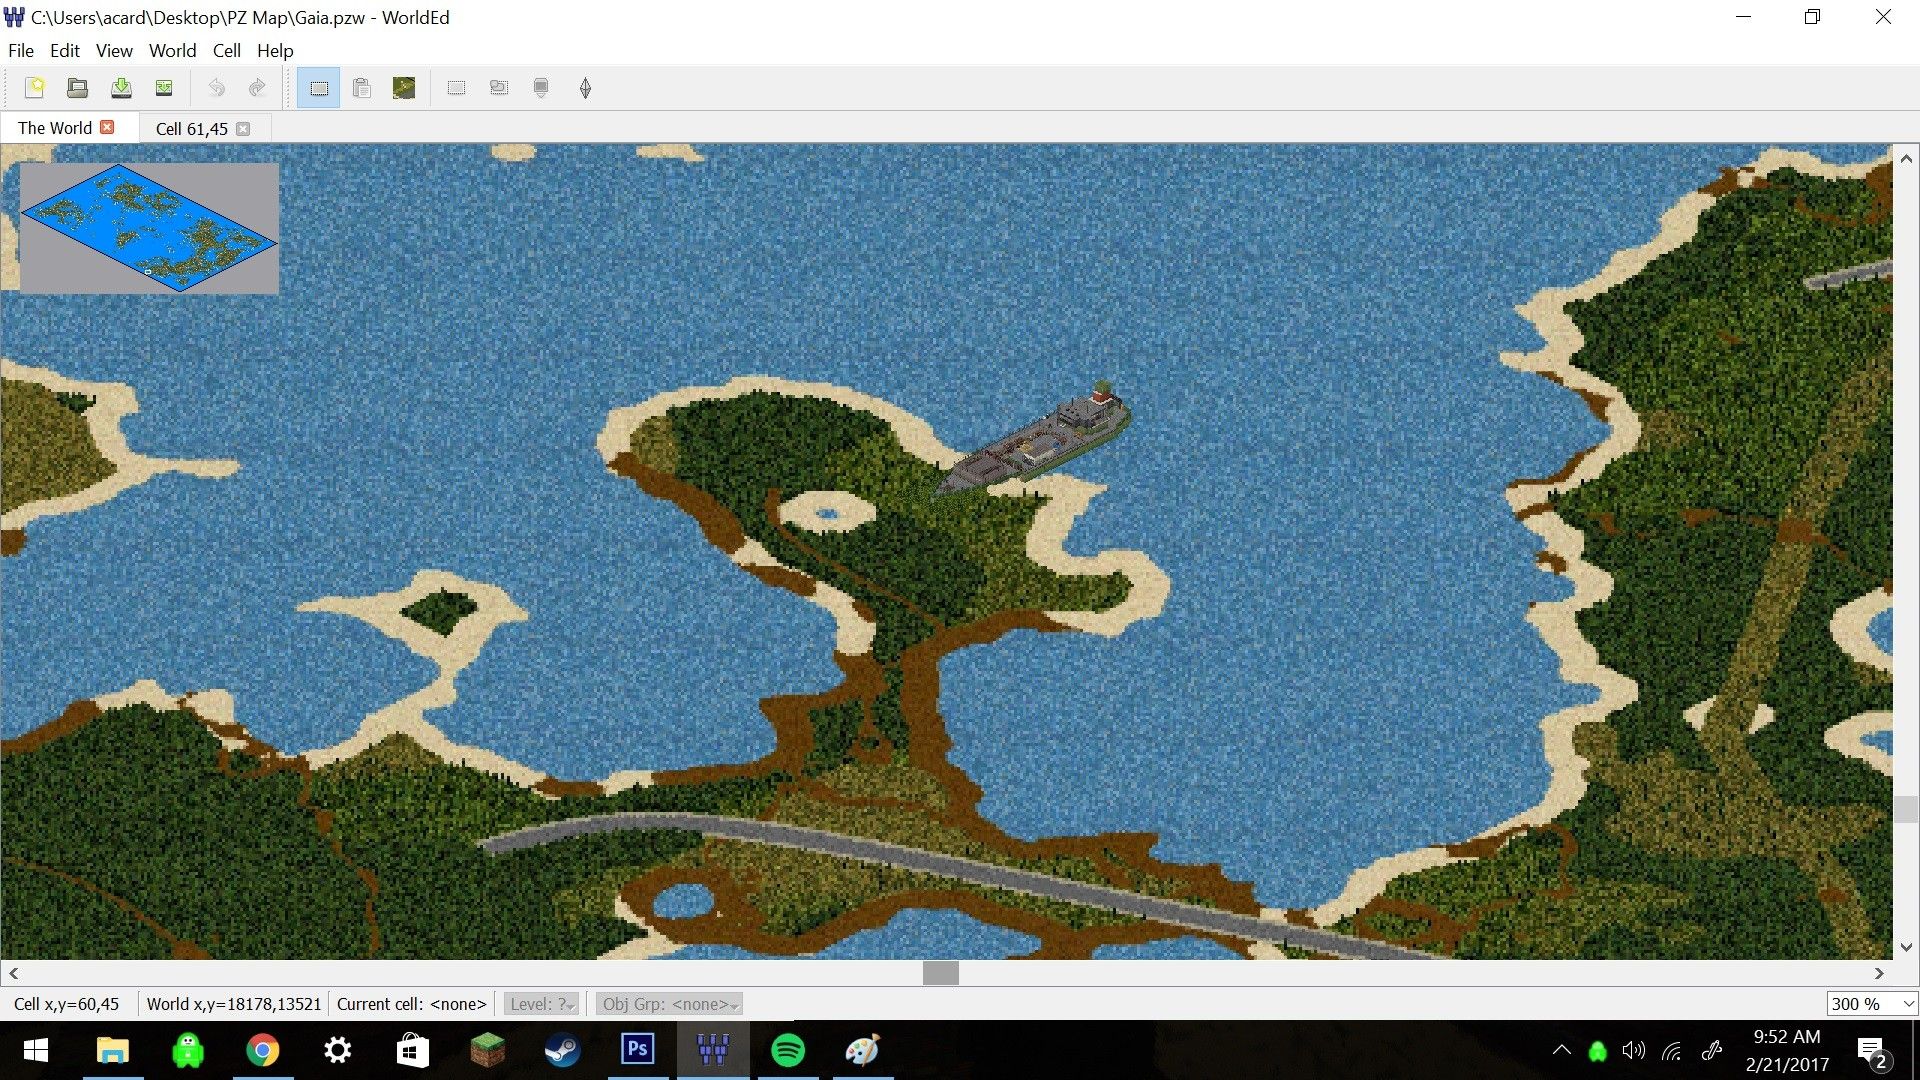
Hello Everyone! As you may have noticed big changes are coming for the map and I'd like to show you the progress of Anabasis and talk a little about what i'm up to. Anabasis is, as many know, the beginning of our story. Thus it will be one of the easier places to live in. The center of town was made with the idea that players would band together and fortify it (maybe like 50 wood log walls would be needed) and several factions could then lay claims to separate areas. In the center you'll find a dorm like area above the bank, a furniture store, hardware store offices, the police station, convenience stores, pizzeria, a school, grocers, self storage, salon and clothing store. By now you've probably noticed the unfinished buildings. The lagest one will either be a hotel or apartments, the ones next to it are a sandwich shop and gas station. then the smaller ones towards the right are going to be small coast homes. The rest of the area will likely be houses and a place to get train tickets to head out into the world and a cabin or two and a pier to fish in. I've also got the boat back in. It'll be a bit of a run to get to the city but you wont be without resources as the ship will have plenty. This would also make a good base if you can fix the front hull breaches. At the bottom left the road there will be leading to a train depot which will also be a good place to fortify due to its high walls but you'll have to clear all the zombies first. Here we have a large portion of the southern part of landmass. I want to populate this area with shells before I release, this way players can have an idea of whats to come. I might also release some of those cell lots for some of you to populate to your liking. Overall though there's a lot to work on and it'll be a long time before I finish it. As always comments, questions, and suggestions are welcomed!

-
The "O" key turns placement on and off. So if your tools are grayed out its likely that you press the "O" key. Simply press it again and youre good to go. as a note this state also continues into new sessions.
-
New Update: Yes I've gone insane and have nearly doubled my work. However, this is actually something I was going to do later and just chose to do sooner to cut a bit of time. The roads have grown significantly as some are now 14 px to 4 px. My zombie spawn map has also changed and now the big cities have a significantly higher proportion of zombies compared to other places and the dirt paths no longer have crazy amounts of zombies. I'll be trying to create a new download link but for now i've removed the old one because its no longer what im envisioning. any comments, suggestions and questions are welcome as always i have the lampposts. still have to make mailboxes though. Hopefully my advice will come in handy for all your maps haha
-
Progress Update: Currently I am still reworking my map and creating minor roads, something I was originally do in worlded. I figured having it done now would be easier. I'm also making my map a little* bigger as I also want to get everything done for the future and not have to ever go back to the actual map, unless someone releases a medieval overhaul. Anyways progress is slow right now as I've started working on the story, I'm working on a tutorial for how i generate my maps, and I also am creating buildings. As always suggestions, questions and comments are always welcome.
-
I actually found a rather nice solution to that problem. There's going to be radios in random houses across the towns so you'll always be able to progress with the story. What I have to figure out is how to time everything so that people can get as much out of it. You're telling me haha This is only one of like 3 projects I have going on right now lol
-
I understand bud, but im not entirely sure what you mean by somewhere that shows the cells. And for dreaming big thats basically me too haha. I always start projects huge even if im a novice at what im doing.
-
Now I have even more reason to finish that tutorial i was making for randomly generating maps of any given size.
- 15 replies
-
- 1
-

-
- monroeville
- wip
- (and 1 more)
-
Yeah A LOT of the community buildings have red question marks. I havent gotten the time to go through them and fix them for blackbeard yet. Some are easily fixable as theyll just be like painting or counters, or difficult if its whole walls.
-
Yeah haha, definitely helps out on getting it done quickly and it makes it easier for future maps.
-
Yeah so you may want to do it by creating a building with a variation of sizes like 5, 10, 25, 50 wide or whatever you think necessary and just dragging those out onto the map. Thats how i do it atleast.
-
How are you making the sidewalks? with tiled and placing tiles or a sidewalk "building" to place in worlded?
-
I could try replicating one of those maps, not to scale, on my own map and then releasing that as a standalone area. As for the game handling it I'm sure it'd be more than capable and it'd end up relying on your rig if anything. The base game map currently has 5 individual towns and then add the modded locations and you have well over 10. It'd be entirely possible to do. If this is a project you're interested in I'd say go for it. The tools are simplistic and you'd be able to quickly get the hang of it with the tutorials available.
-
That map looks absolutely amazing! Check out my map thread once i start posting up buildings again, I'll be creating lots of highrise buildings for some of the cities. Also if you need any train tracks you can get them off my thread too. Good luck in your project though, it'll be great to play in I bet.
-
Its going to be a long time before its finished as it's just me right now working on the entirety of it with help from the community with some buildings. It likely wont be complete before the creative mode is released. I'm not entirely sure to be honest. It'd be something I have to test but because im trying to release towns without errors and everything in those cells placed I doubt you'd lose progress as the updates would only change nonexistent cells up until that point. Road update: A lot of the minor towns got screwed up when I tried to change the road width. So it looks like today I'll be reworking my roads but I'll have a surprise in store for you all
-
I have three in fact cause I don't want to lose days worth of work. Thank you! Hopefully they come to good use to everybody. Bit of an update on whats happening cause i've been a little silent lately. Map progress is coming along and right now i'm creating houses for the map and also for the community to use. They are all unfurnished for the time being and right now i've got most of them under the same template but will fix them up as i start finishing towns. Im also working on an elementary school for the kids and to have another fortifiable location for when the raiders inevitably come. I've also got to make some changes to the map so you may actually be getting a Bunjil 2.0 along with this anabasis 2.0. After reading todays mondoid I realized that while my map revolves around vehicles it wouldn't quite support them. Reason for this is because i made my roads to small, they would only be able to fit one vehicle at once thus I have to make them about one or 2 or 4 more tiles thick which can mess up the layout of some of the towns. However there's not just all bad in mondoid for me. In fact a great thing about this mondoid is POI's just got a little more interesting. I'll be able to create little events that will push players to go exploring. Btw, one thing I am looking into with this map is quite possibly making it larger. Sure its a larger endeavor but one that may pay off later on. As always comments, questions and suggestions are always welcomed!
-
Anabasis 2.0! The new town is starting to come along. This will likely be among the best place to wall off as there will be less zombies in comparison to other towns and plenty of rooms and space for multiple people and even factions to call home. As I mentioned before I'm renovating and it is at a bit of a crawl but hopefully I'll have Anabasis done by the end of the weekend.
-
Train tracks took way too long to make, spent most of today just making the corner pieces because of how randomly spread out the pieces were. On a brighter note, now that i've finished them i can start filling out the tracks for the rest of the map both the elevated city ones and the ground ones for the regular trains. I will also be starting almost entirely anew on the towns. While the buildings i got were wonderful and i know the creators made them with care i want the towns to feel like everything belongs. Thus this project just increased its length tremendously. I tried to make it pretty modular so that you can make turns easily, do larger lines or smaller ones and be able to place them over roads without disrupting anything
-
This looks great!
- 29 replies
-
- 1
-
-
- valley station military outpost
- valley station
- (and 7 more)
-
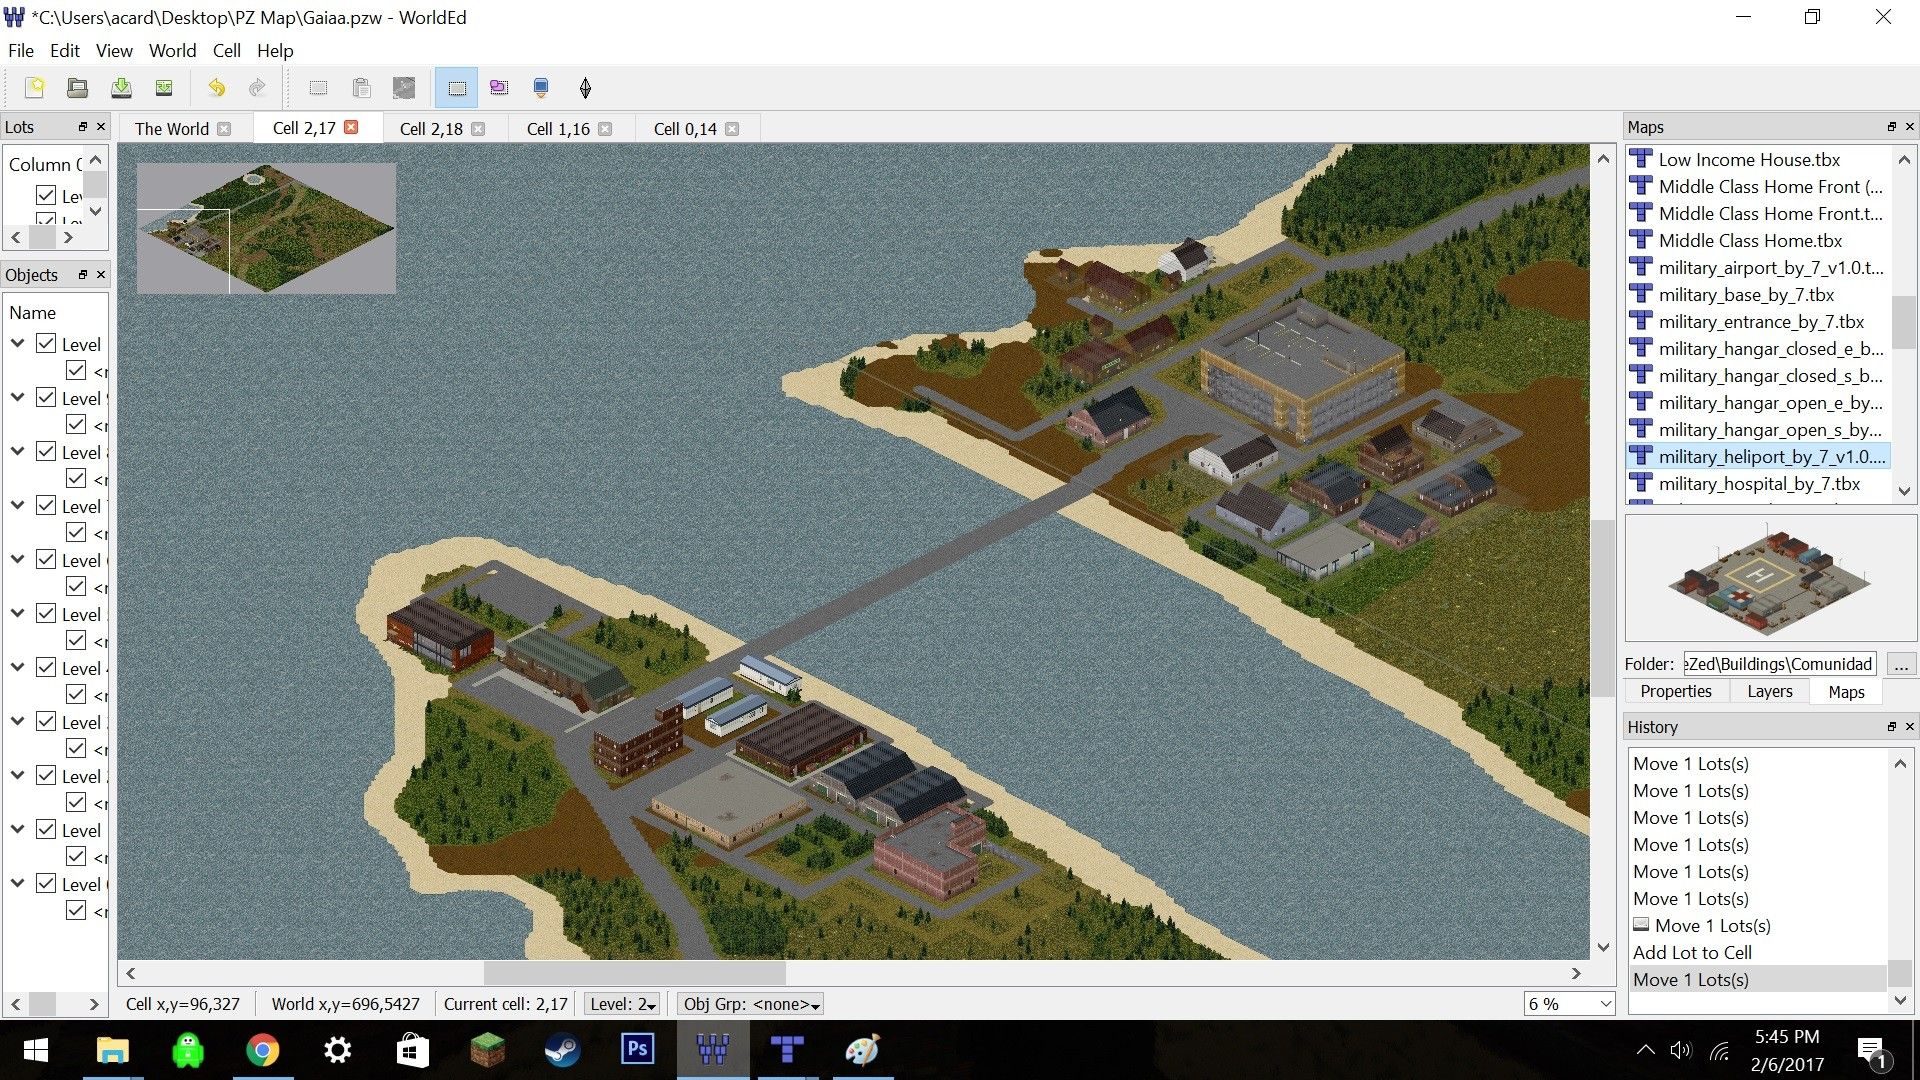
@Queen Glory I'll get everything fixed up either tonight or tomorrow Progress Update: As you may know the east will have a higher density of zombies and thats because these are big cities. In big cities you'll usually find some form of subway or train system and thus my cities will also have that. Thus i give you and example of some train that i made with the tiles i have at my disposal. the first two images are of a near complete train turned survivor hold out and the last picture is of what a regular train will look like. You'll likely find them strewn across the whole of the rail system. The systems in the cities will also be on floor 3 so watch your step cause there arent any walls. As usual questions suggestions and comments are always welcome. I will likely release a small tutorial on how to quickly (relatively) make a map like my own so that you dont waste too much time on that and rather spend more time on buildings which are also time consuming. Which reminds me, I'm looking for builders to take up small to large projects. Just send me a pm and we can talk about what I'm in need of.
-
Thanks for the heads up! I'll look through to make sure that they're not in there for the steam release. And thank you! Progress is probably going to stagnate a little over the next week or two while I create buildings.
-
A small update on what I'm working on: I've finished placement for two more towns and just need to fix them up to be able to be released. I'm also starting work on my own buildings so that I can make the towns a little more cohesive. I have also started making elevated trail rails for the metropolitan cities in the east. I probably won't be releasing updates as quickly now that I'm going this route as I end up spending about 30-60 mins on each building and I expect it to be even longer in more detailed buildings. Right now I will probably fix up some of the buildings I've already got placed so that they're less repetitive and makes every town feel a little more unique.
-
1. Yeah, ill probably get that done tomorrow and just resize the Anabasis image and reupload with that small fix. 2. The ship will eventually be a spawnpoint but for now its just the one. 3. the Zombie spawn map is something i just made really quickly with gradients but i'll get back to it sometime this week As for discovering everything did you find the factory and the watch tower? Im going to be making small bridges for inaccesible islands, more than likely though ill make it so that you'll have to repair them to have access Thanks!
-
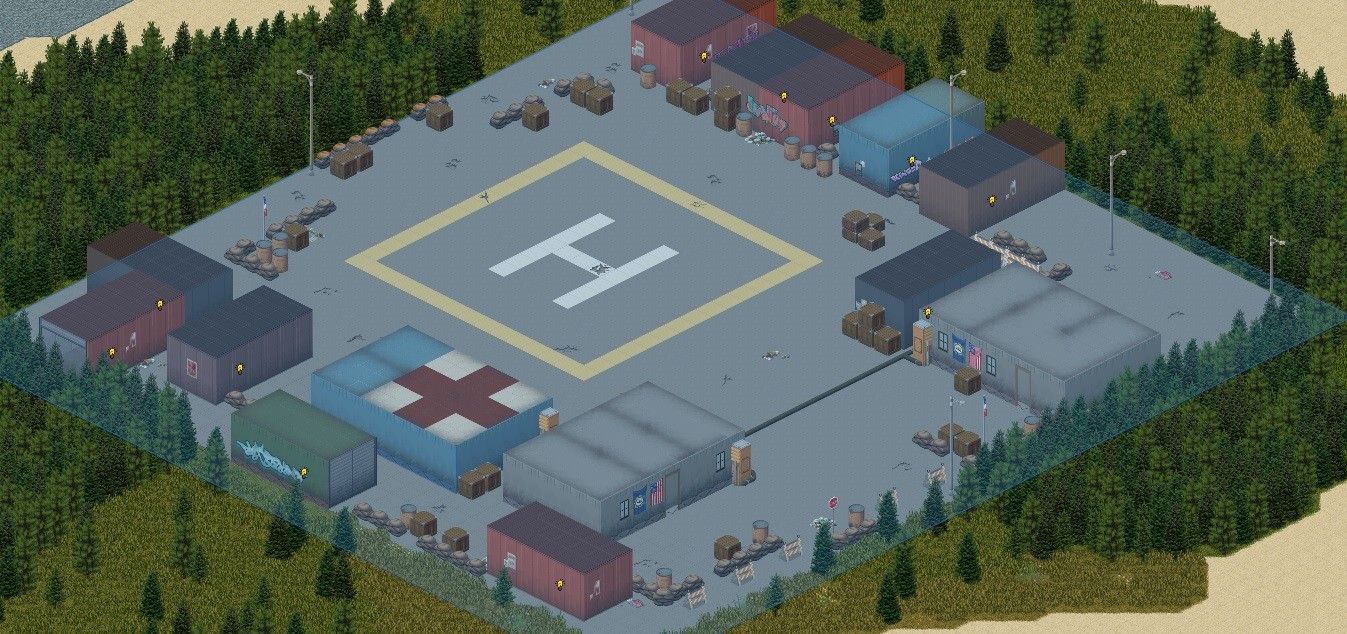
Alpha 2 This update brings out 3 more POI's along with the town of Bridgewater! Bridgewater is a tiny town that relied heavily on the nearby factory for work. However it closed up shop and now the people o Bridgewater have fallen into desperation and take up whatever jobs they can in the city. The three new POI's are two military locations and the factory. The two military locations are probably going to be places you'll want to check out early on in order to get those nice radio's you'll want to hear the story. and remember, get there early or you'll miss something! Other things of note, there is currently only one spawn and thats due to me not liking all the ones i had so i just made one for the time being. it'll be at the top left hand side of town along the beach. Anabasis also got a bit of cleaning. There shouldnt be blacktiles anymore and some buildings like the grocery got walls in areas it was missing them. The files will be in the Topic post. As usual all comments, recommendations and questions are welcome. As for the steam release, I've decided on not releasing anything until this weekend as it'll allow me to finish up a few more towns for larger use.